Let’s make gift wrapping something truly magical. In this tutorial we wrap presents inspired by Sanrio characters from the Hello Kitty universe. Each gift matches a different character, with colours, textures, ribbons and simple details that bring their personality to life.
We wrap six gifts: My Melody, soft and sweet. Hello Kitty, classic and cute. Keroppi, playful and bright. Pompompurin, cozy and cheerful. Cinnamoroll, dreamy and light. And Kuromi, cute with a cheeky twist. We start with boxes already wrapped in each character’s colour and go straight to the decorating.
Small details can change the whole look of a gift. It is perfect for birthdays, Christmas or any day you want a present to feel extra special and match someone’s favourite character.
BEFORE WE START
What you need.
Materials
- Small boxes× 6
- Wrapping paper in light blue, yellow, green, pale green, pink, lilac, purple and red
- Printable template
- Brown felt
- Ribbons: blue, yellow, dark red, white lace, thin purple, pink and red satin
- Foam tape squares
- Tape and double-sided tape
- Tiny white pompoms
- Glue
Tools
- Scissors
- Black marker
- A round lid to trace
- Pen or pencil
PART 1 OF 6
Cinnamoroll
- 1
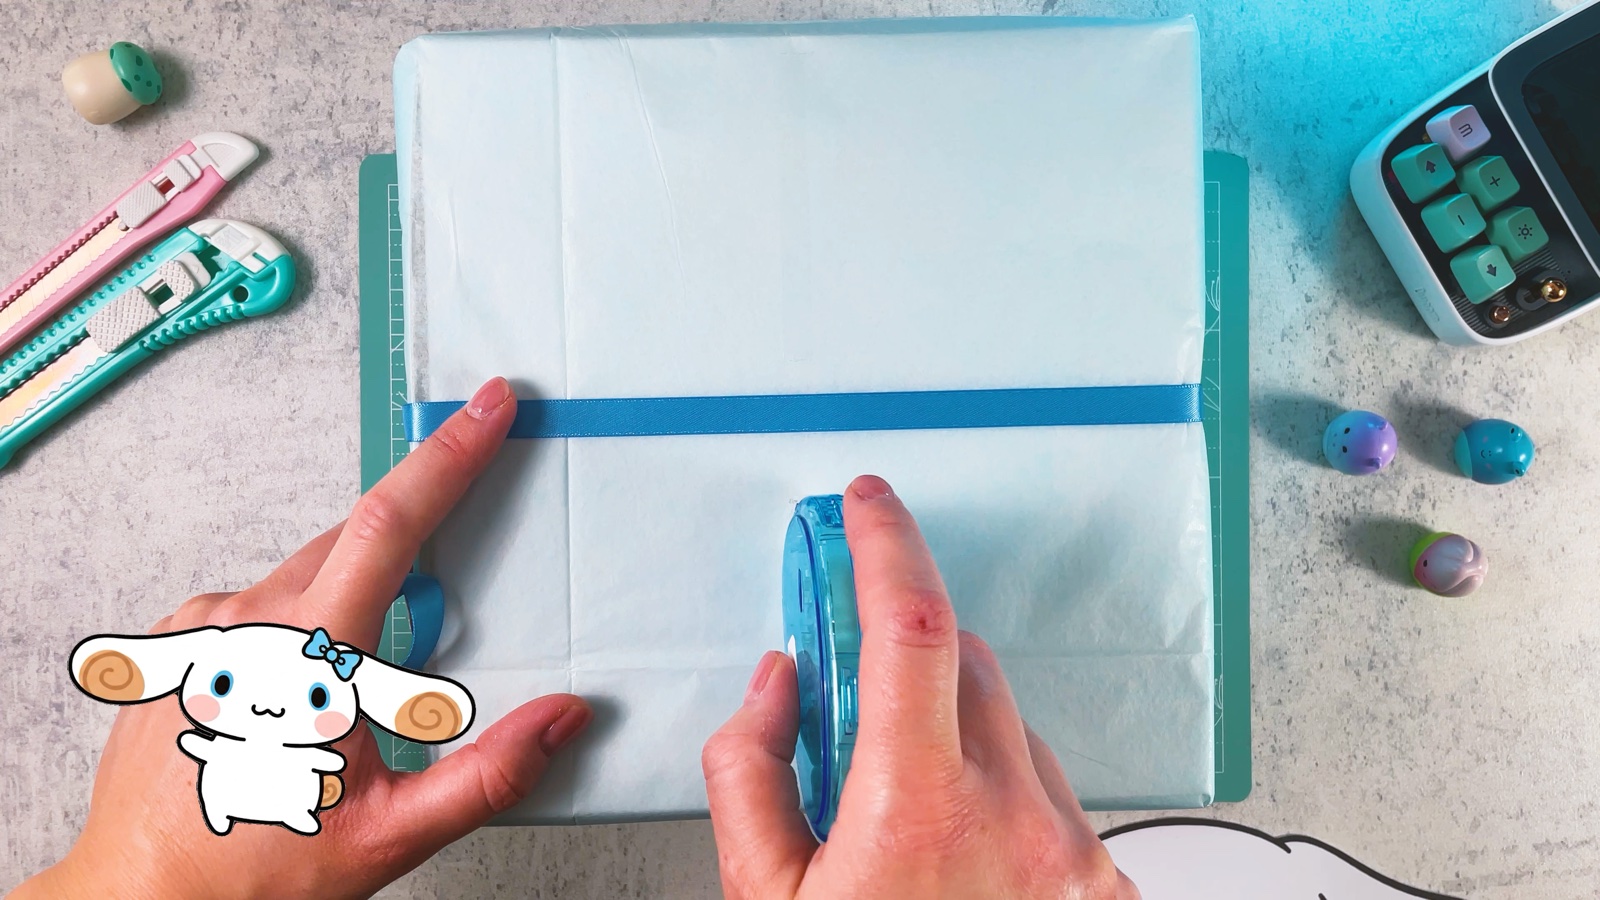
Add a blue ribbon cross
Start with a box wrapped in light blue paper. Run a blue ribbon around it one way, then the other way, so the two ribbons cross in the middle. Tape the ends on the bottom of the box.
- 2
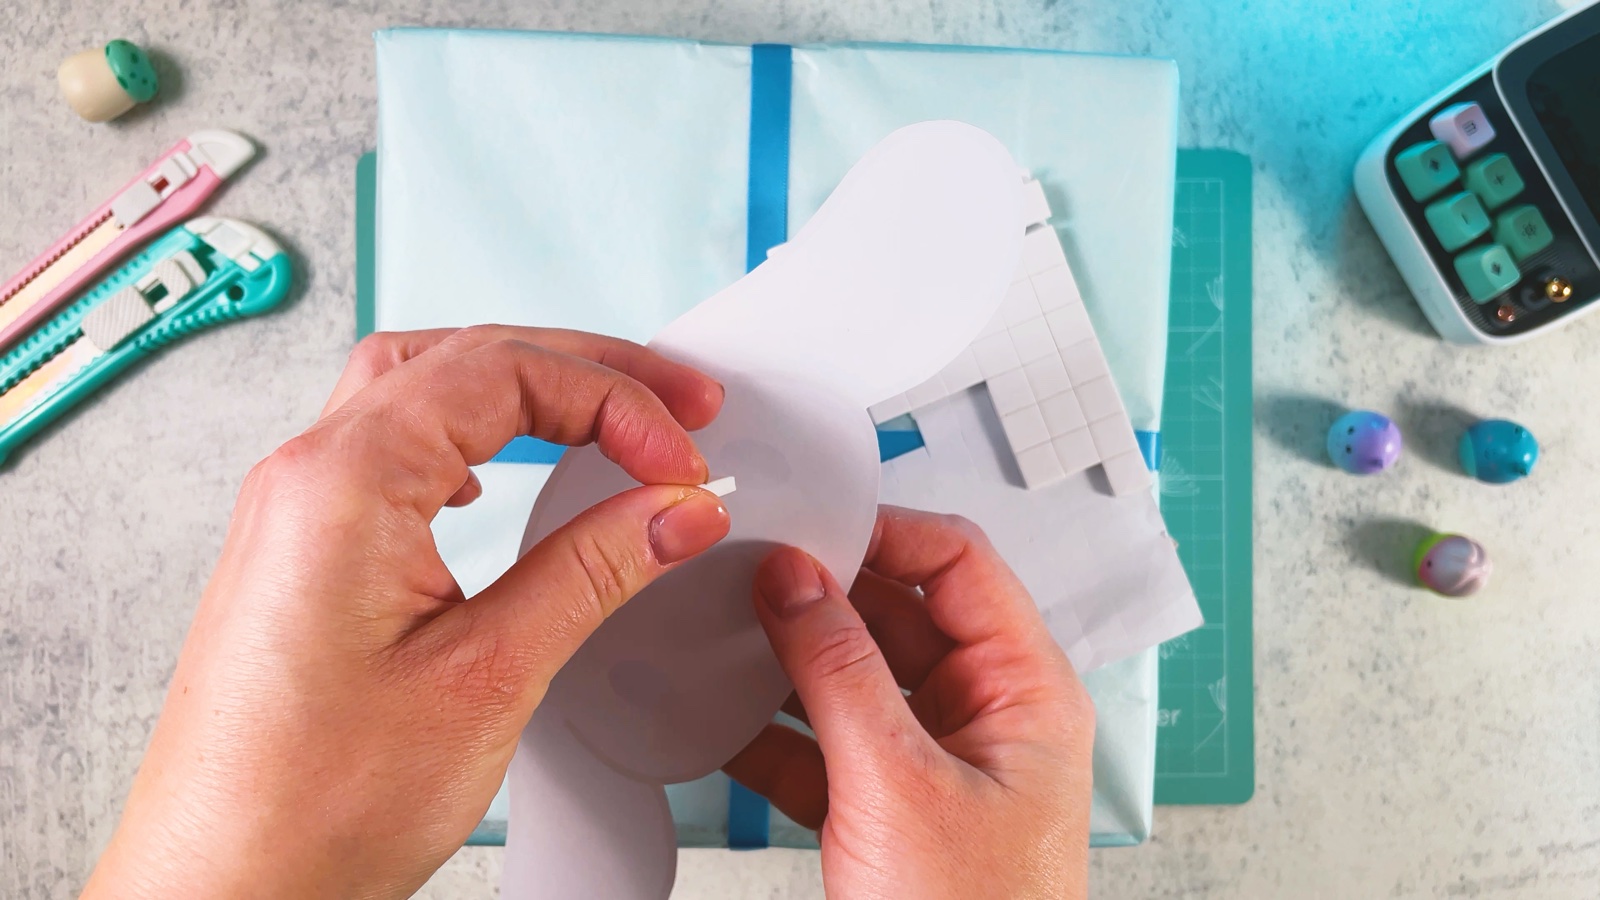
Put foam tape on the face
Cut out the Cinnamoroll face from page 2. Stick small foam tape squares all over its back. The foam lifts the face a little, so it looks like it pops out of the box.
- 3
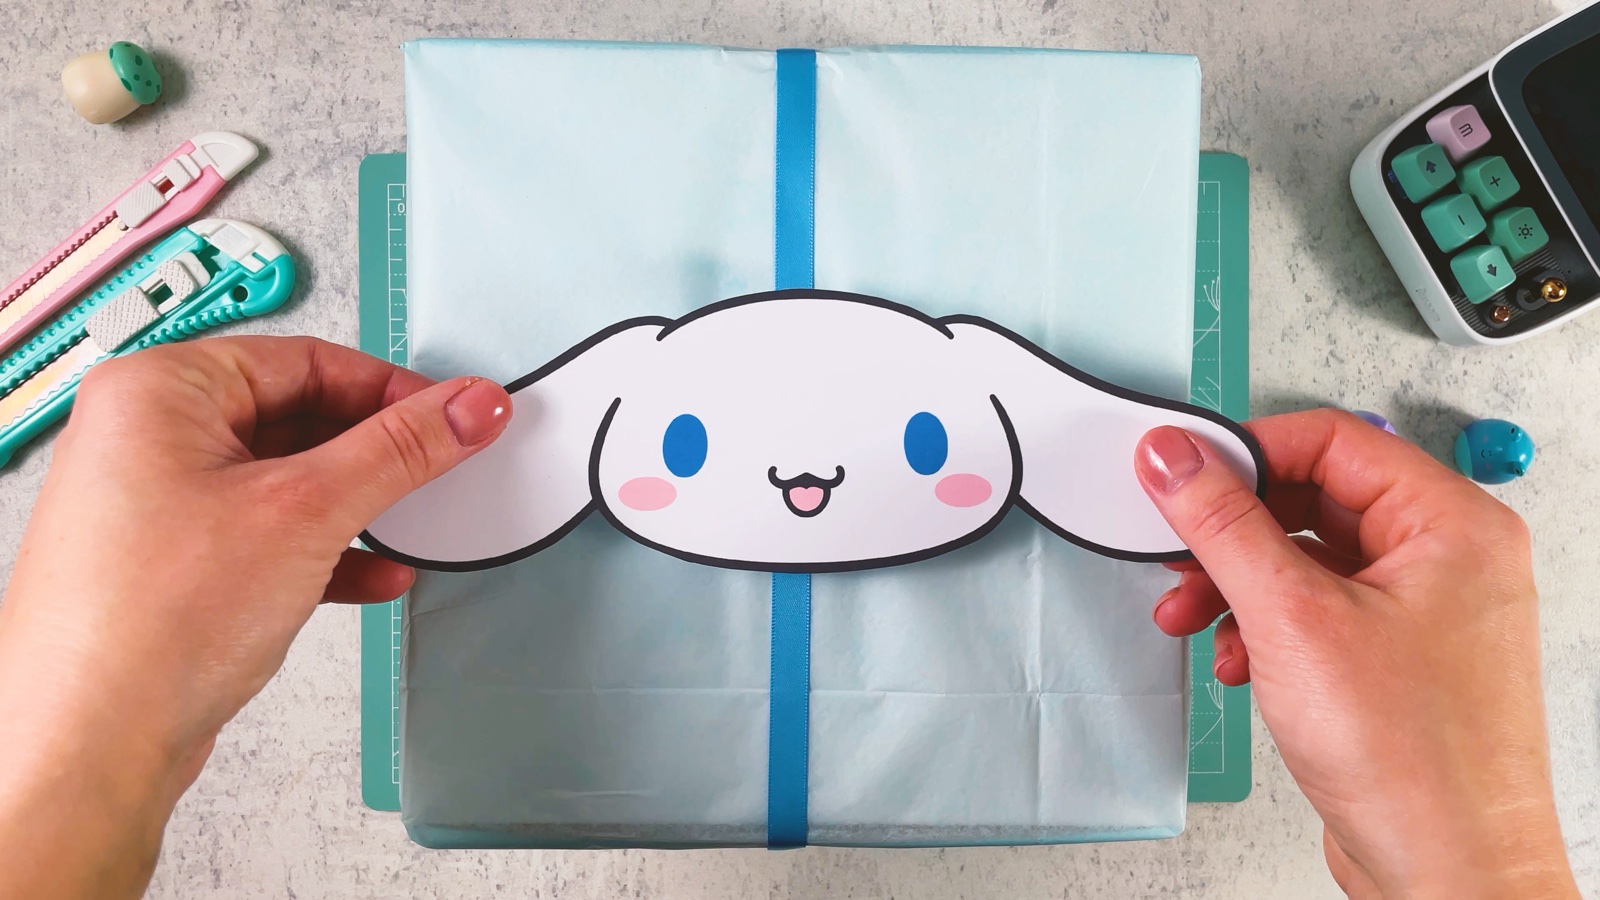
Stick on the face
Peel off the backing and press Cinnamoroll onto the box, right where the ribbons cross. The long ears can reach out to the sides.
- 4
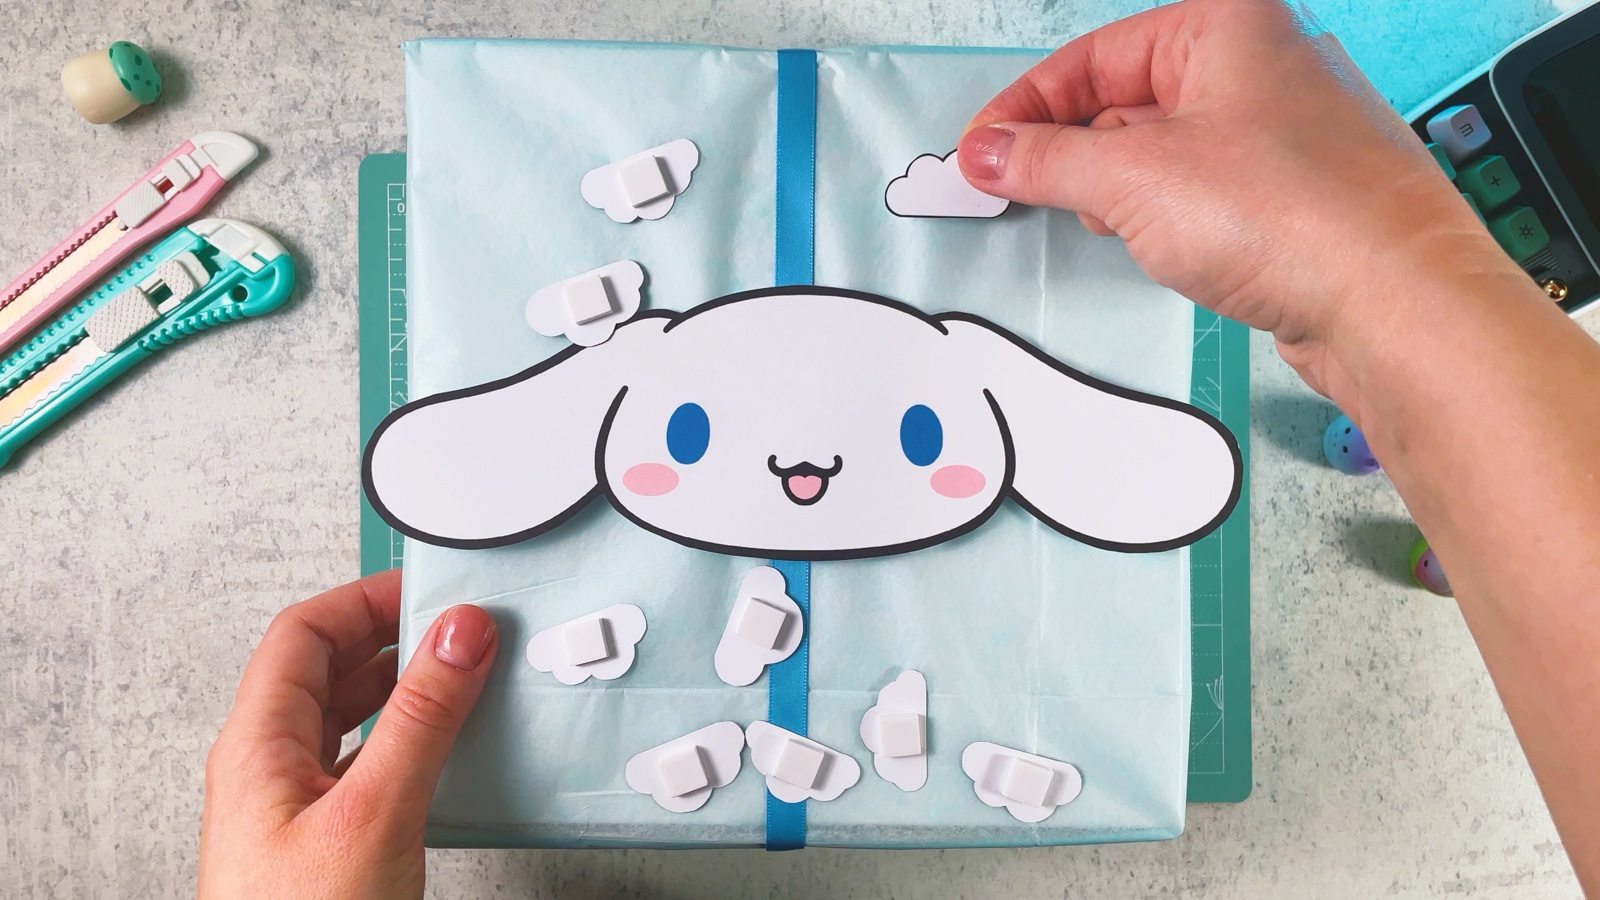
Add the clouds
Cut out the clouds from page 1. Put a foam square on each one and stick them all around Cinnamoroll, on the top and the sides of the box.
- 5
Show it off
Turn the box around and check the sides. Add one more cloud anywhere it looks empty.
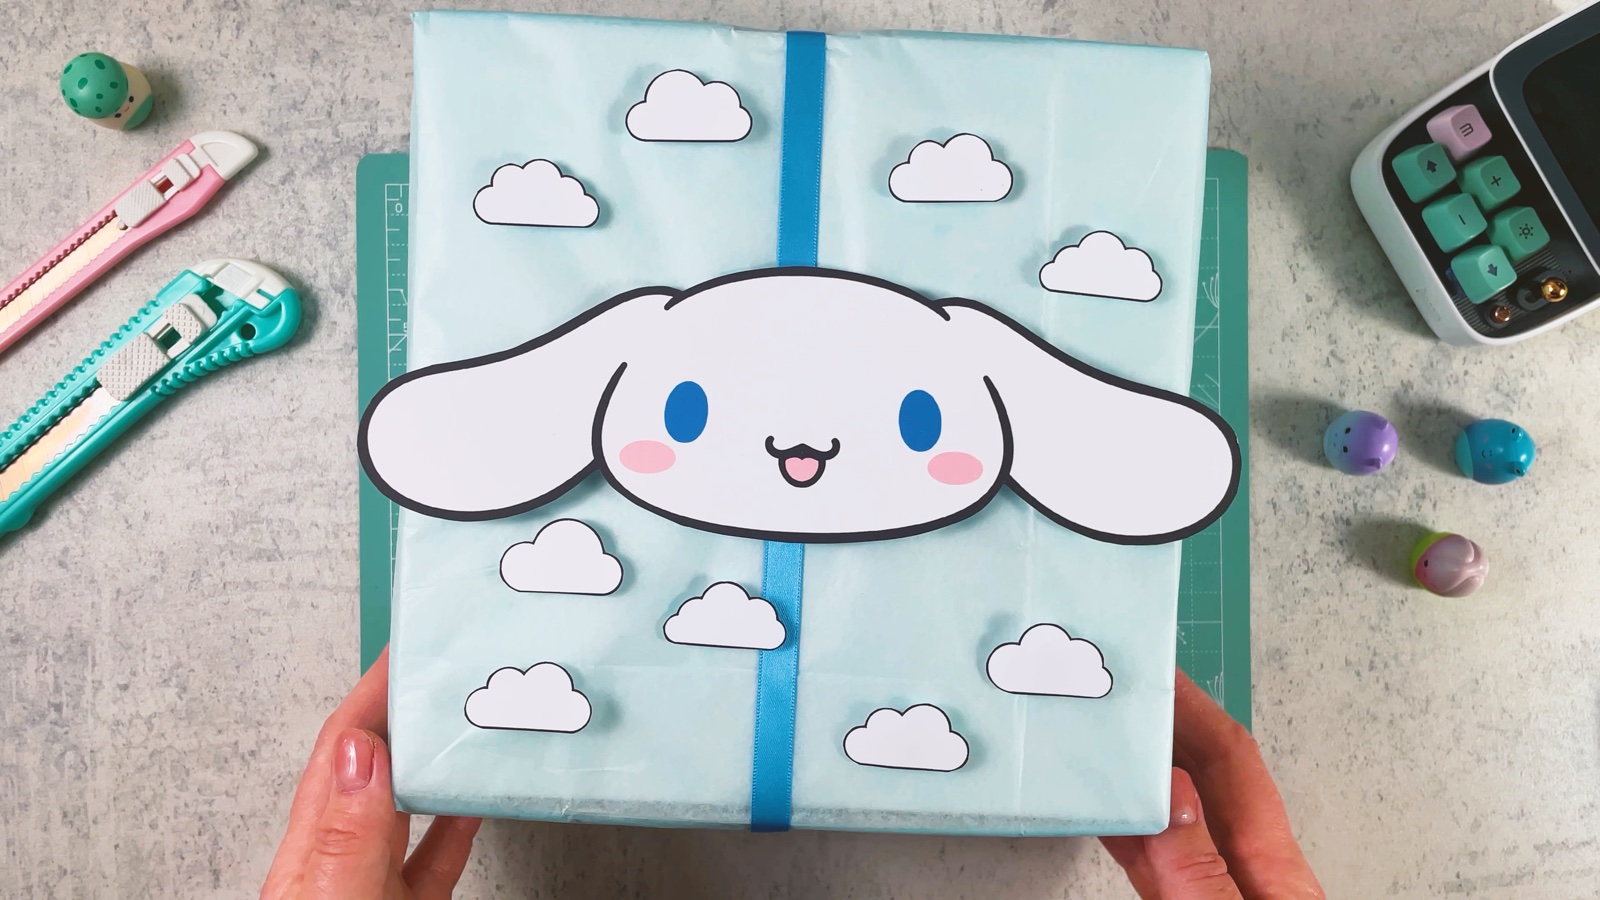
Cinnamoroll's sky-blue gift is ready.
PART 2 OF 6
Pompompurin
- 6
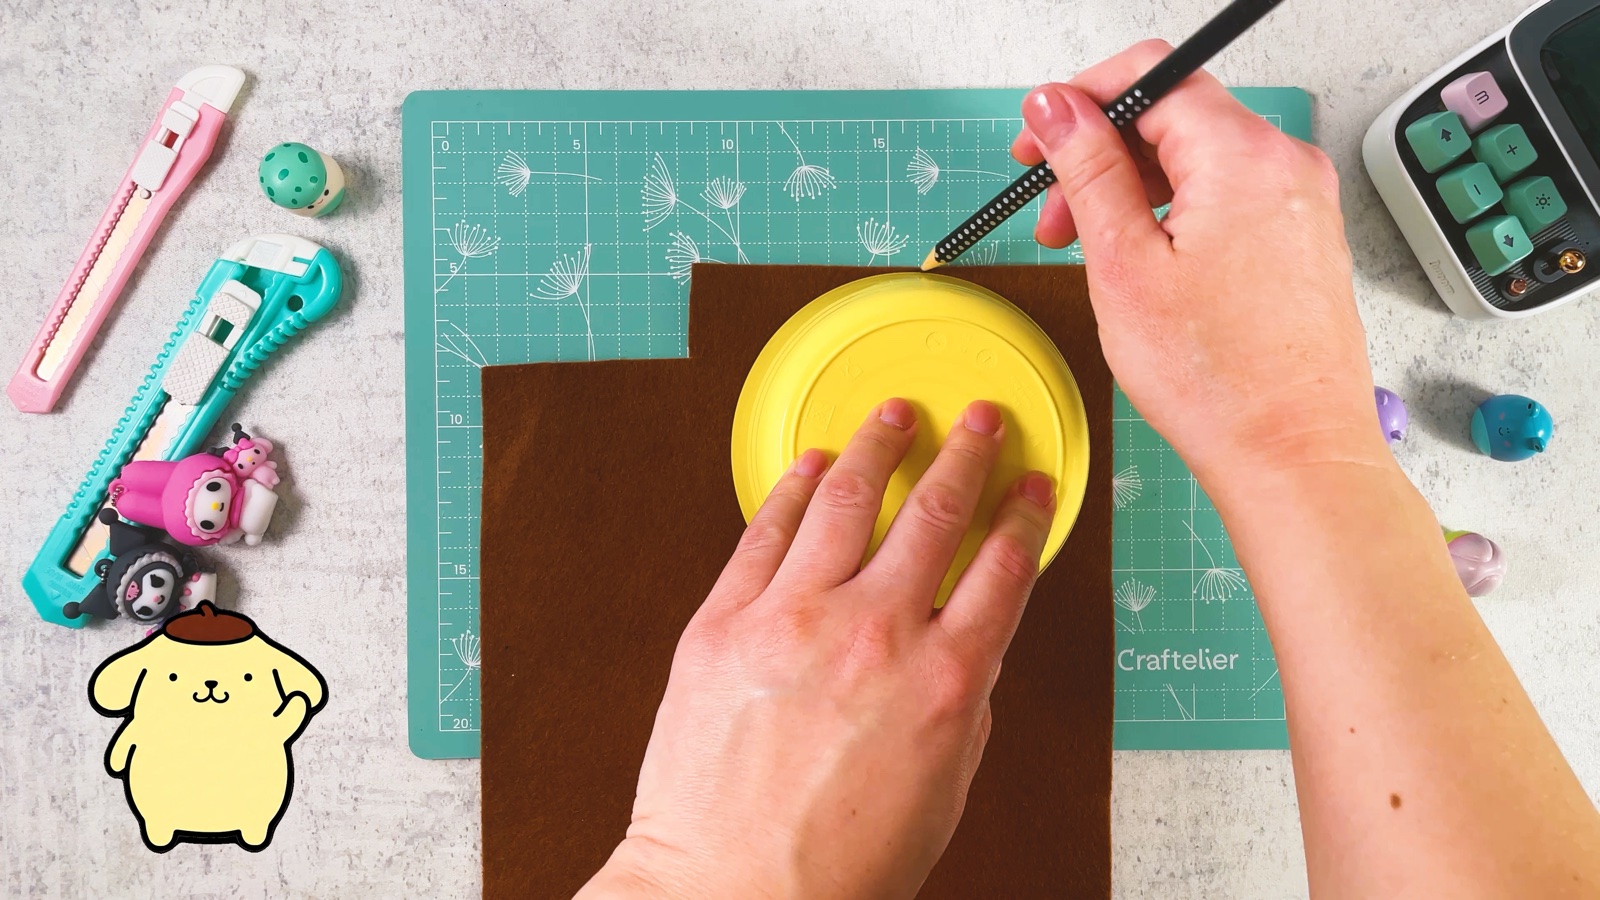
Trace a circle on brown felt
Start with a box wrapped in yellow paper. Put a round lid on brown felt and draw around it. This circle becomes Pompompurin's beret.
- 7
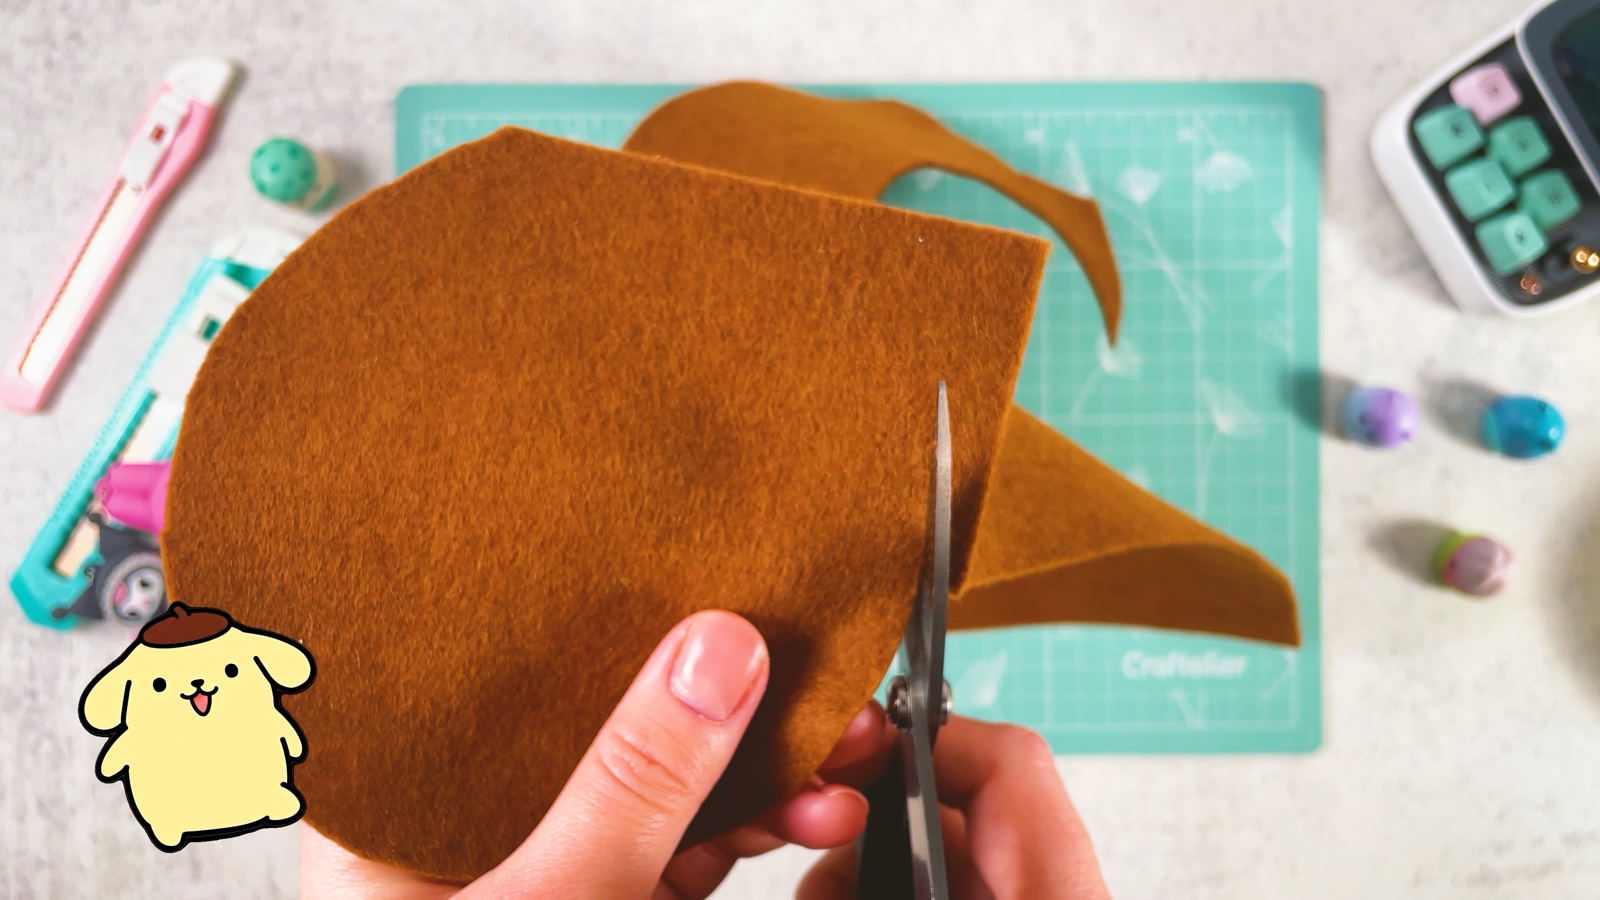
Cut out the beret
Cut out the circle. Fold it in half and cut along the fold, so you get a half circle.
- 8
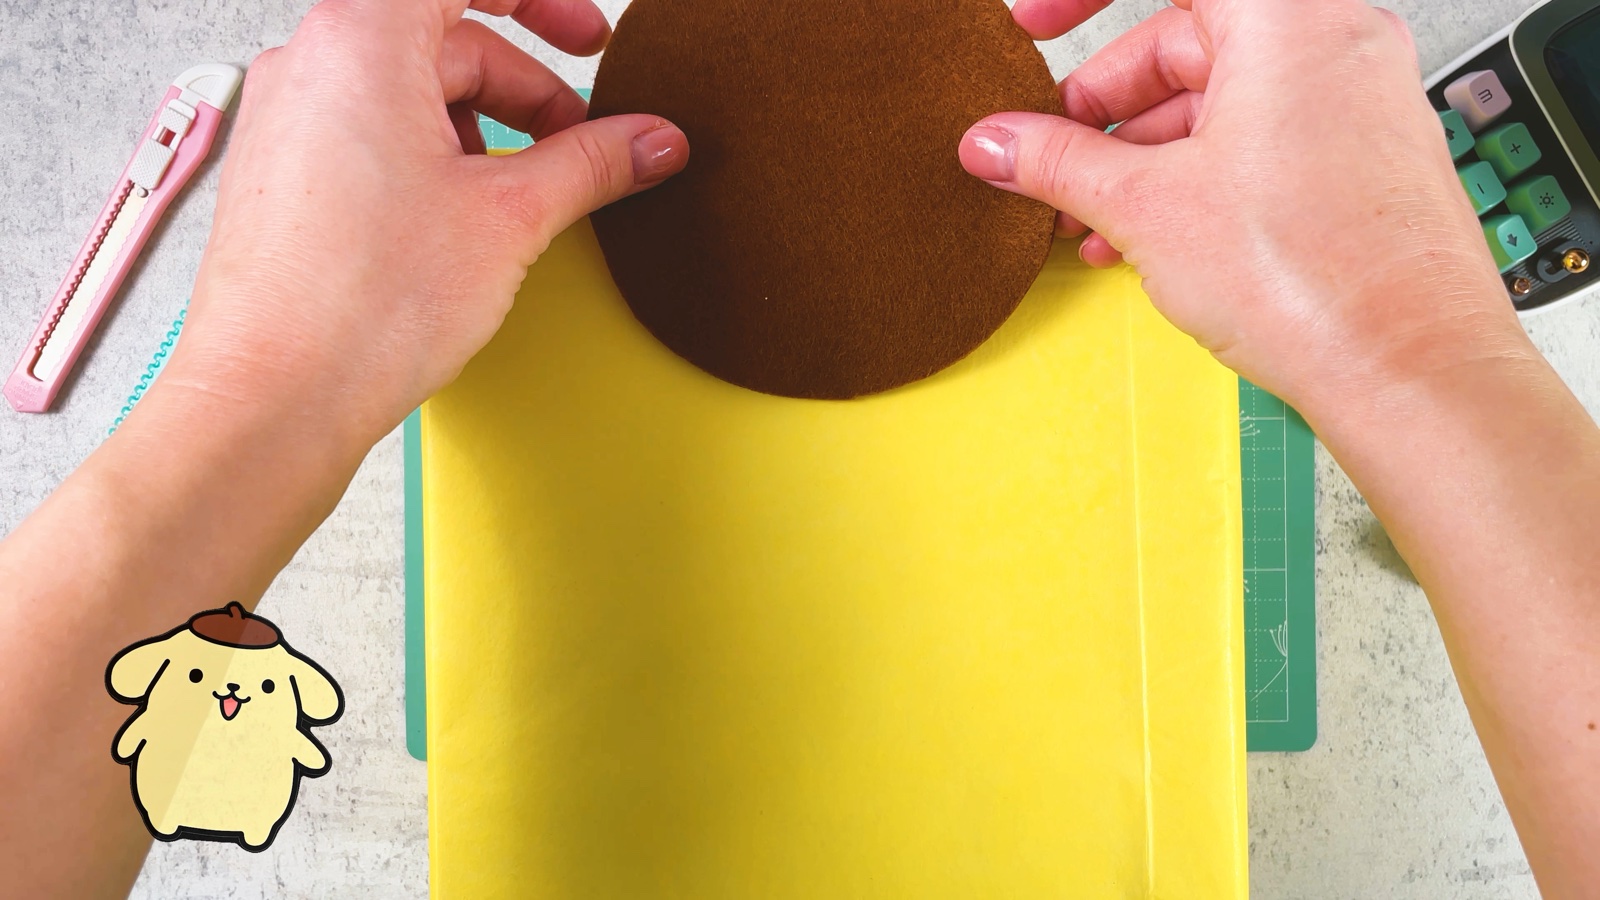
Glue on the beret
Put double-sided tape along the straight edge of the half circle. Stick it on the top edge of the box, with the round side hanging down over the front.
- 9
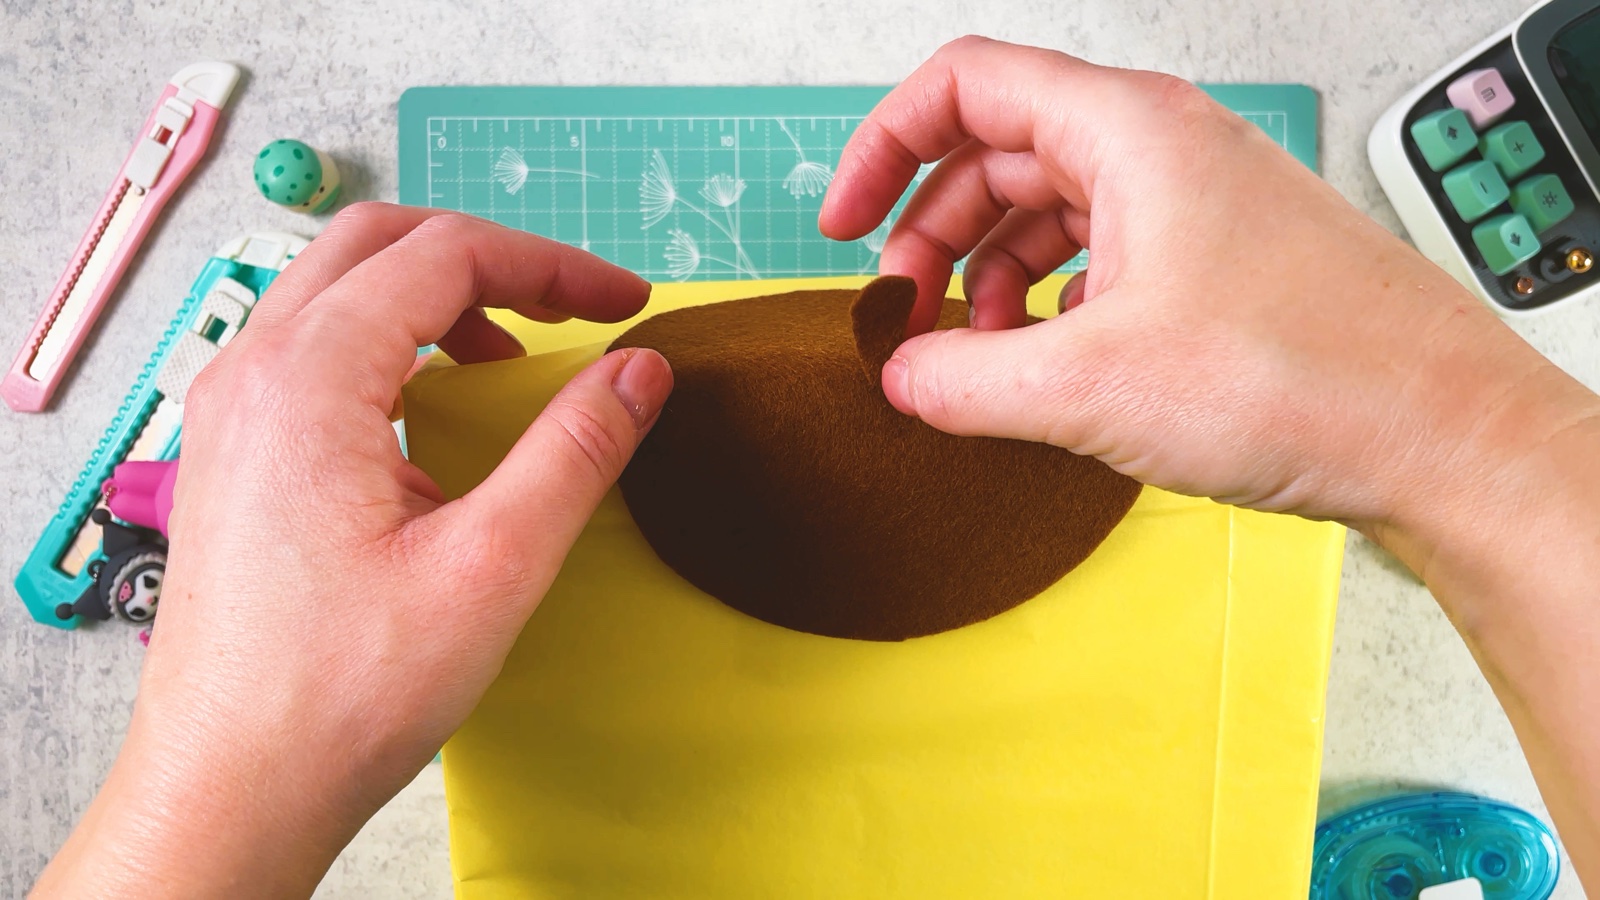
Add the little stem
Cut a small stem from the leftover felt and stick it in the middle, on top of the beret.
- 10
Draw the face
Draw two dot eyes, a small nose and a happy mouth with a black marker. Keep the face small and low, under the beret.
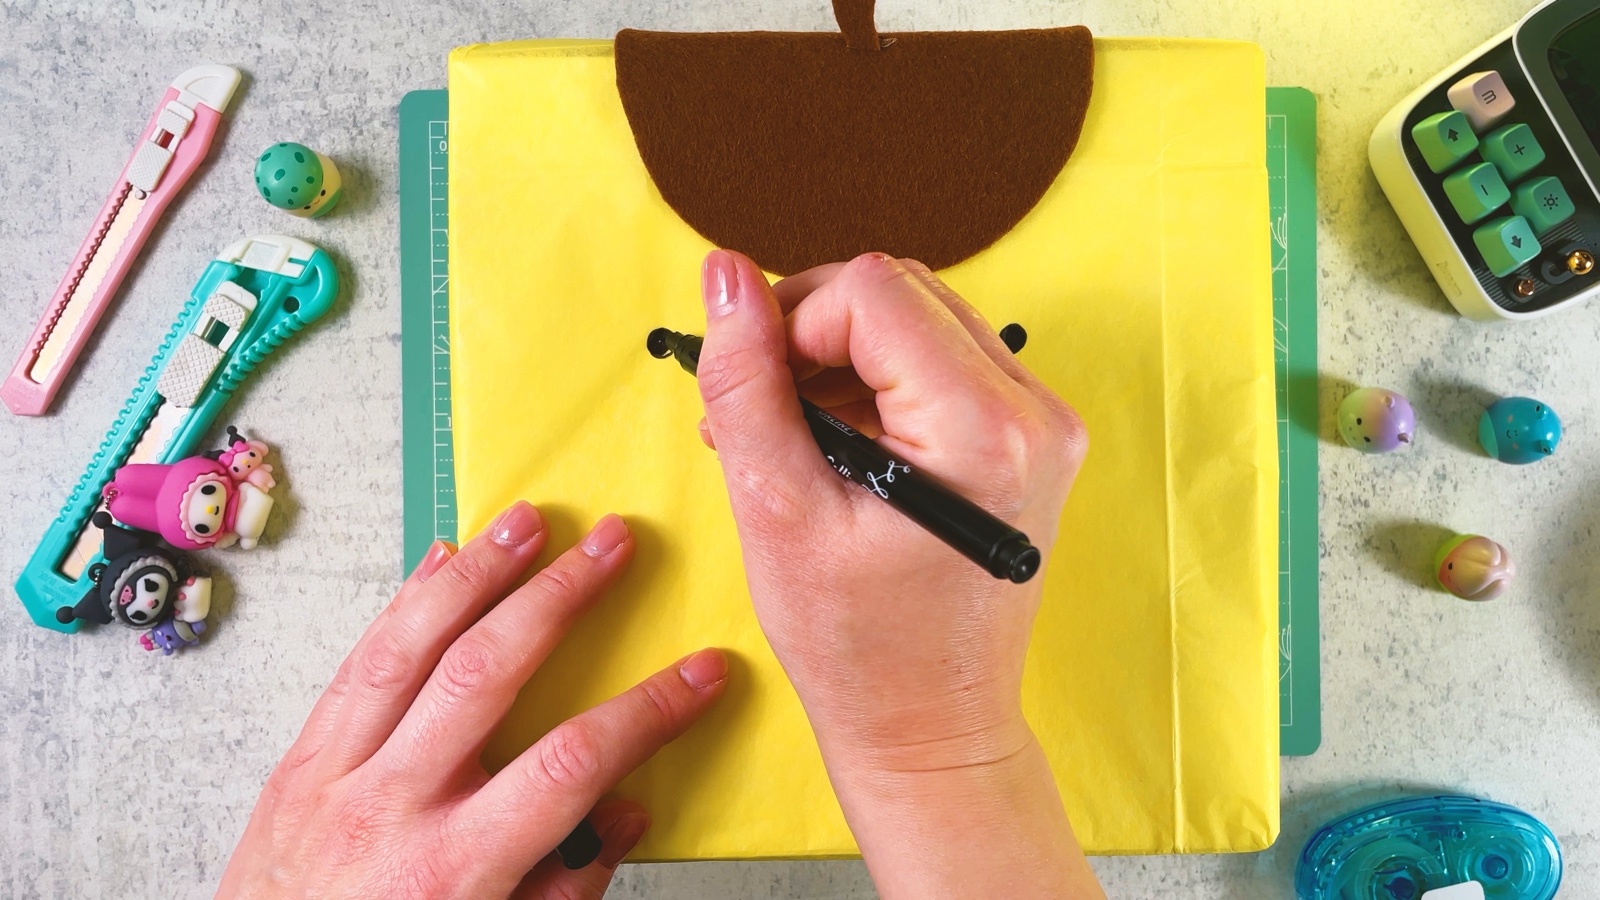
- 11
Tie a yellow bow
Wrap a yellow satin ribbon around the bottom of the box and tie a bow at the front, like a bib under the chin.
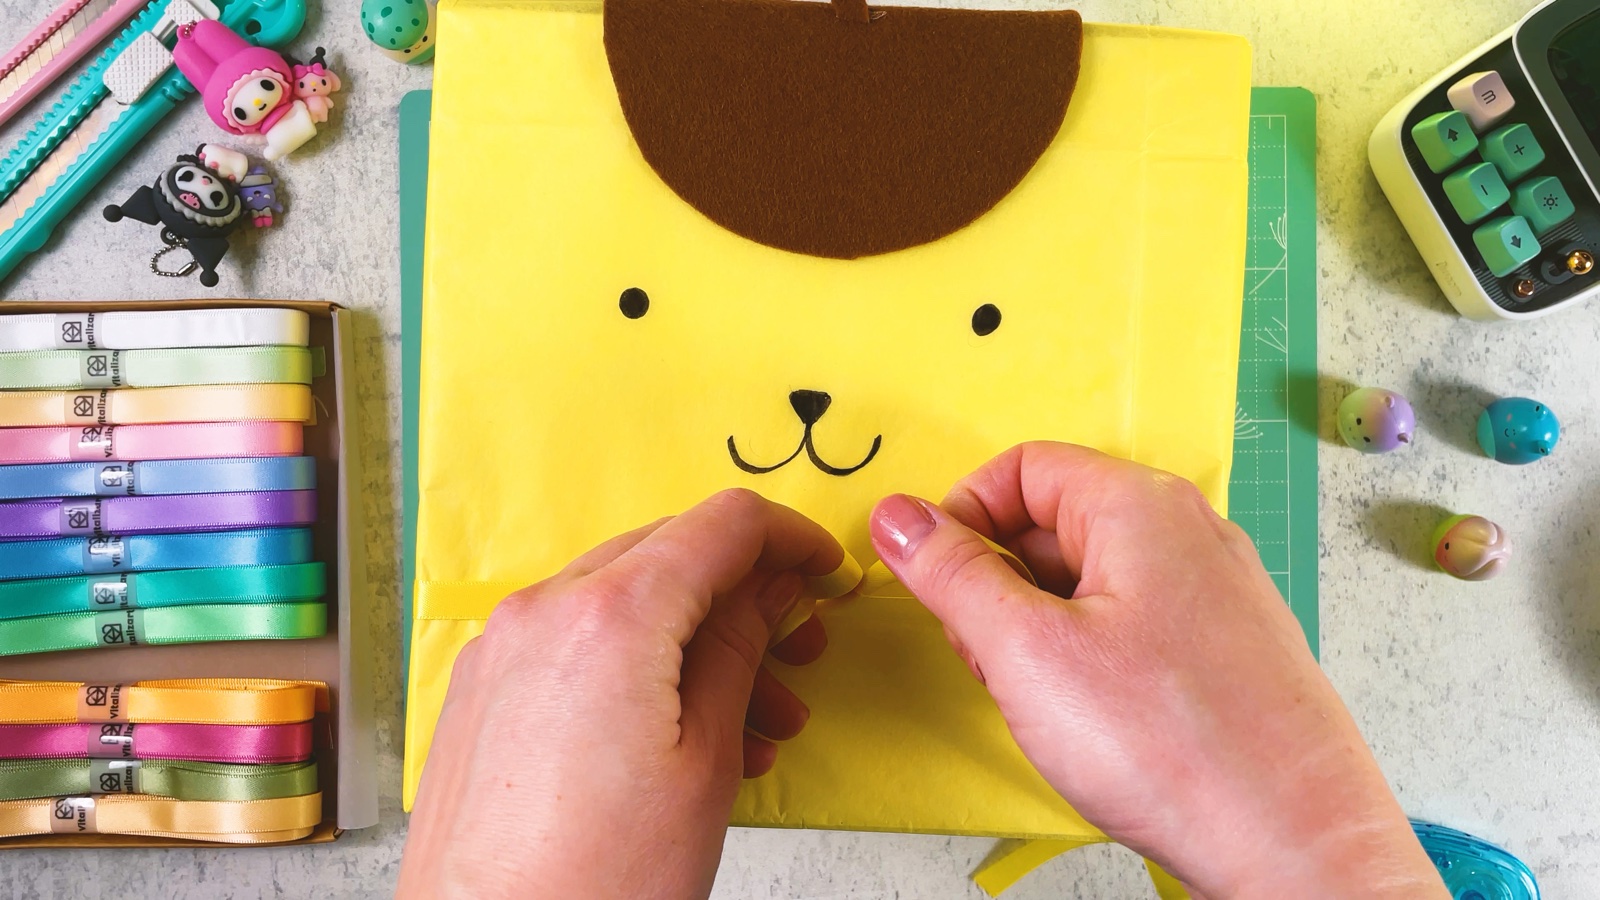
Pompompurin's pudding-yellow gift is ready.
PART 3 OF 6
Keroppi
- 12
Add a pale green strip
Start with a box wrapped in bright green paper. Lay a wide strip of pale green paper down the middle and fold the ends under the box.
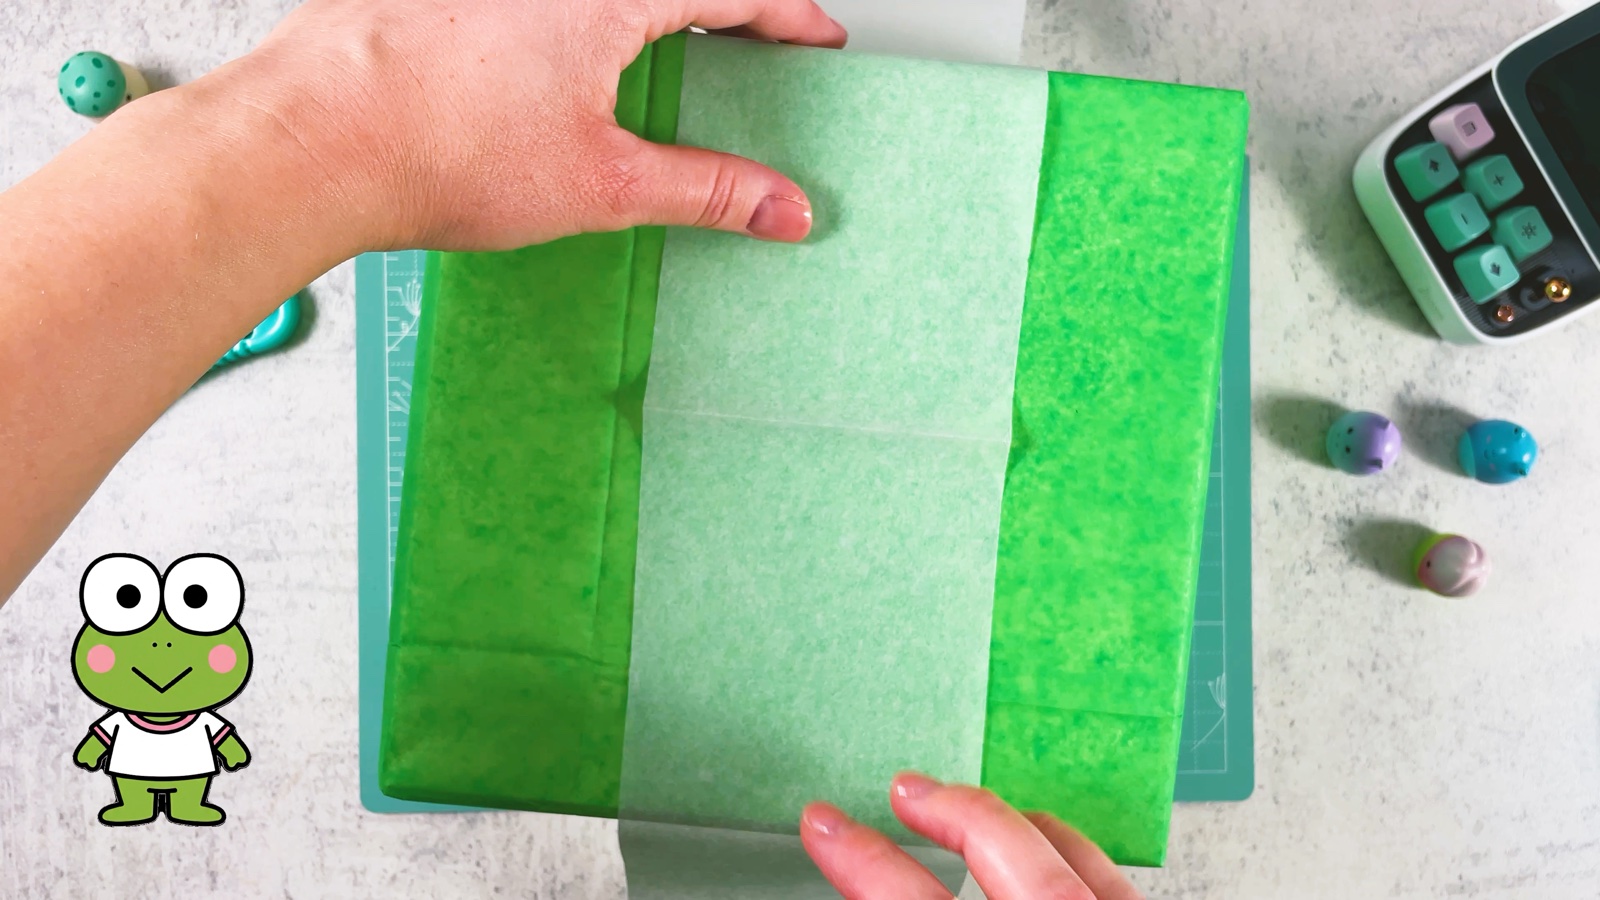
- 13
Add red ribbon stripes
Run a dark red ribbon around the box, along the edges of the pale strip. Add more stripes until you have four. Tape the ends underneath.
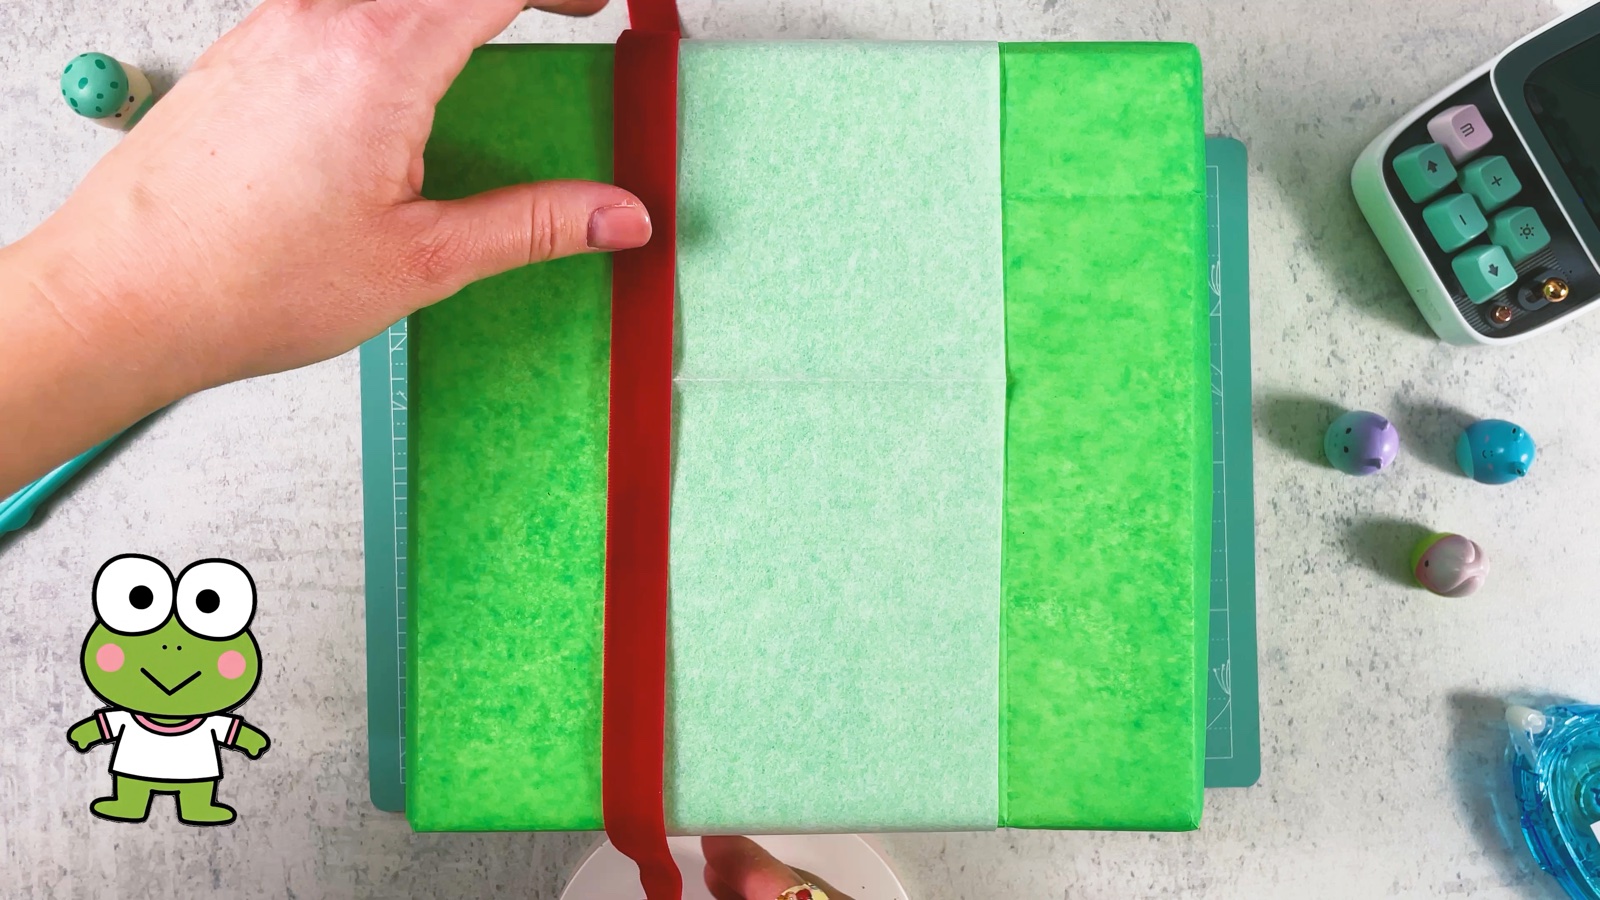
- 14
Stick on Keroppi's face
Cut out the Keroppi face from page 2. Put foam tape squares on its back and press it on the front, a little above the middle.
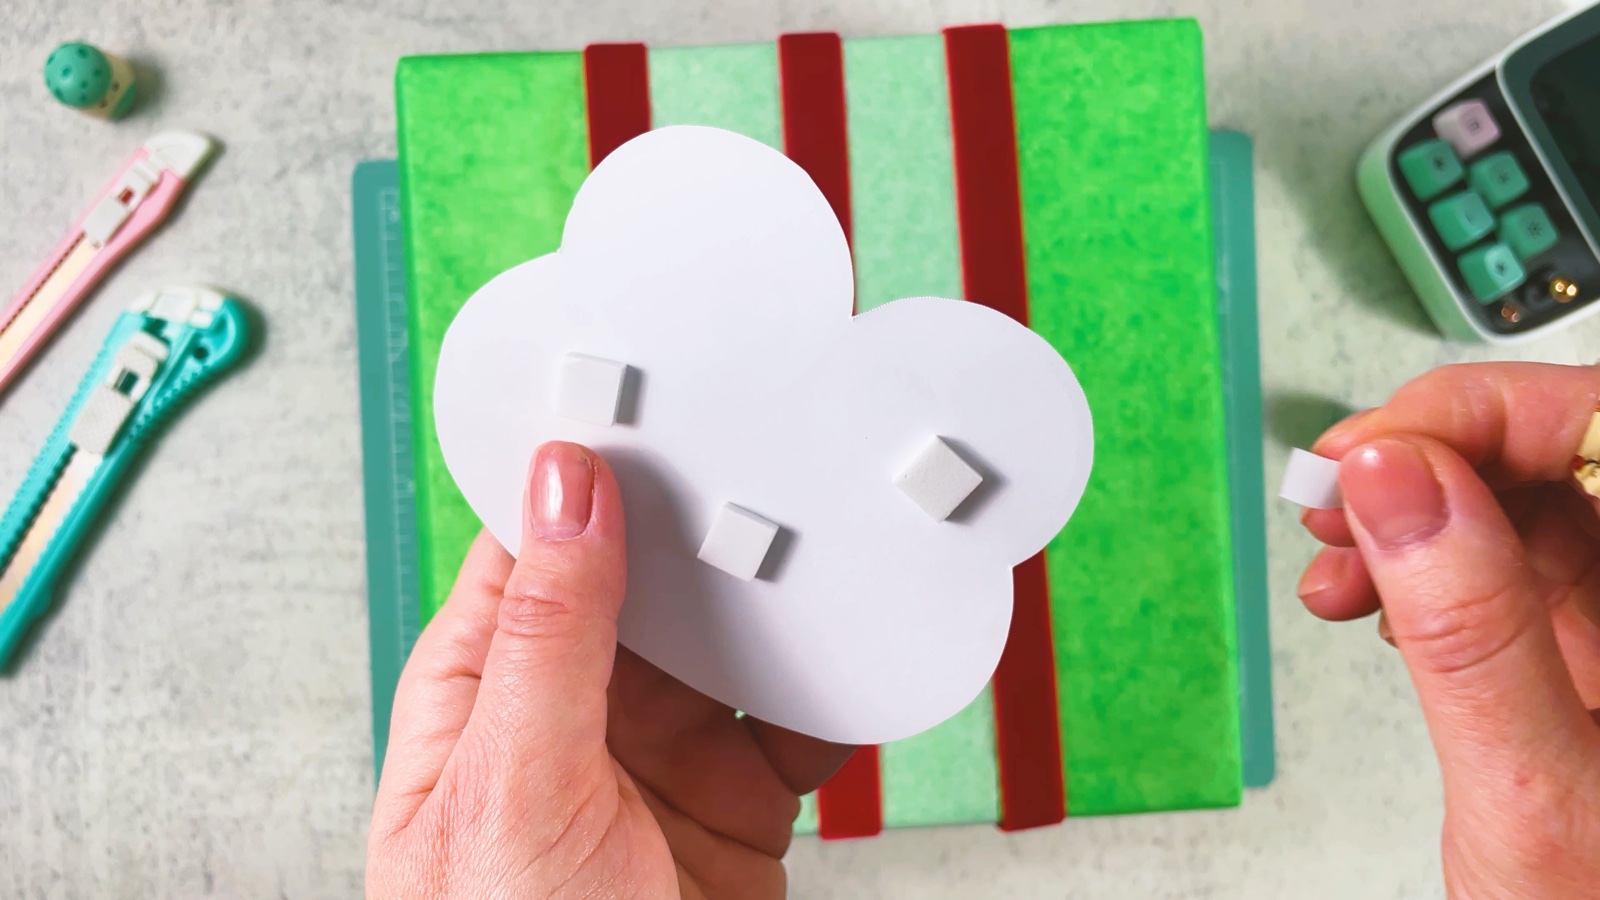
- 15
Check the stripes
Look at the box from all sides. If a stripe moved, straighten it and press it down again.
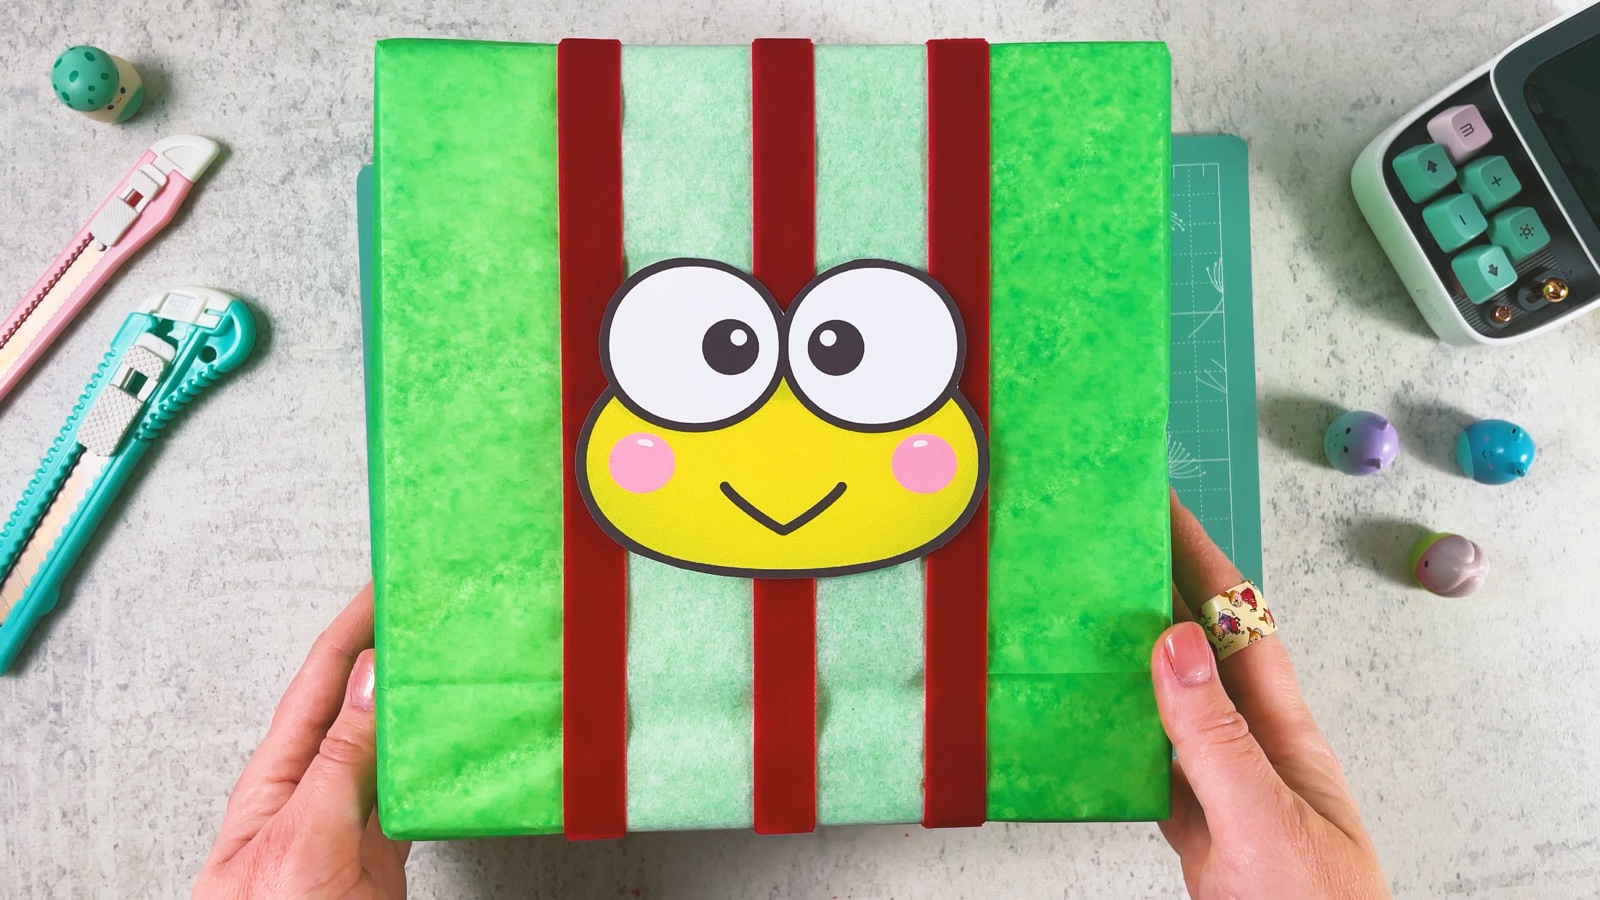
Keroppi's stripy green gift is ready.
PART 4 OF 6
My Melody
- 16
Add a lace band
Start with a box wrapped in pink paper. Put a white lace ribbon across the front and tape the ends at the back.
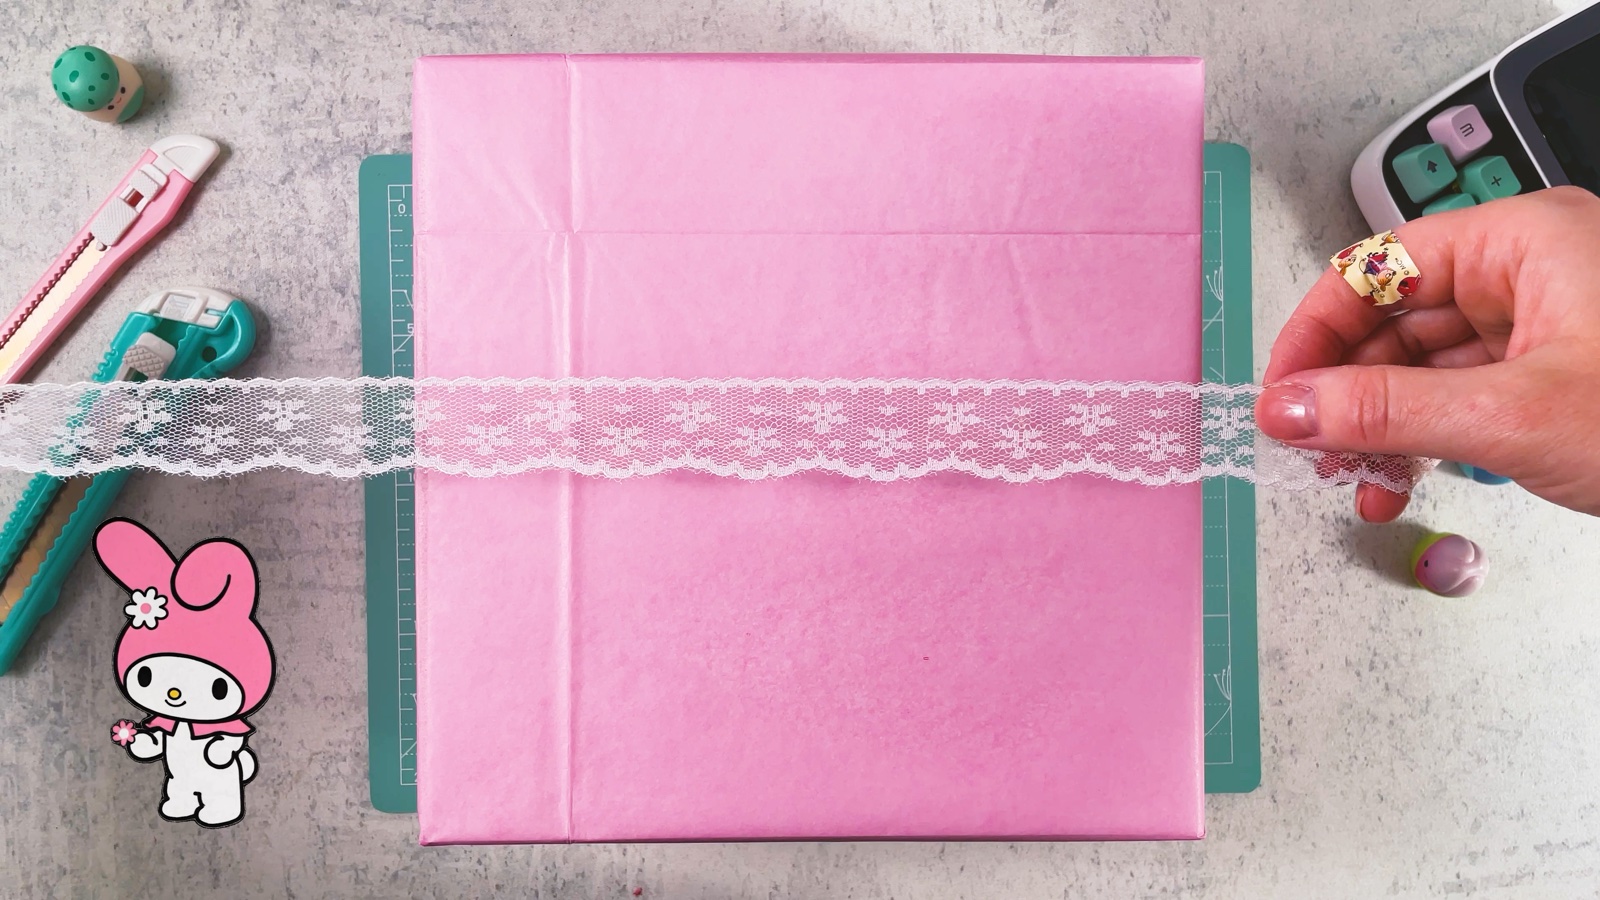
- 17
Stick on My Melody
Cut out the My Melody face from page 2. Put foam tape on its back and press it on the box, just above the lace.
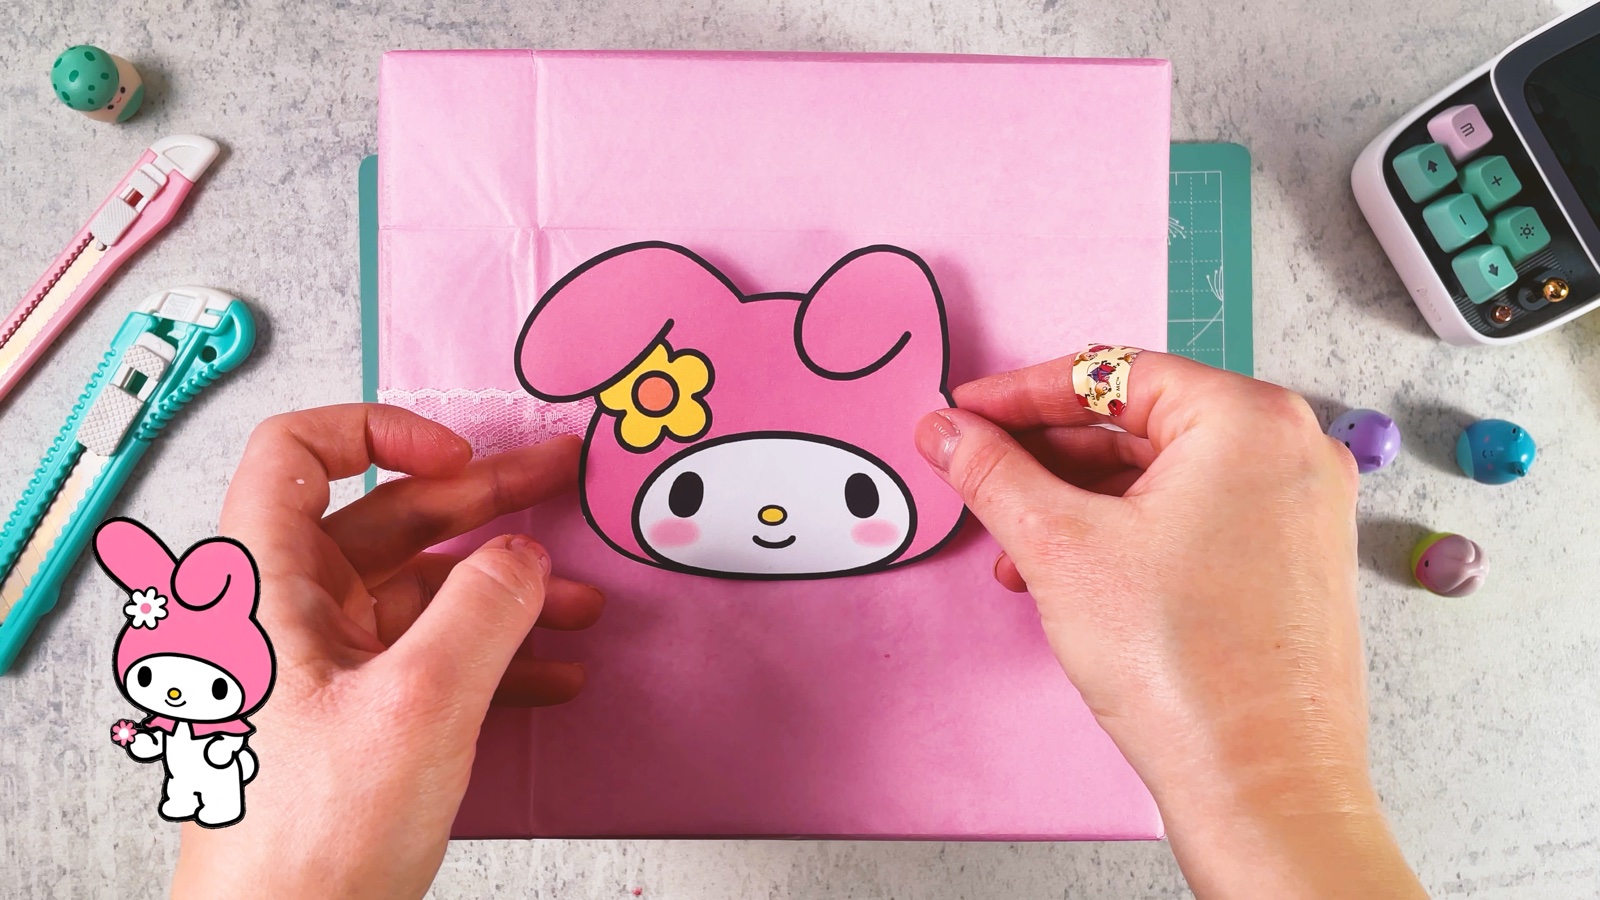
- 18
Make a lace bow
Take a long piece of lace and fold it into two loops, like a bow. Pinch the middle together.
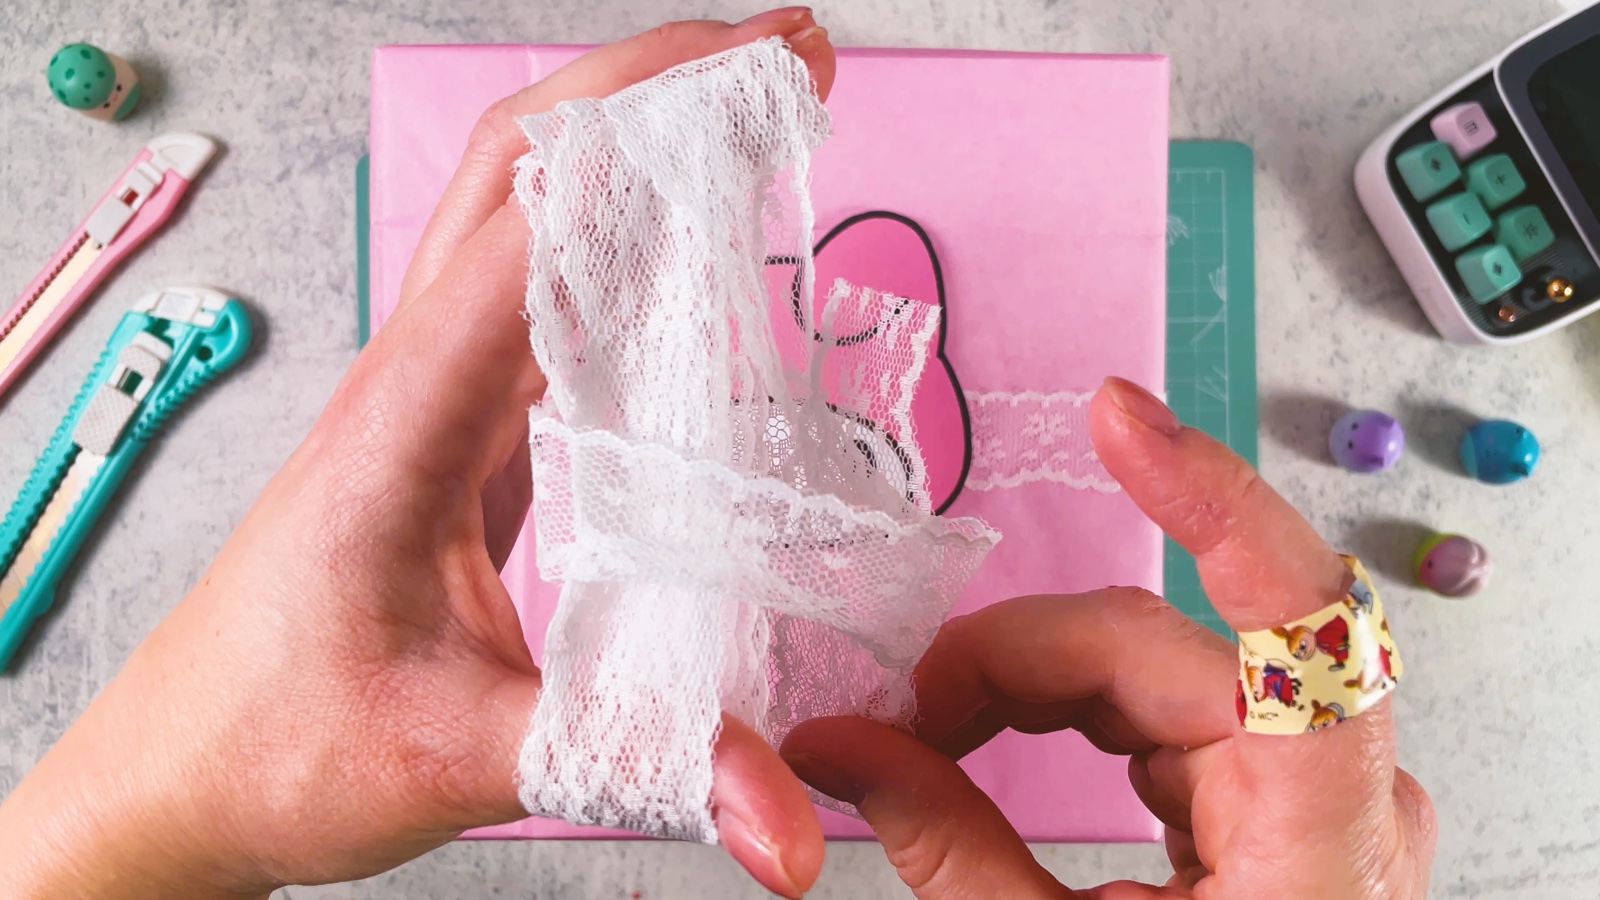
- 19
Tie the middle
Wrap a small piece of lace around the pinched middle and tie it tight. Fluff up the loops.
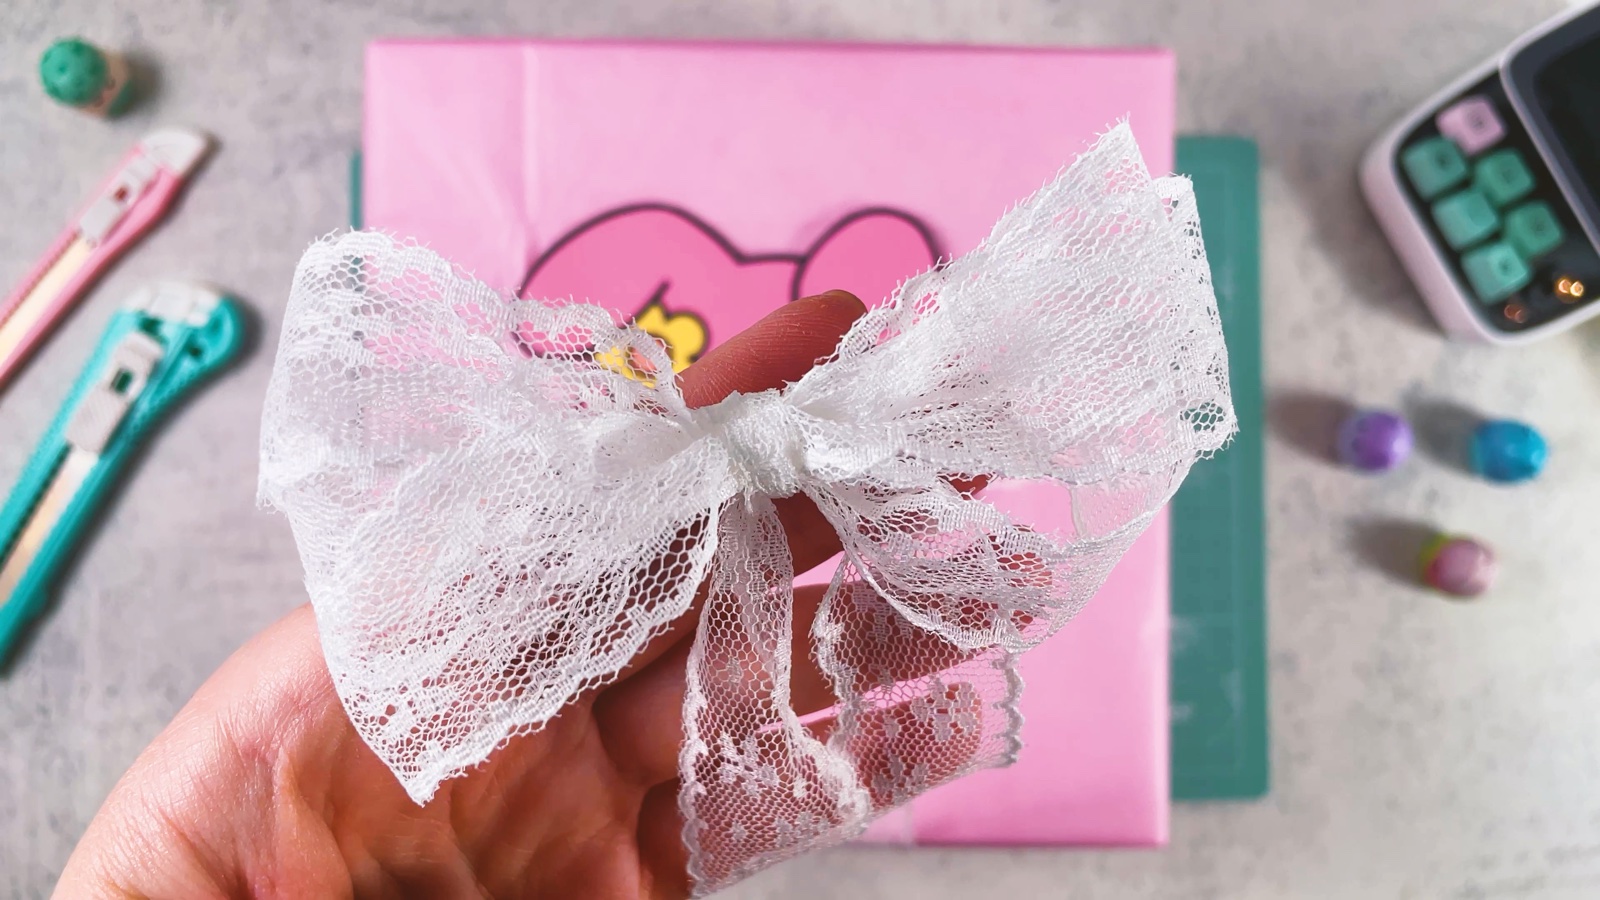
- 20
Add the bow and trim the ends
Stick the bow under My Melody's chin. Cut the lace ends at a slant so they look neat.
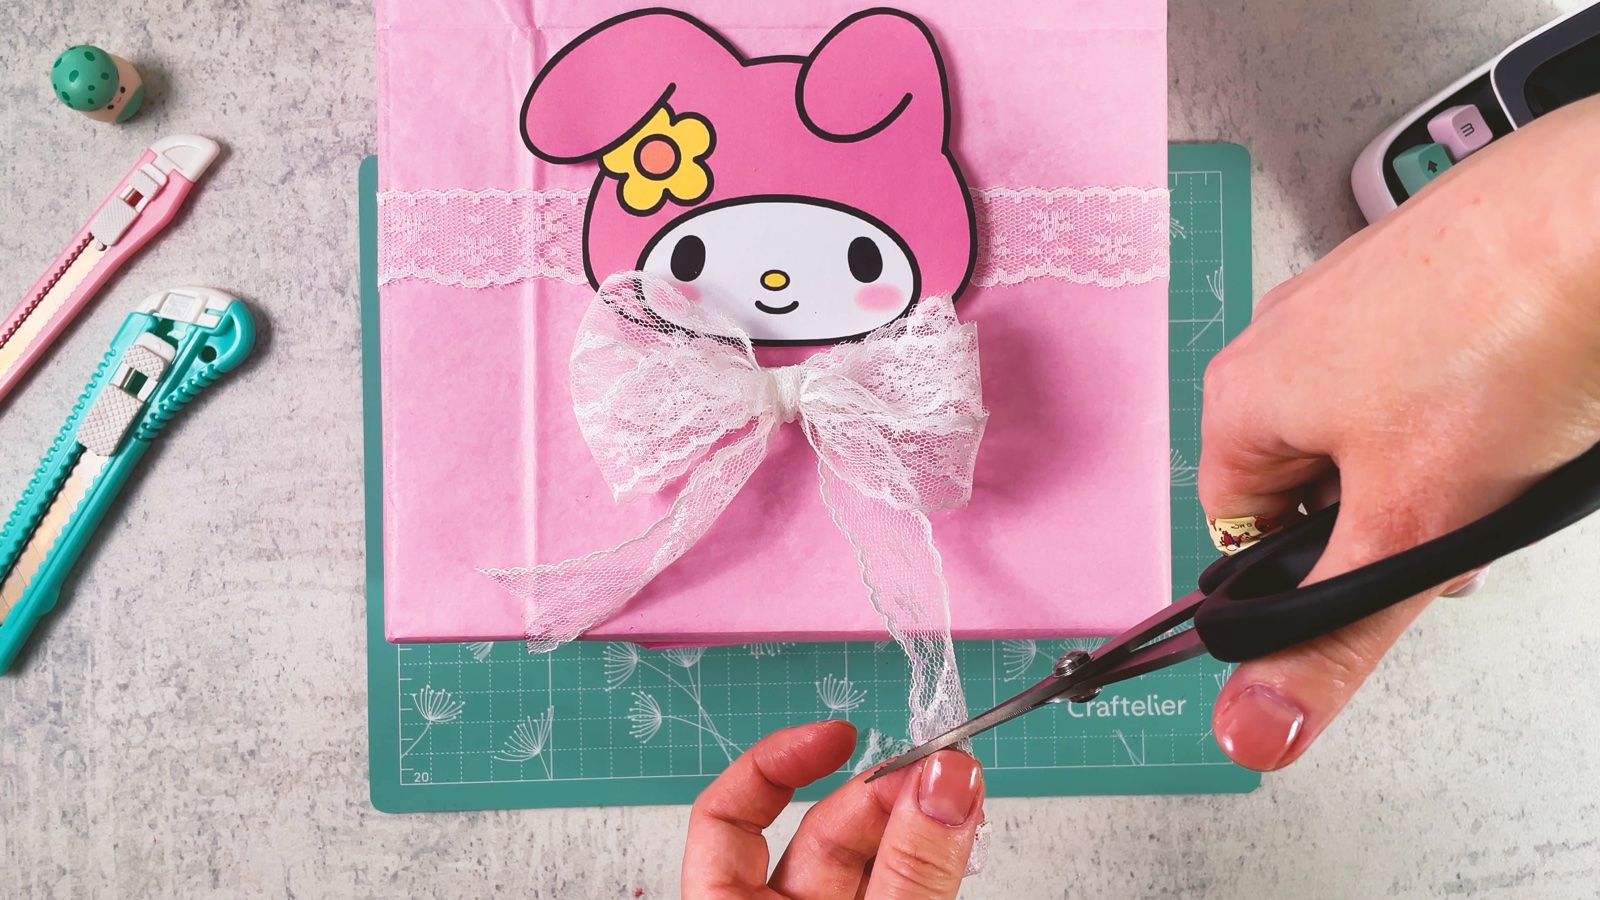
- 21
Fluff the bow
Give the loops one last fluff so the bow looks soft and full.
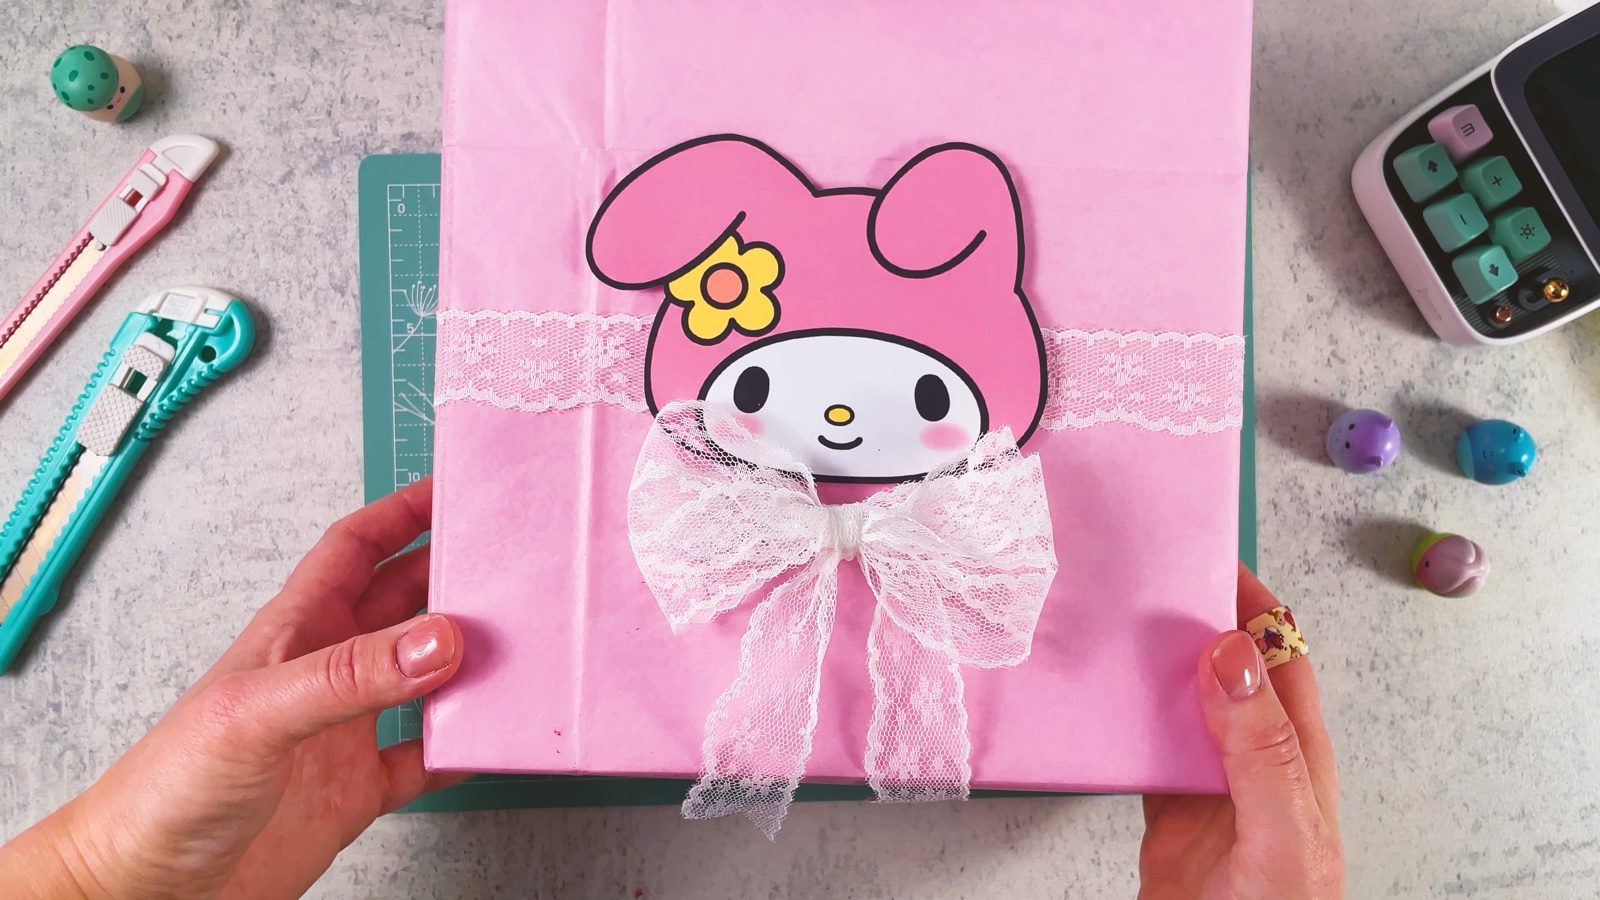
My Melody's sweet pink gift is ready.
PART 5 OF 6
Kuromi
- 22
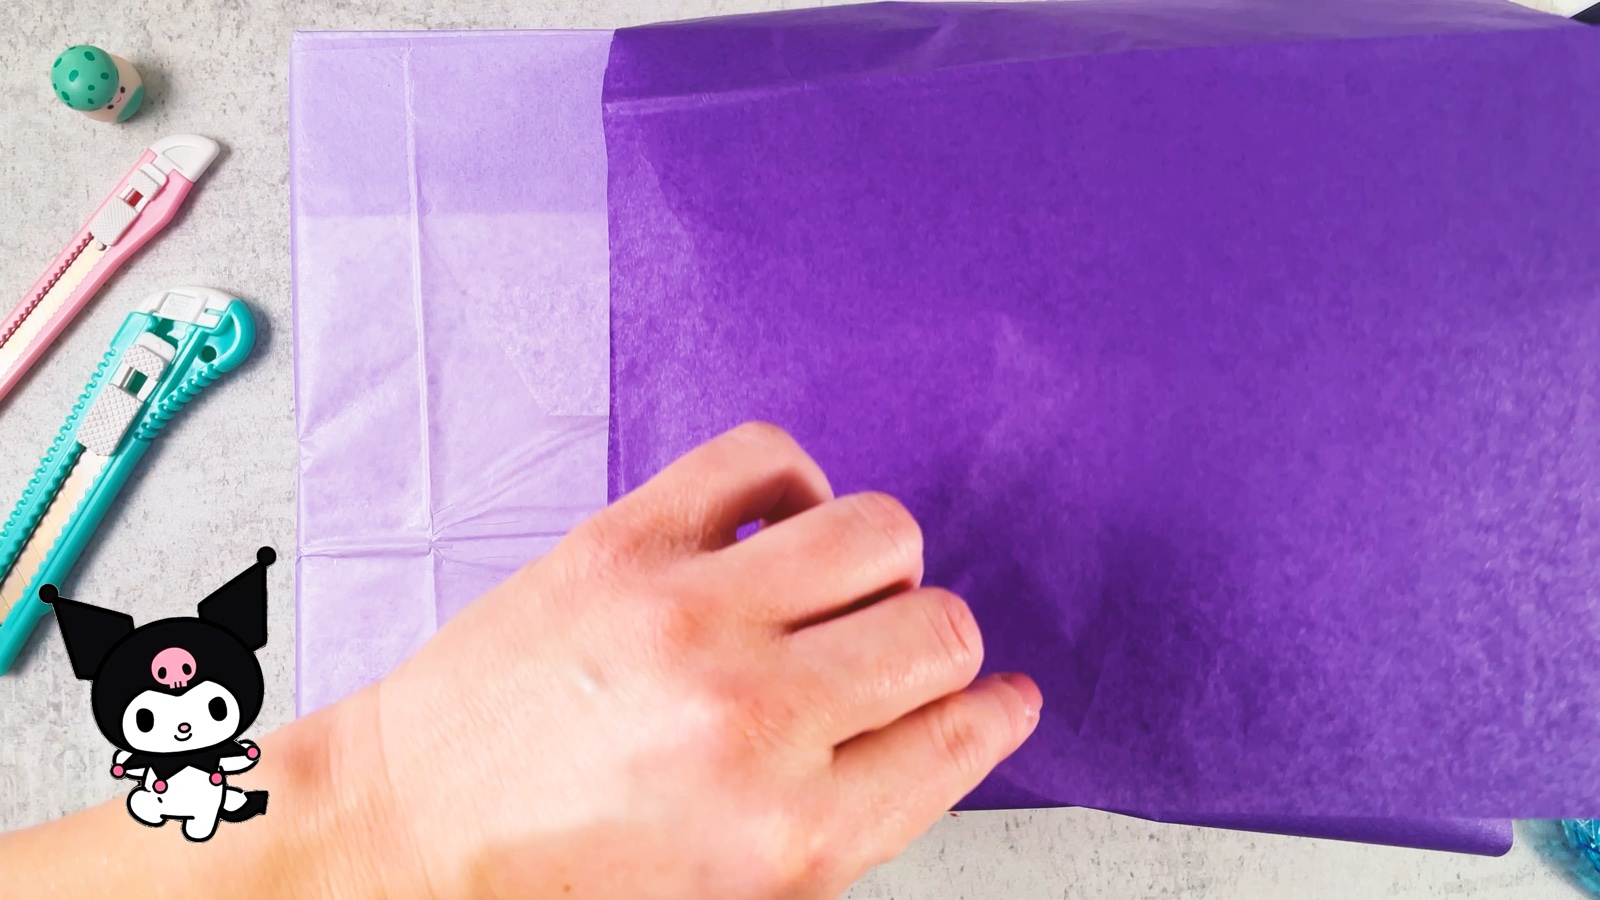
Add a dark purple bottom
Start with a box wrapped in light lilac paper. Wrap a sheet of dark purple paper around the bottom half only.
- 23
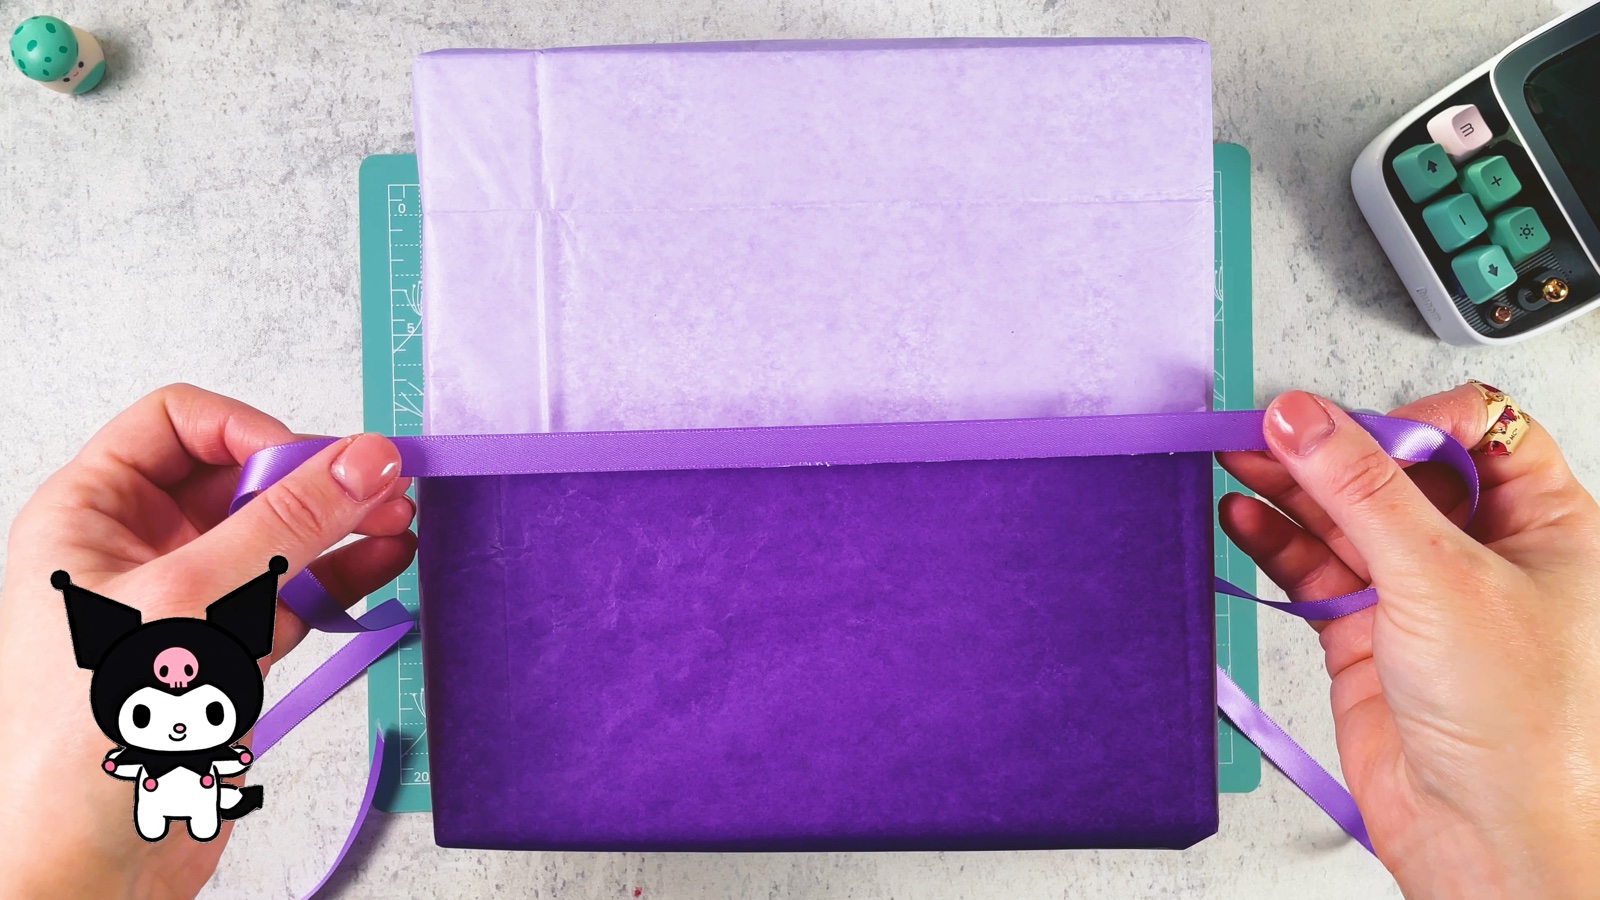
Add a thin purple ribbon
Run a thin purple ribbon around the box, right on the top edge of the dark purple paper. It makes a clean line between the two colours.
- 24
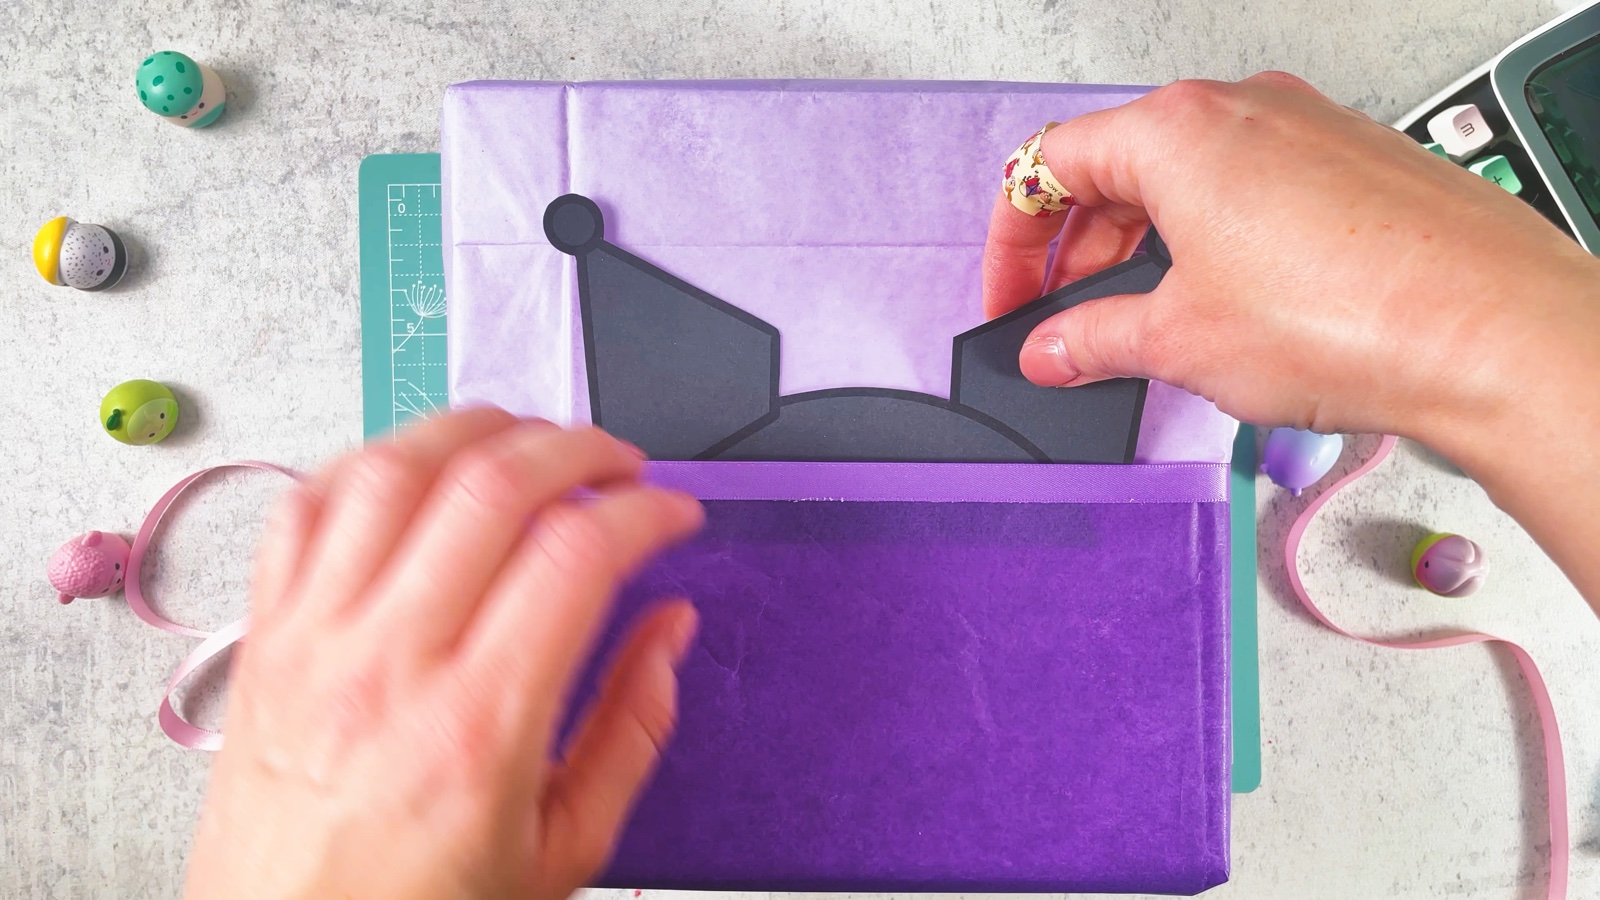
Tuck in Kuromi's hood
Cut out the black Kuromi hood from page 1. Slide it with its ears behind the edge of the dark purple paper, so only the top sticks out.
- 25
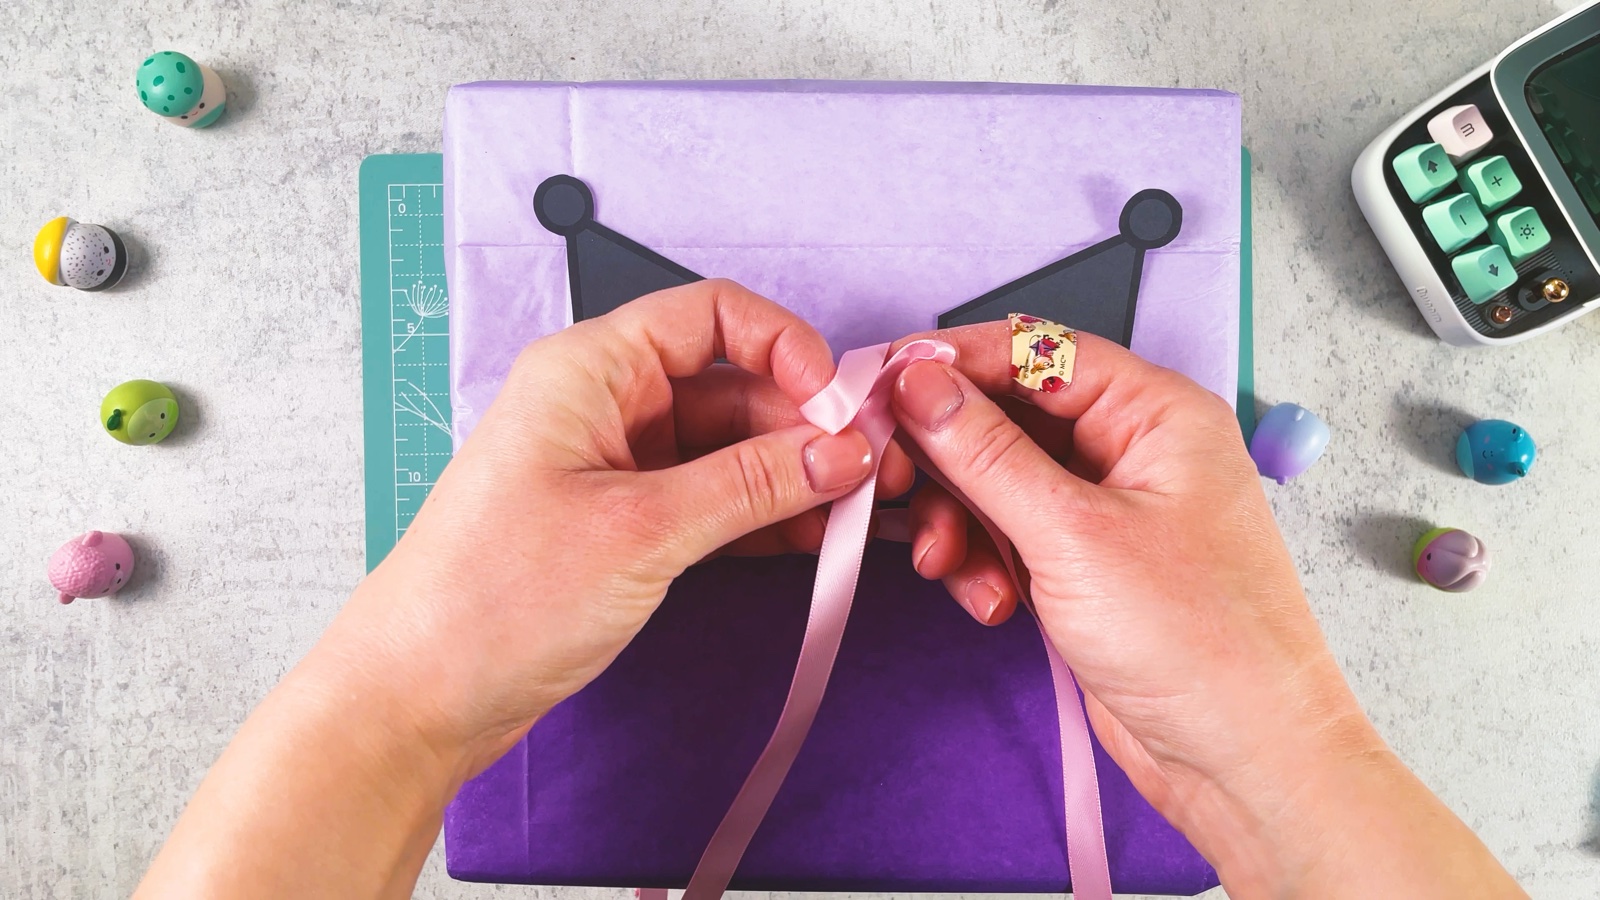
Tie a pink bow
Wrap a pink ribbon around the box over the thin purple one and tie a bow in the middle.
- 26
Straighten the ears
Push the hood down so both ears stand up evenly, and pull the bow loops to the same size.
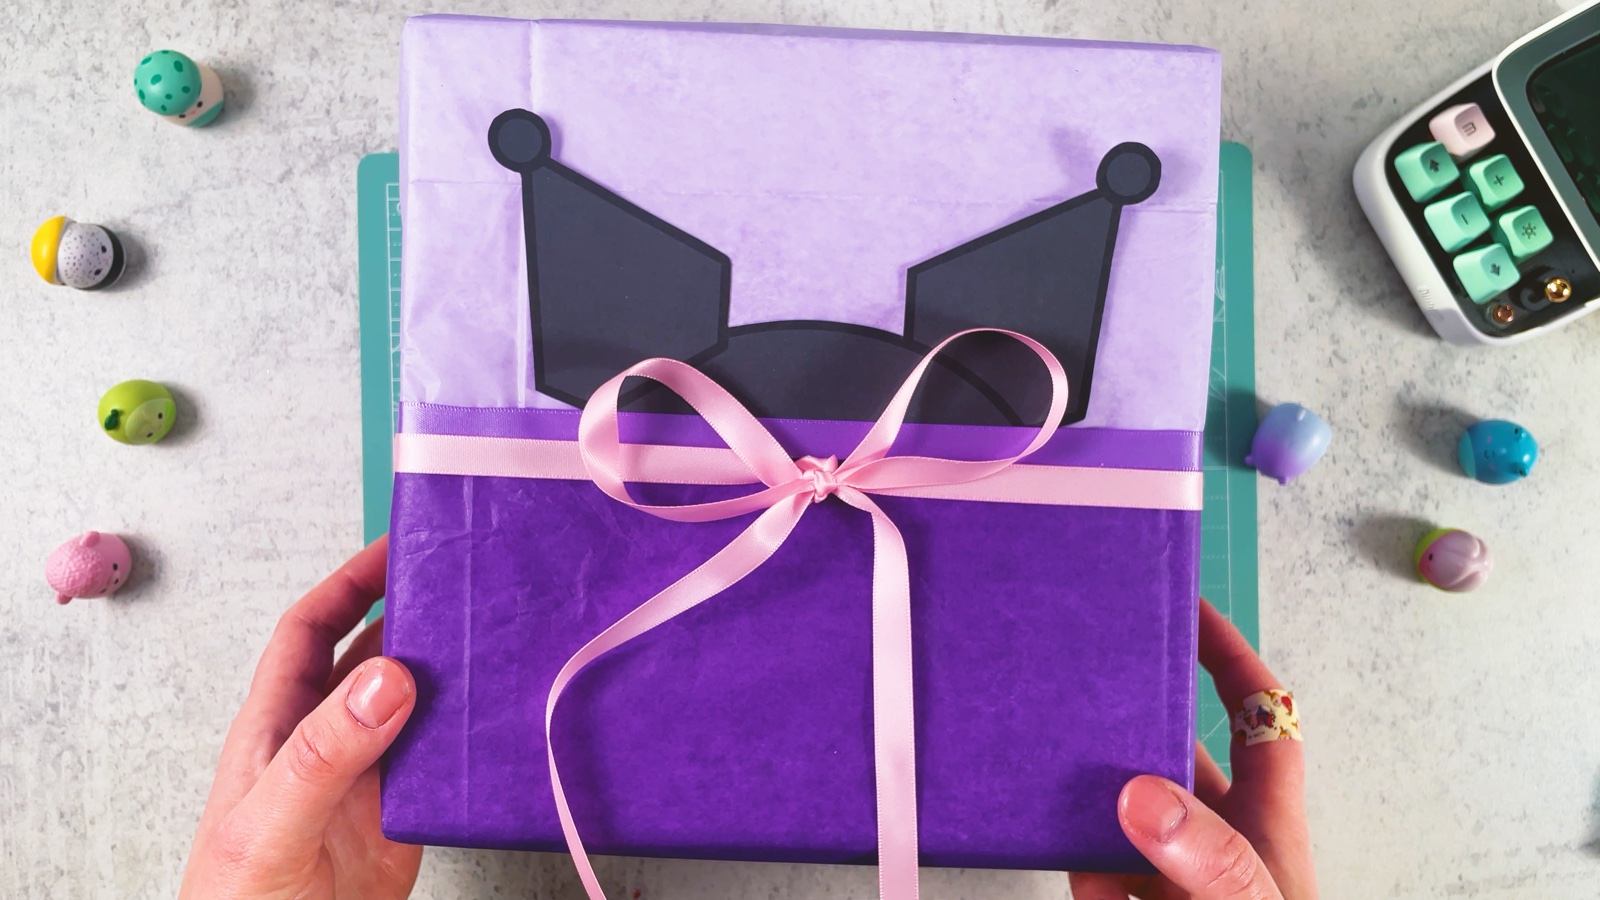
Kuromi's cheeky purple gift is ready.
PART 6 OF 6
Hello Kitty
- 27
Stick on Hello Kitty
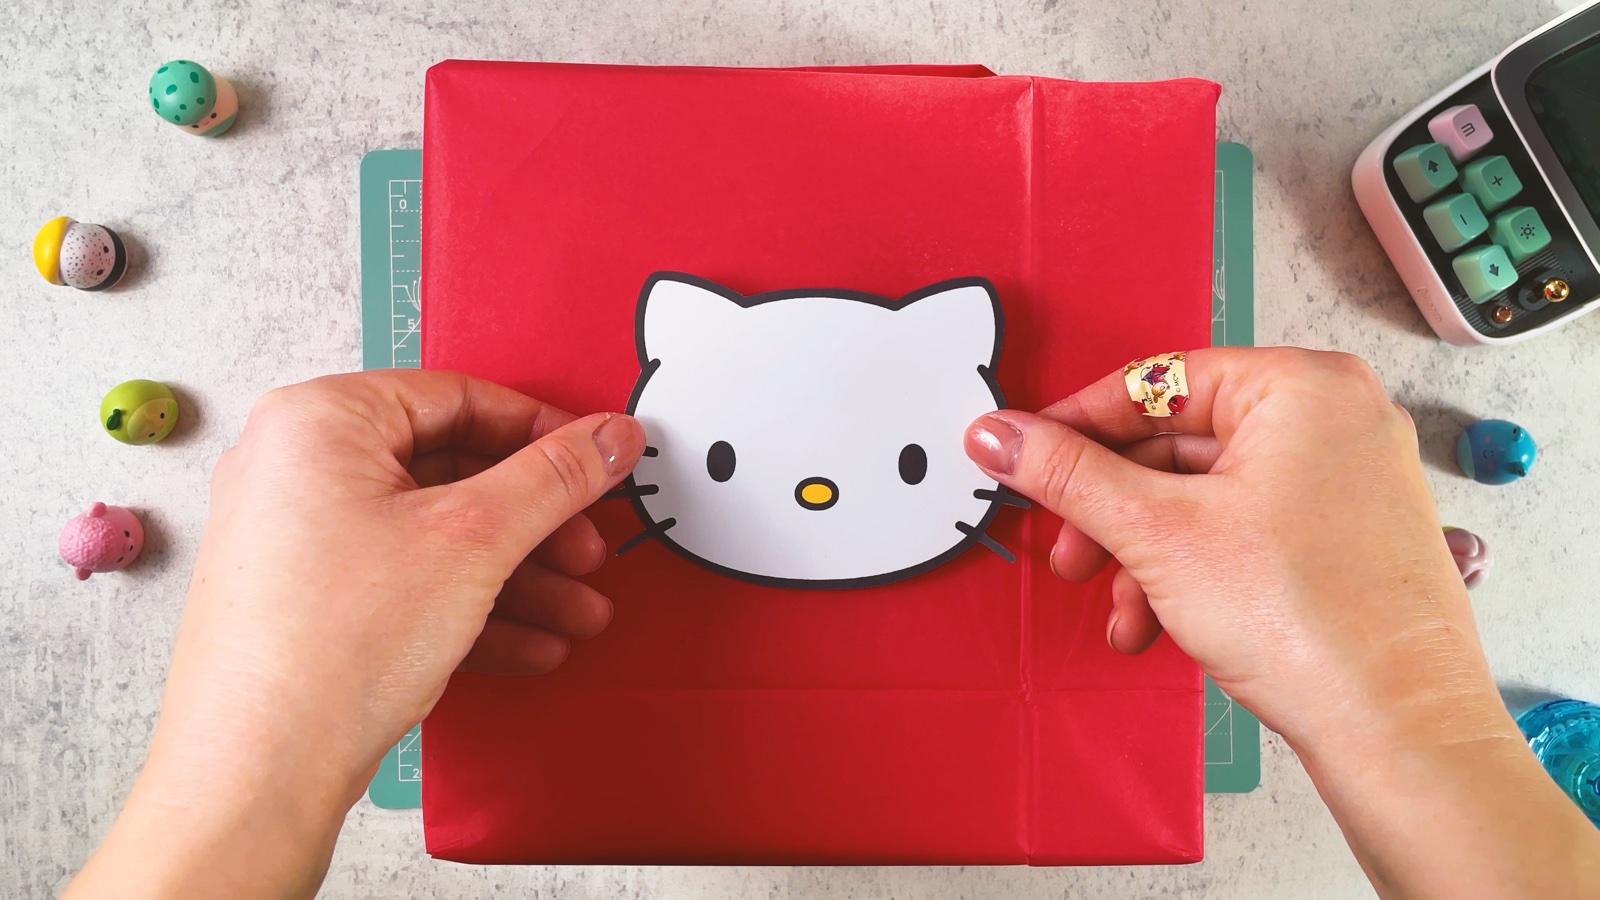
Start with a box wrapped in red paper. Cut out the Hello Kitty face from page 1. Put foam tape on its back and press it on the middle of the box.
- 28
Fold a satin bow
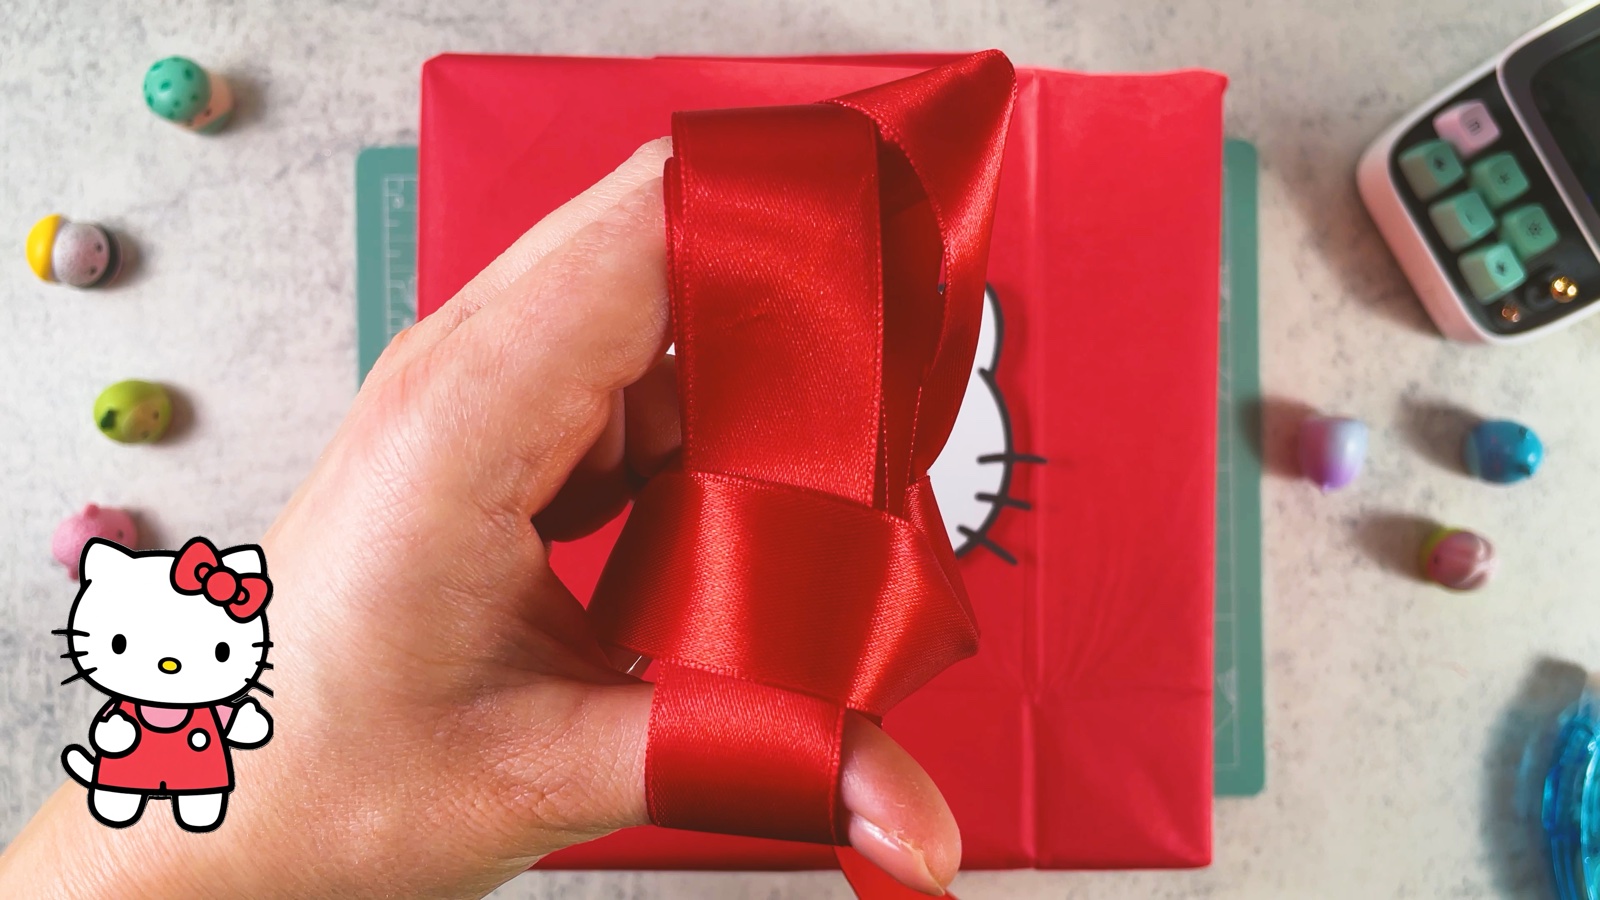
Take a red satin ribbon and fold it into loops, one on each side. Hold the middle tight between your fingers.
- 29
Add the bow to her ear
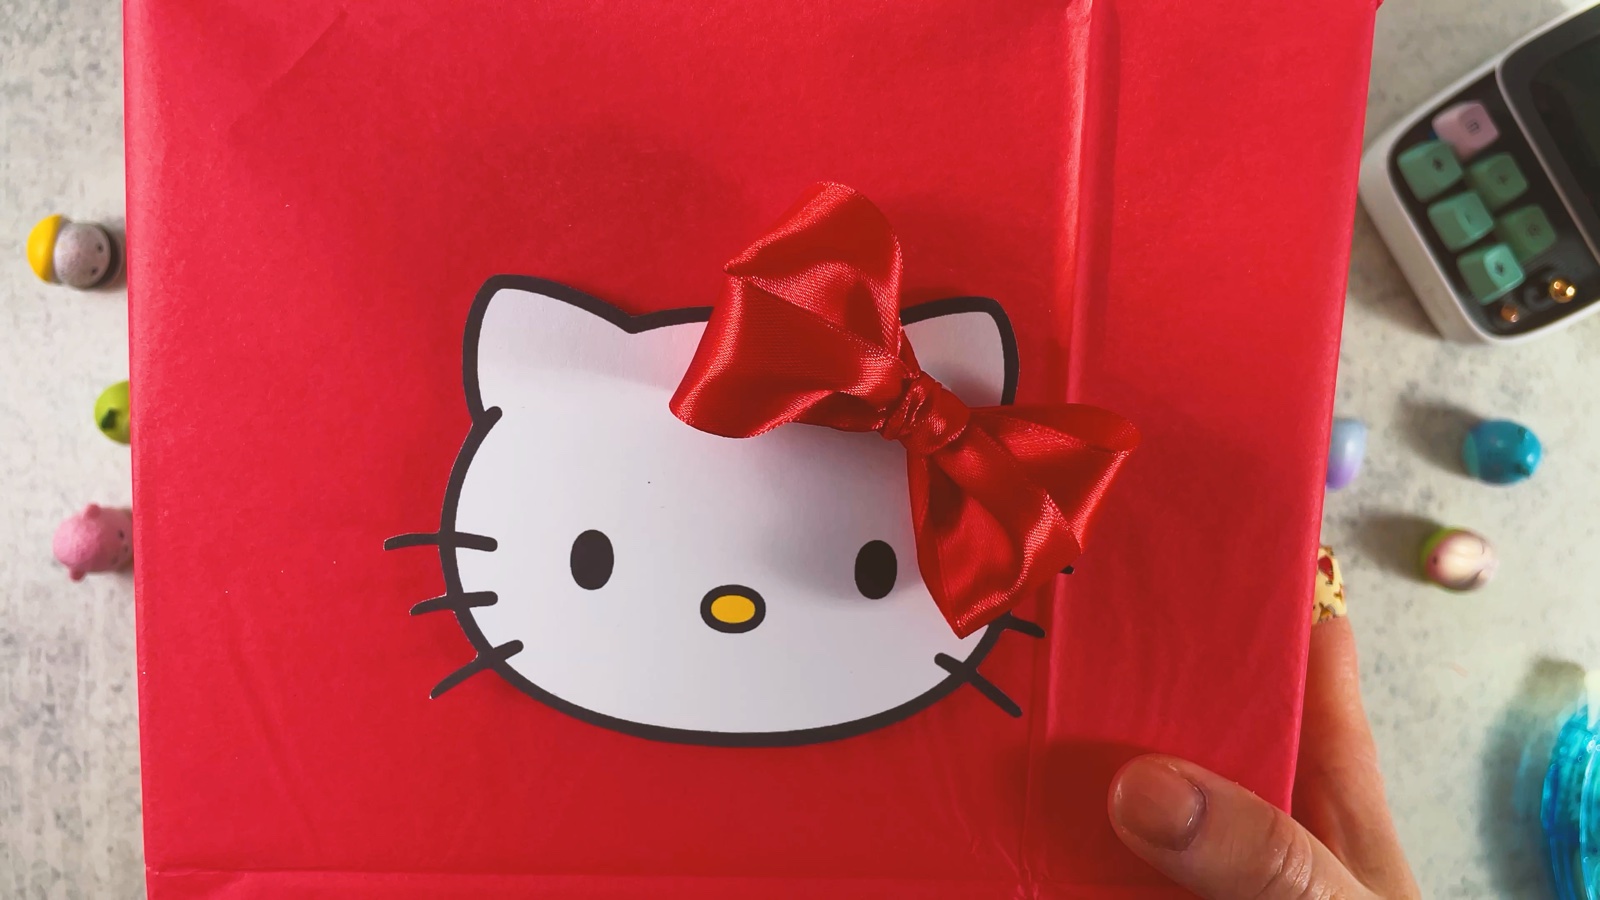
Tie the middle of the bow with a short piece of ribbon. Stick the bow next to Hello Kitty's ear, where her red bow always is.
- 30
Glue on white pompoms
Put a small drop of glue on the box and press a tiny white pompom onto it. Add more dots all over the box, on the top and the sides.
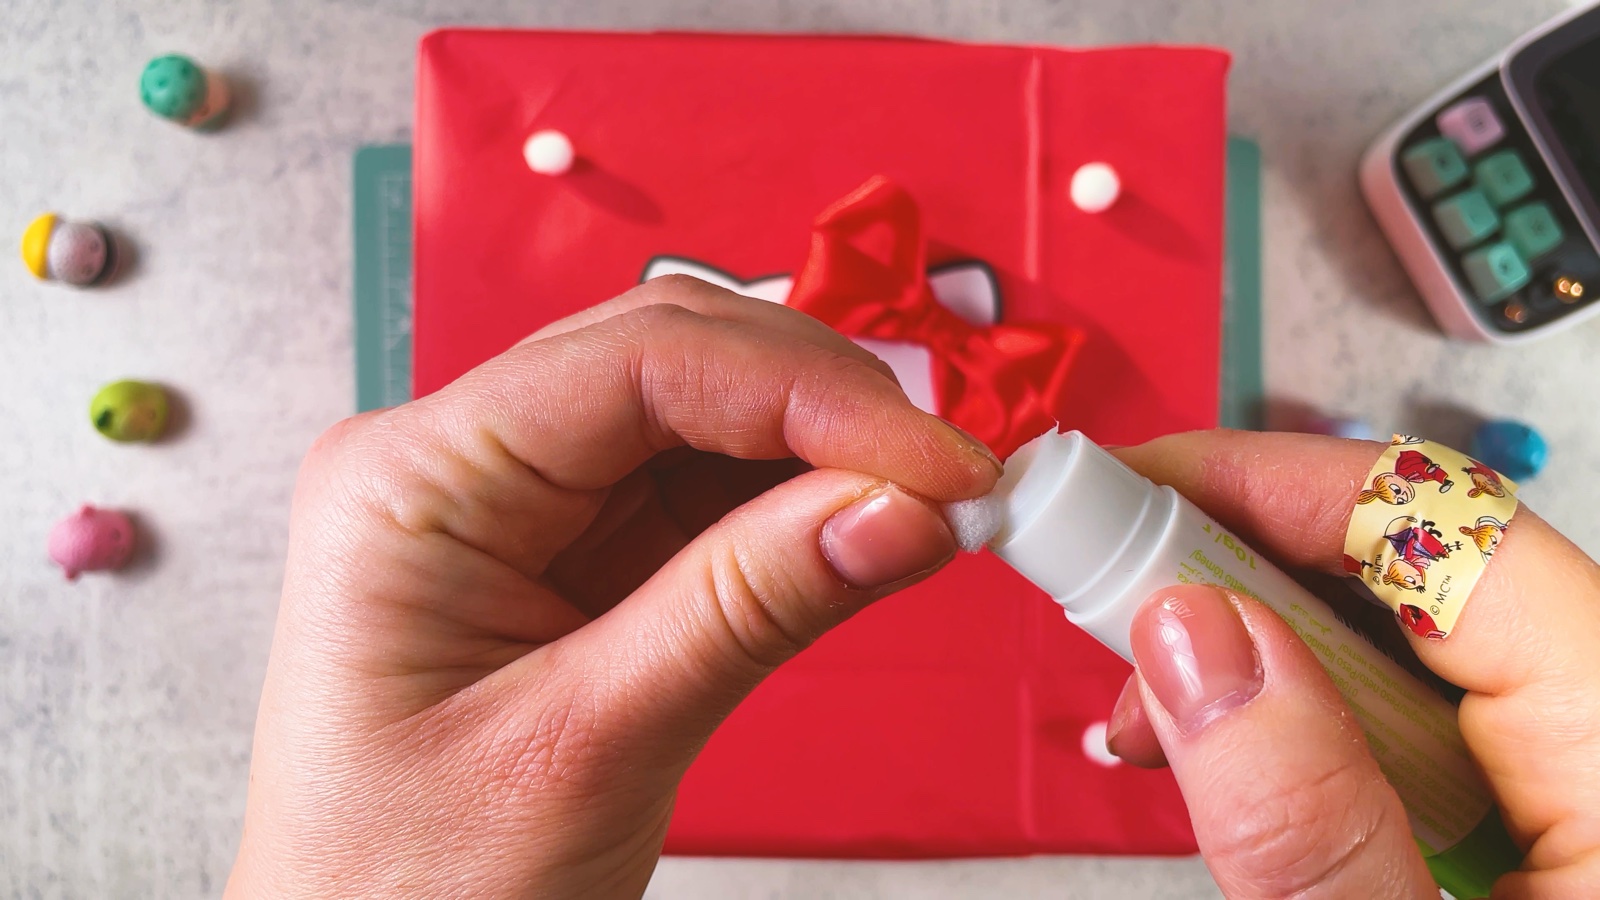
- 31
Line them all up
Let the glue dry. Then put all six gifts together and see who is who.
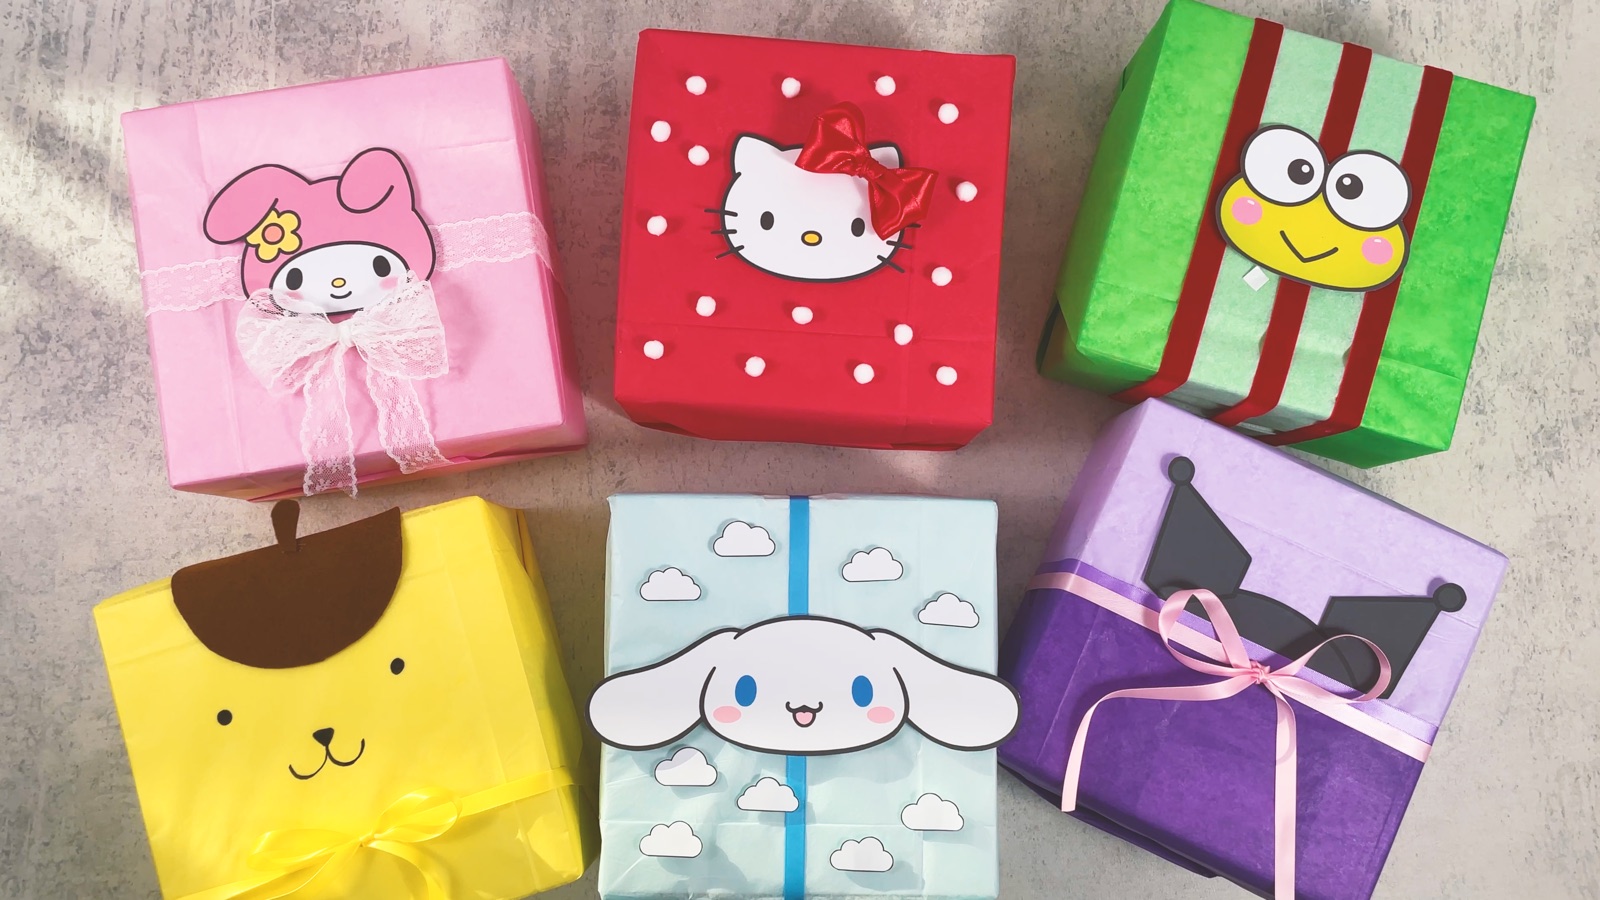
All six Sanrio gifts are ready.
THREE LITTLE TIPS
Make it easier.
- Use foam tape for the faces. It lifts them off the box, so they look like they pop out.
- Match the box to the friend. Pick the character first, then their colours. The colours do half the work.
- Print the faces on card. Thicker paper stays flat on the box and does not curl.

A CUBI MINI MOMENT
Which friend will you wrap?
Cubi is wrapping a little gift for Mini, in Mini’s favourite colours. Which Sanrio friend matches the person you are giving yours to?
A yellow Pompompurin box, with a tiny felt beret just Mini’s size.
Loved making it?
Catch the next make first, or save this one for a rainy day.