Let’s make an awesome Pokémon paper airplane inspired by Green Rayquaza! In this easy tutorial we fold a flying paper airplane from a single sheet of paper, using a printable double-sided Rayquaza design.
This paper airplane is simple to make and looks amazing from every angle, thanks to the special Pokémon-inspired print. Perfect for fans of Pokémon crafts, origami, paper toys and creative DIY projects, and a fun thing to fold together at a Pokémon birthday party.
BEFORE WE START
What you need.
Materials
- Printable template
- A4 or US Letter printer paper
Tools
- A printer that prints on both sides
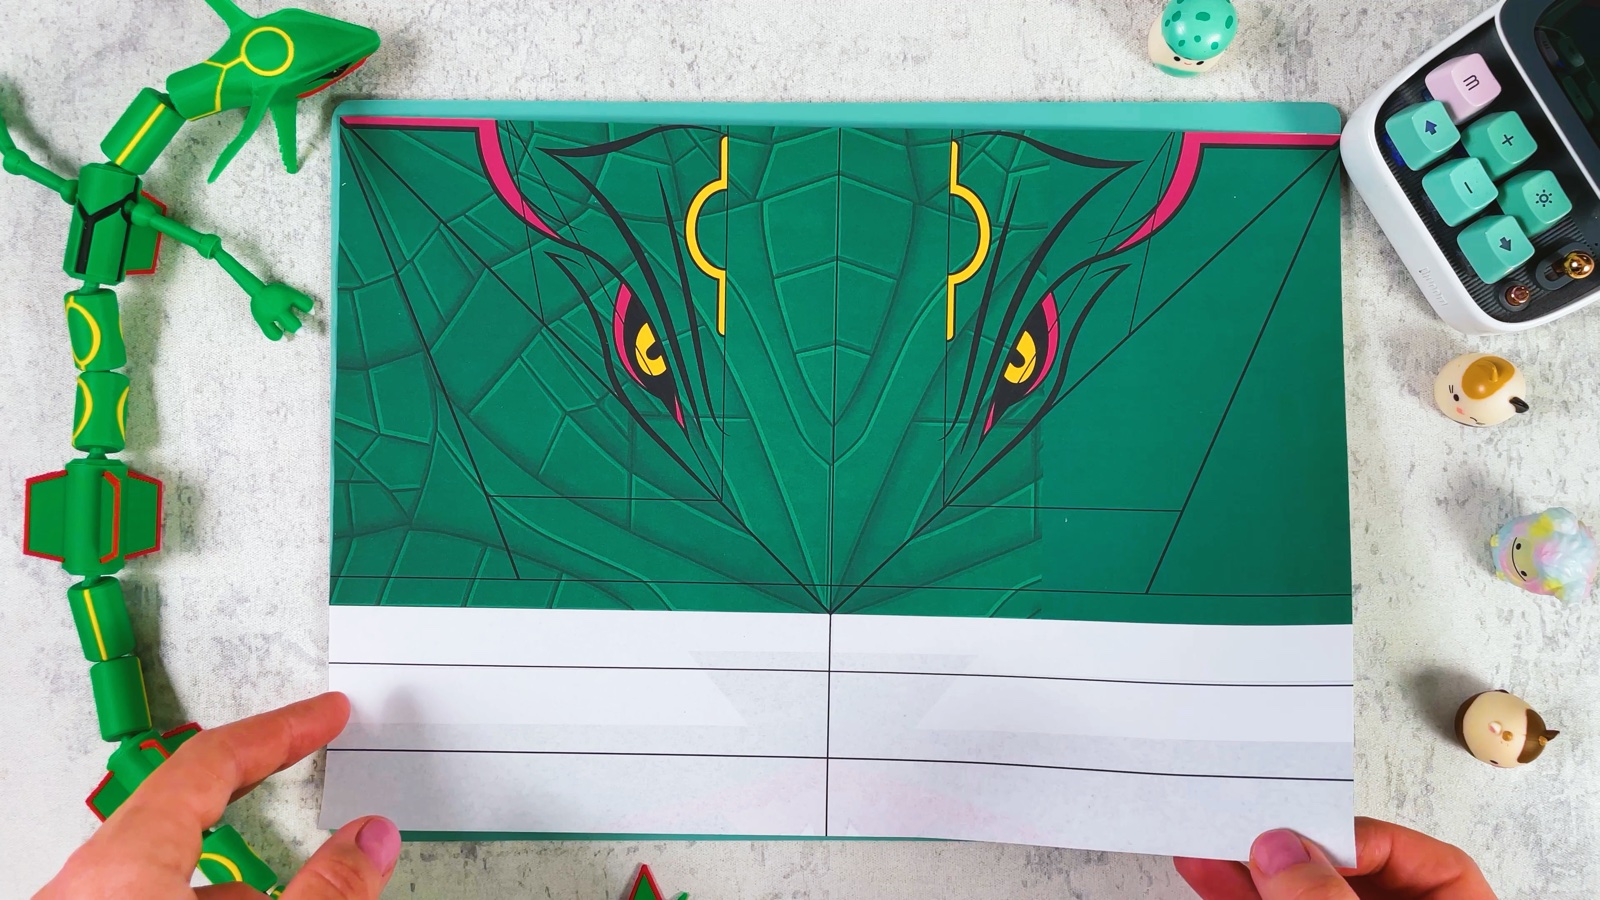
Page 1 has the eyes, page 2 has the rings and the mouth. Print both on one sheet of A4 (on US Letter, choose “Fit to page”), so the two pictures line up back to back.
Get the free template ↓STEP BY STEP
Let’s make it.
- 1
Print the template
Print the template on both sides of one sheet of A4 paper (on US Letter, choose “Fit to page”). One side shows Rayquaza’s eyes, the other side shows the yellow rings and the mouth. The thin dark lines on the print are the fold lines.
- 2
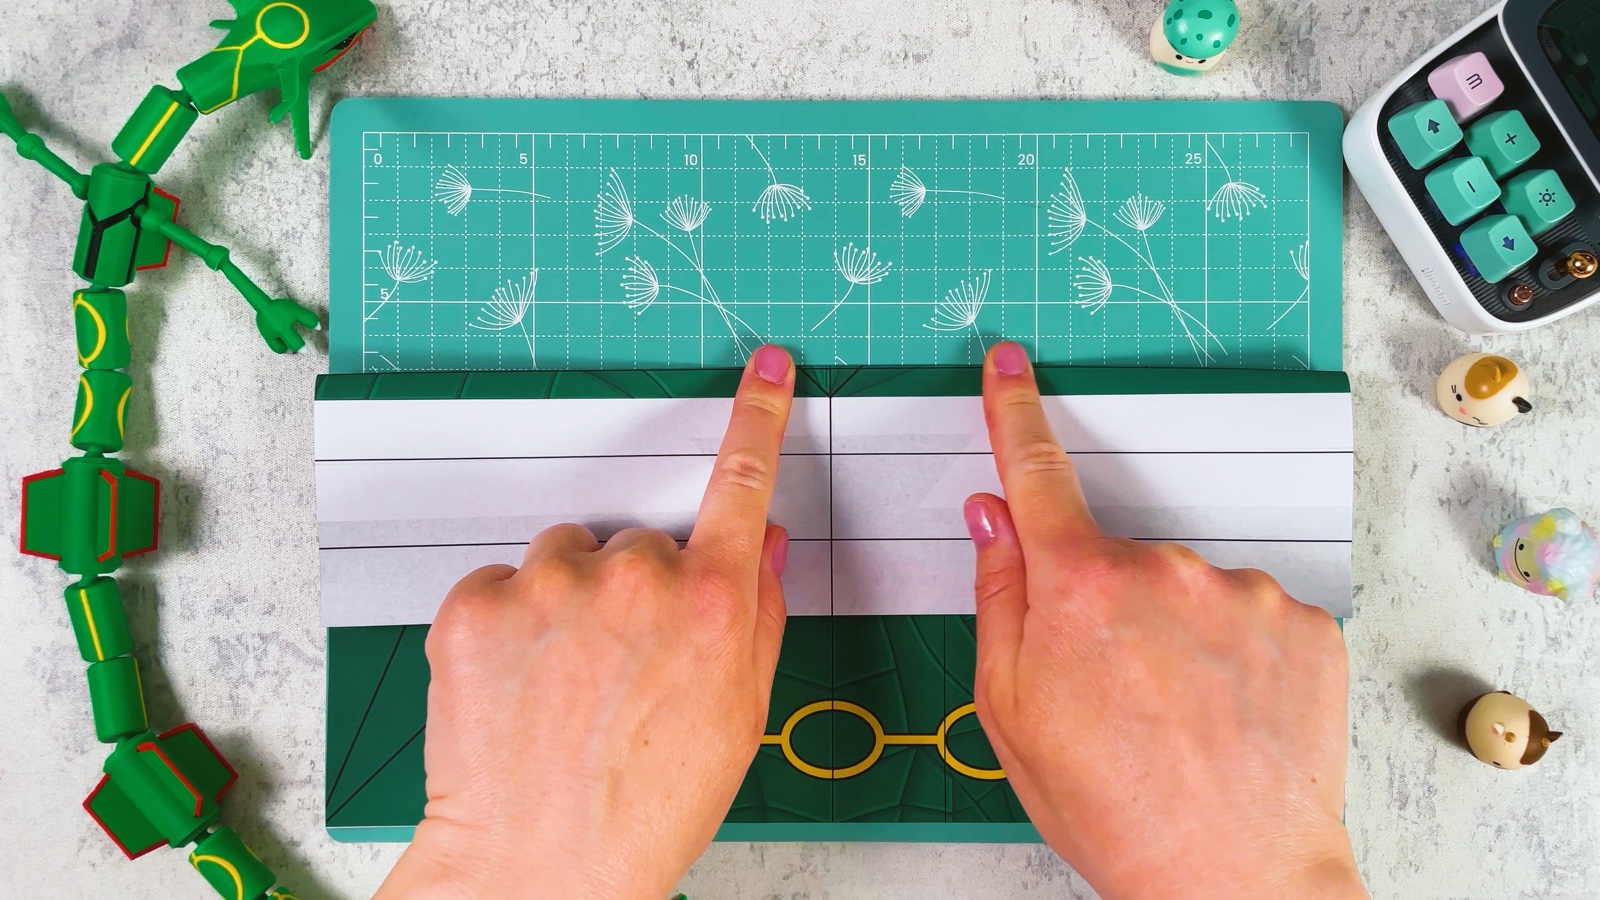
Fold the white strip
Lay the sheet with the rings side up and the white strip at the top. Fold the strip down along the first printed line and press the fold flat with your fingers.
- 3
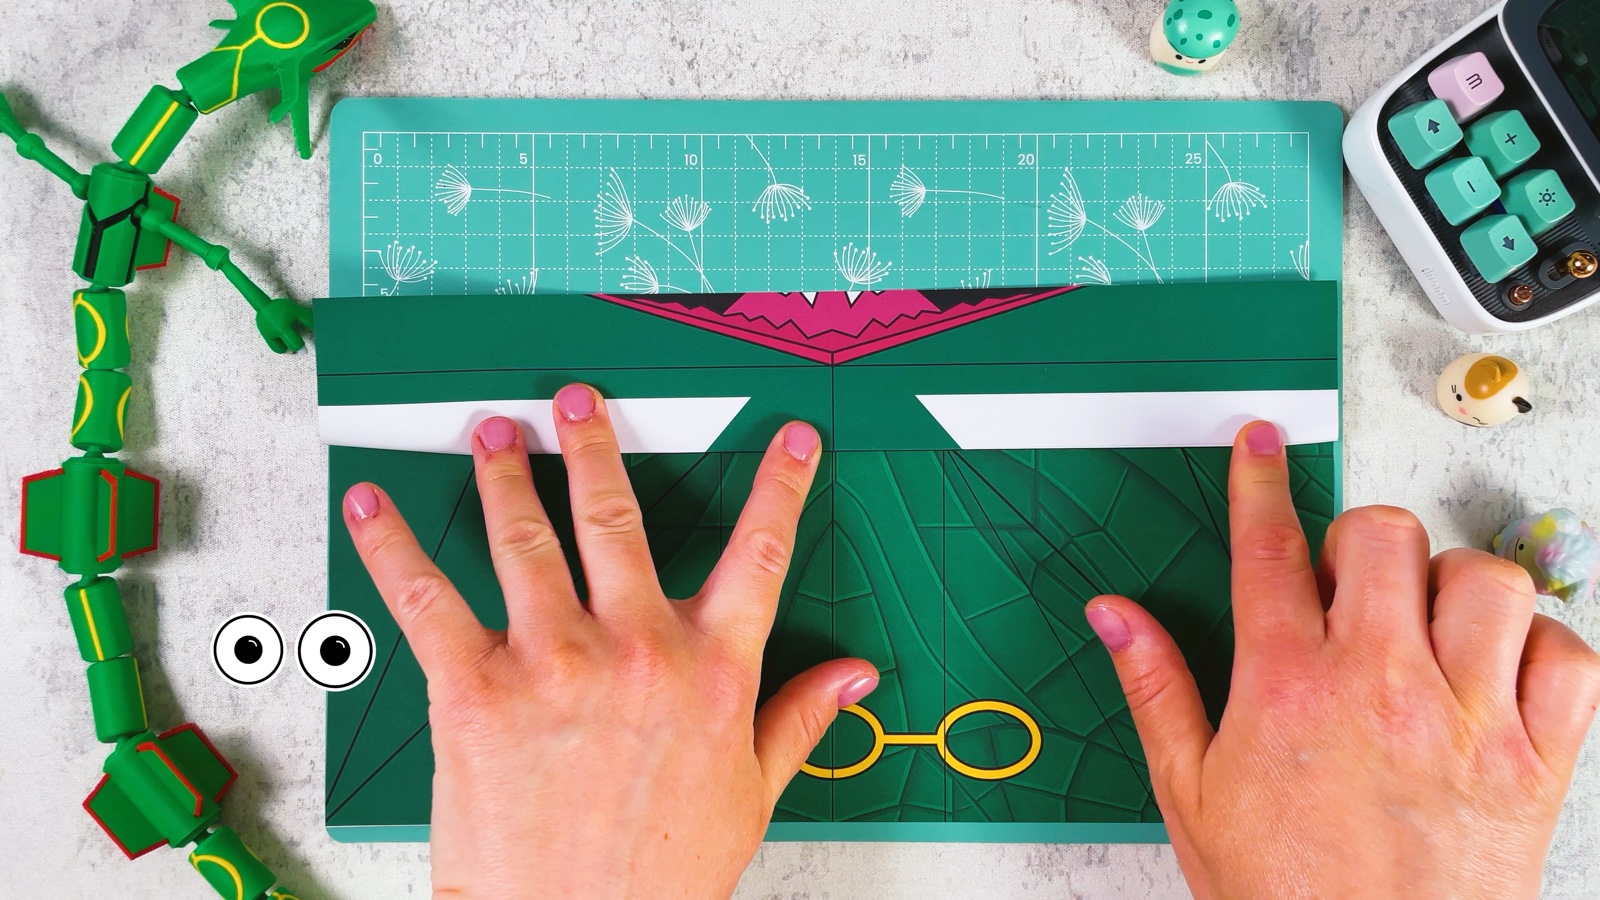
Put the mouth on the edge
Keep folding the strip along the next printed lines. Stop when Rayquaza’s pink mouth sits right on the top edge of the sheet.
- 4
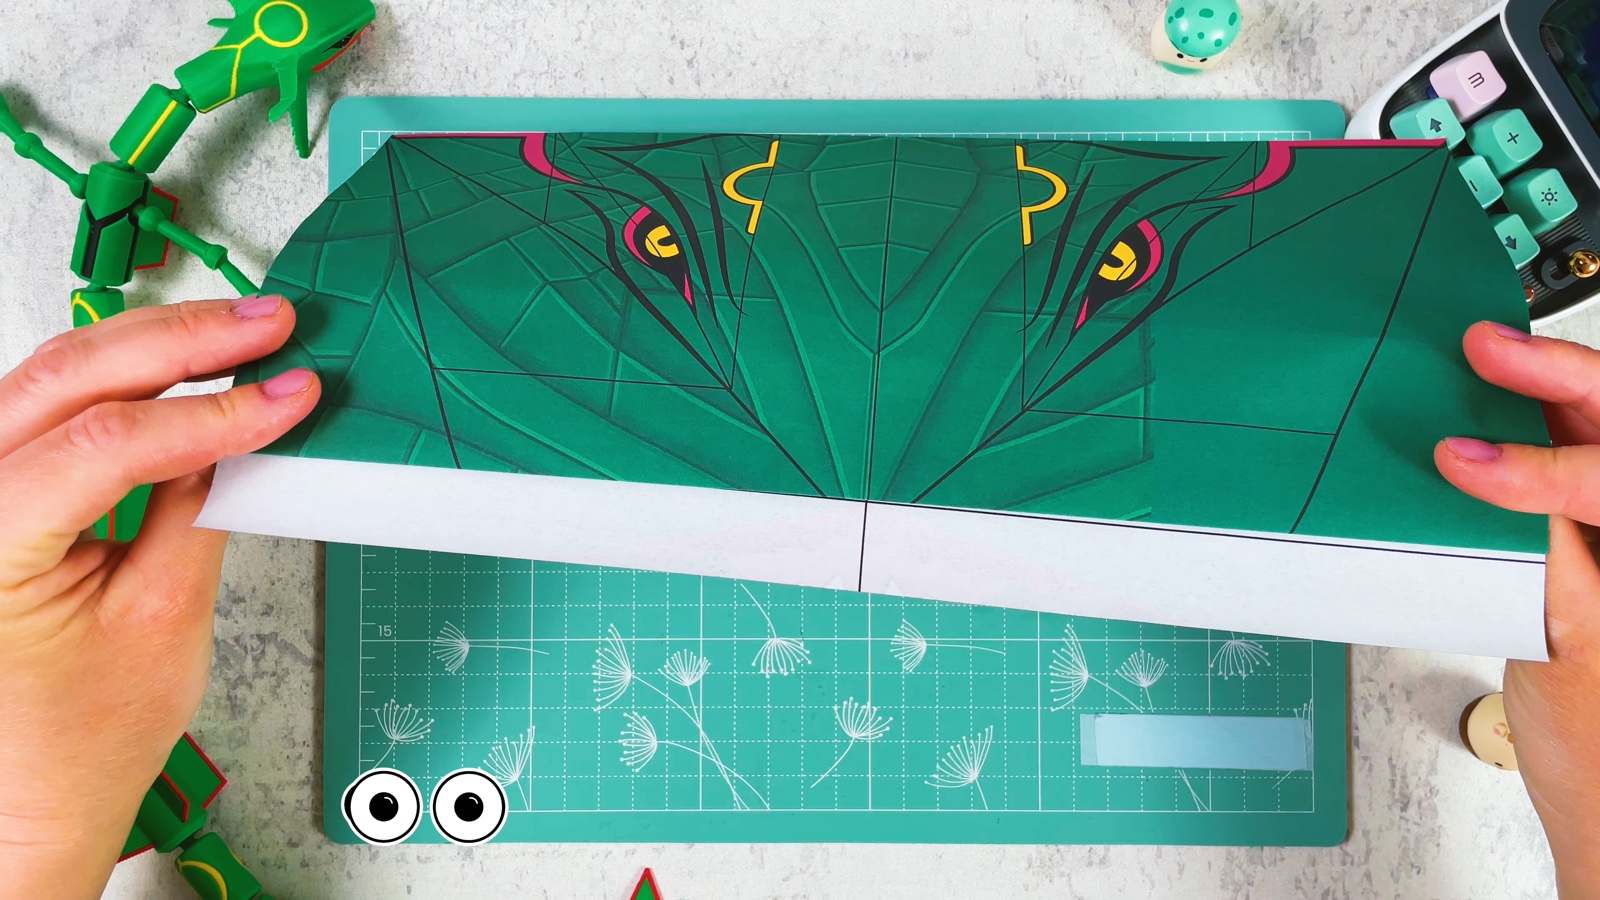
Turn the sheet over
Turn the sheet over so the eyes are on top. The folded strip is now at the bottom.
- 5
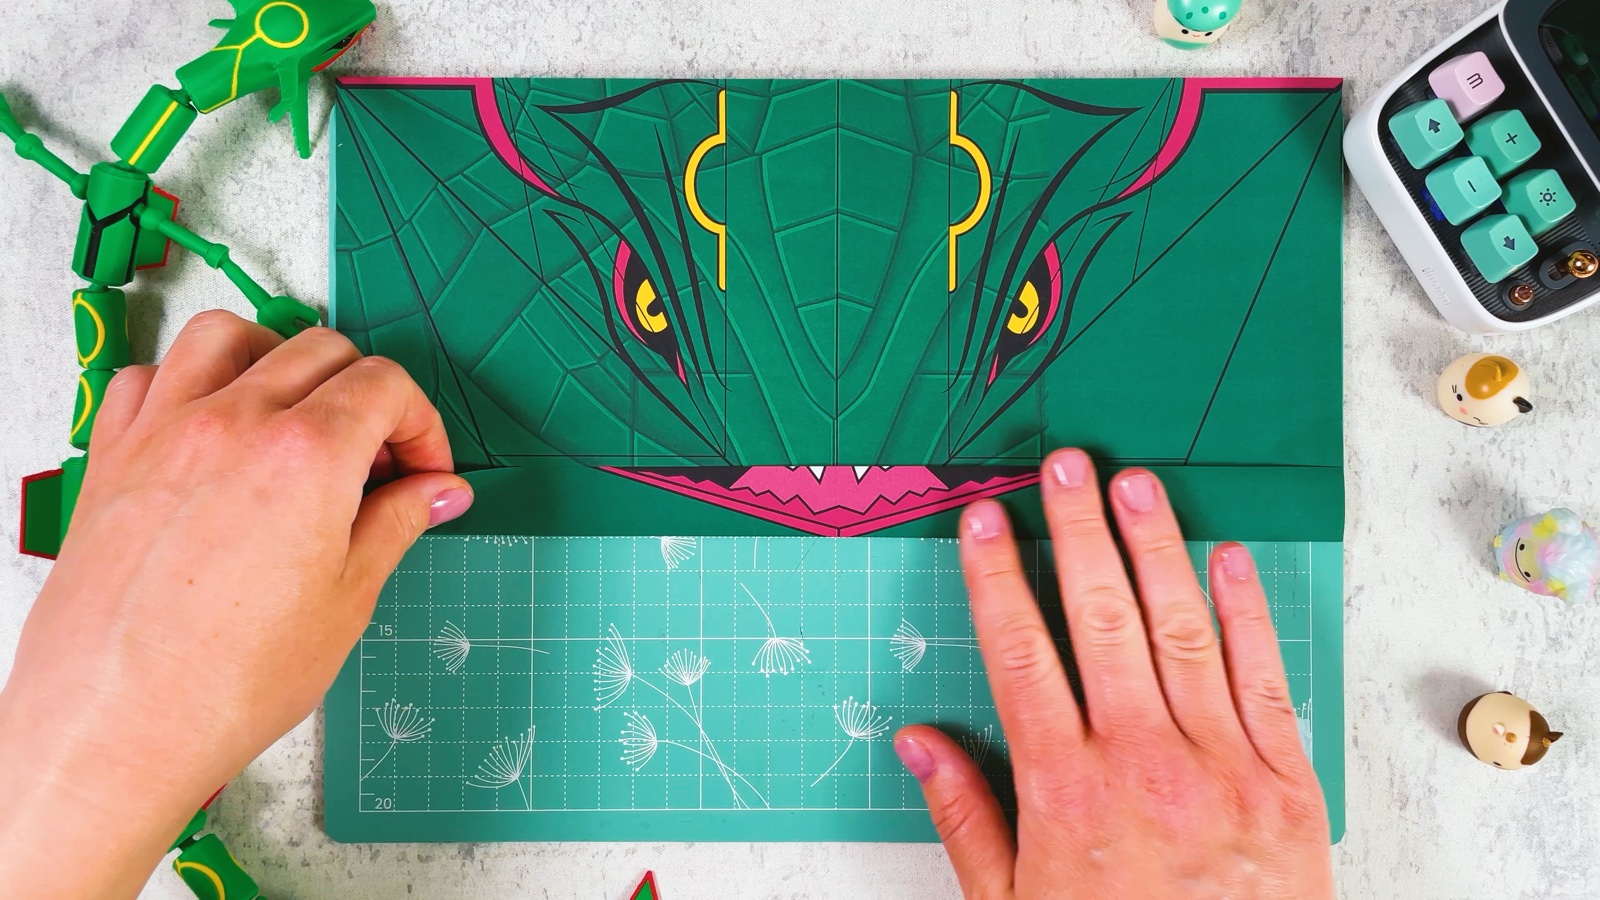
Fold the mouth up
Fold the strip up once more, so the mouth sits just under the eyes. Press it flat along the whole length.
- 6
Fold it in half
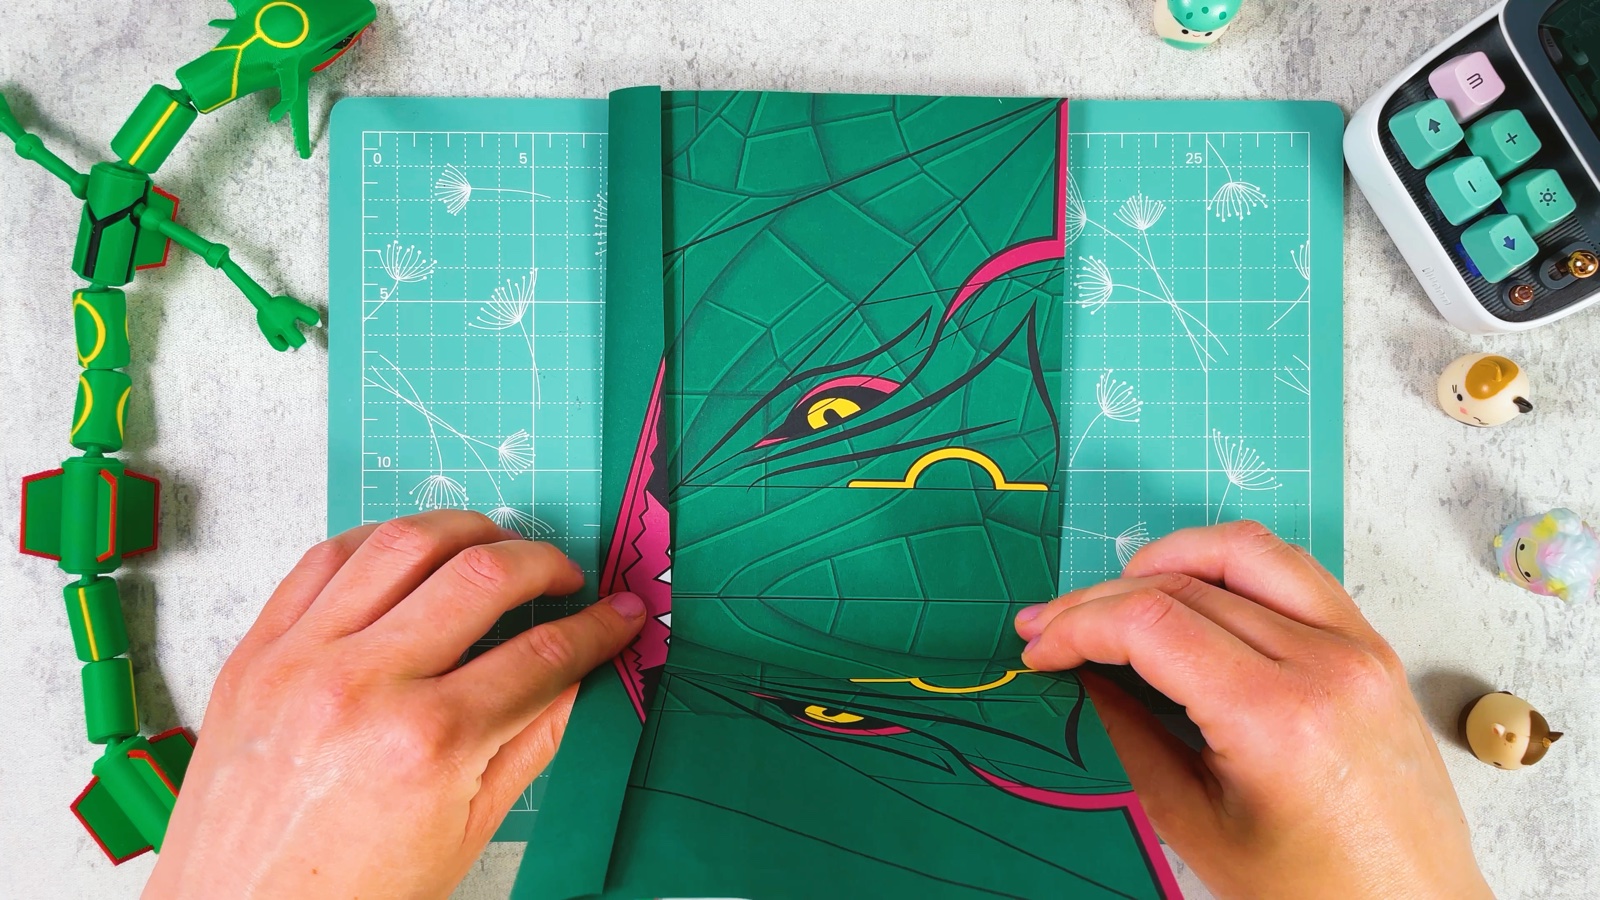
Fold the sheet in half along the middle line, from the mouth to the top edge. Press the fold, so you have a long, narrow shape.
- 7
Make the first diagonal fold
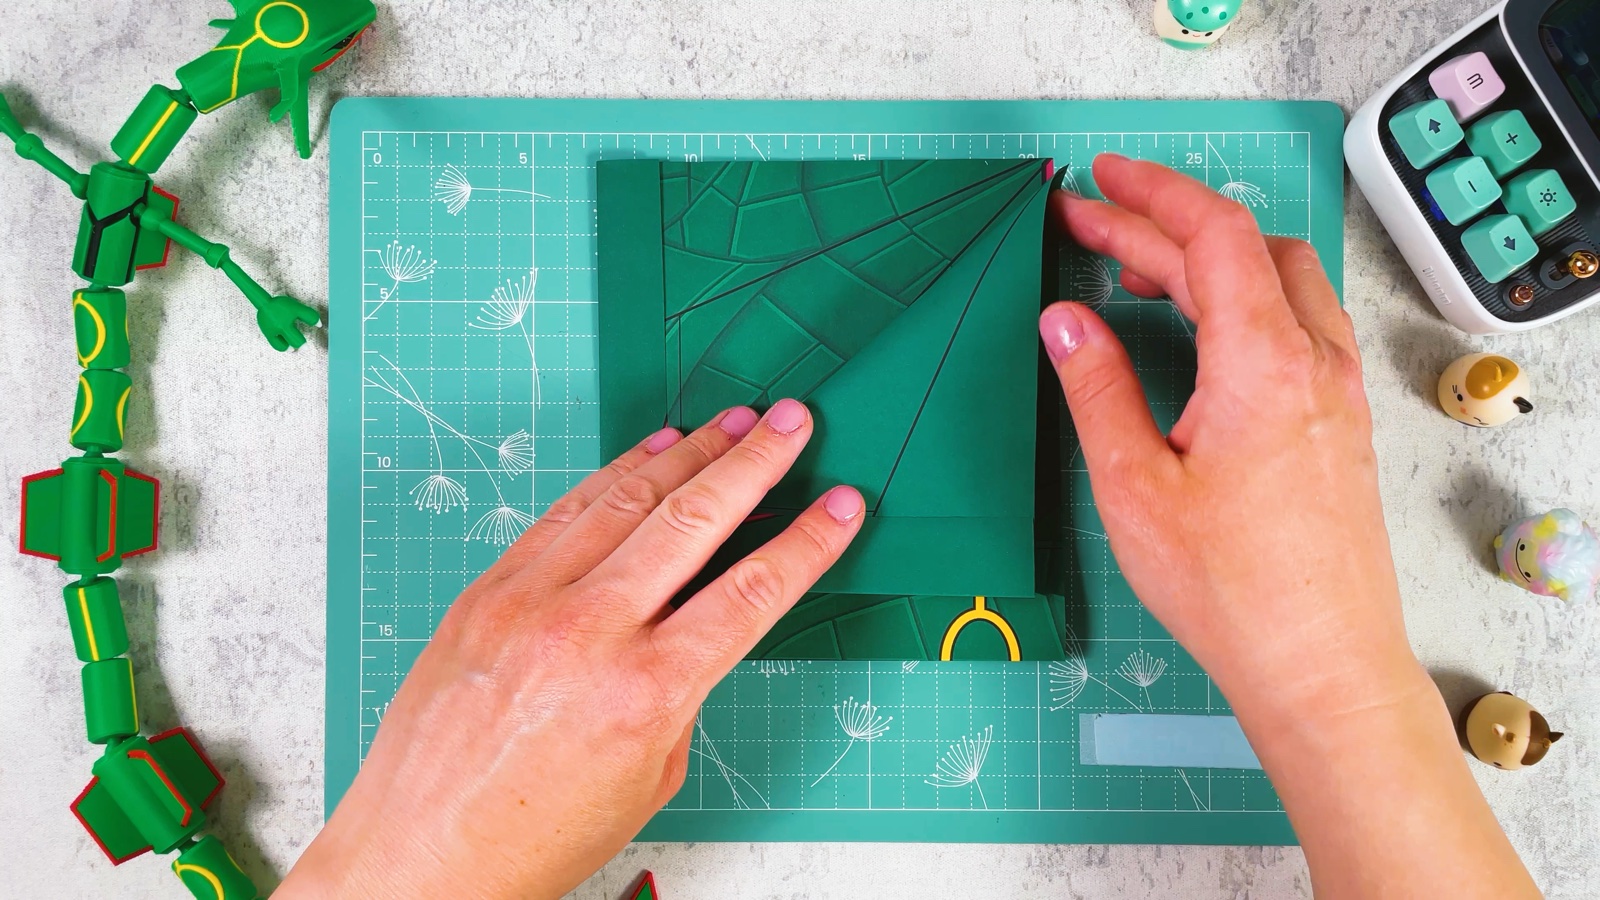
Fold the top layer along the first printed diagonal line. The corner goes down towards the folded edge. Press it flat.
- 8
Fold it once more
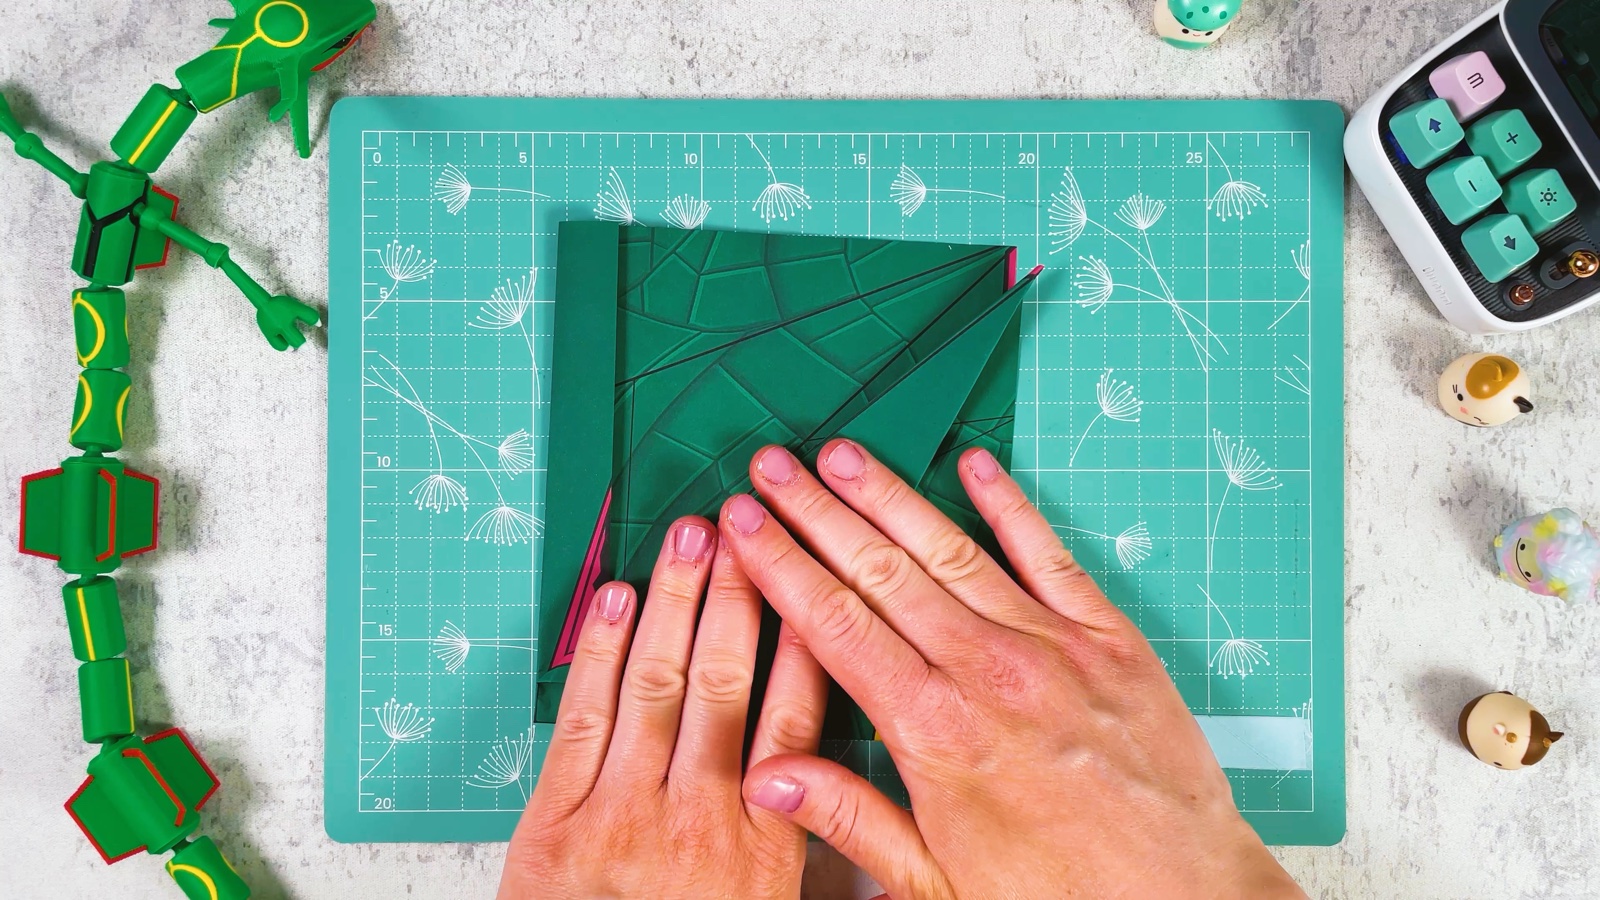
Fold the same side again along the next printed line. Now one side has a sharp, pointy shape.
- 9
Repeat on the other side
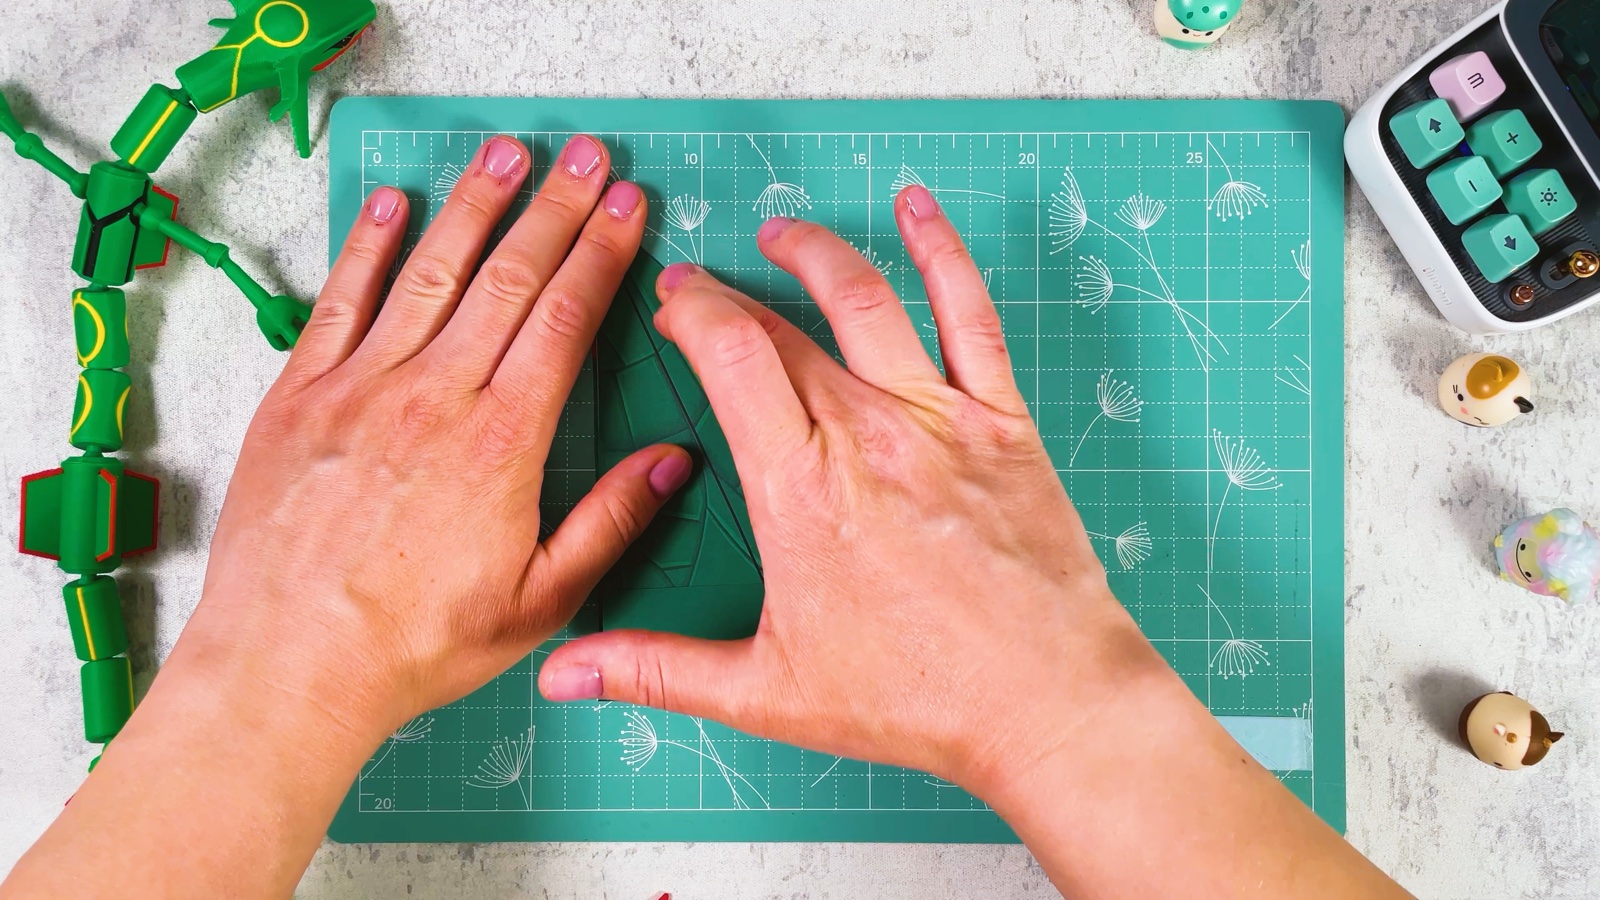
Turn the plane over. Make the same two diagonal folds on this side, along the printed lines. Both sides should match.
- 10
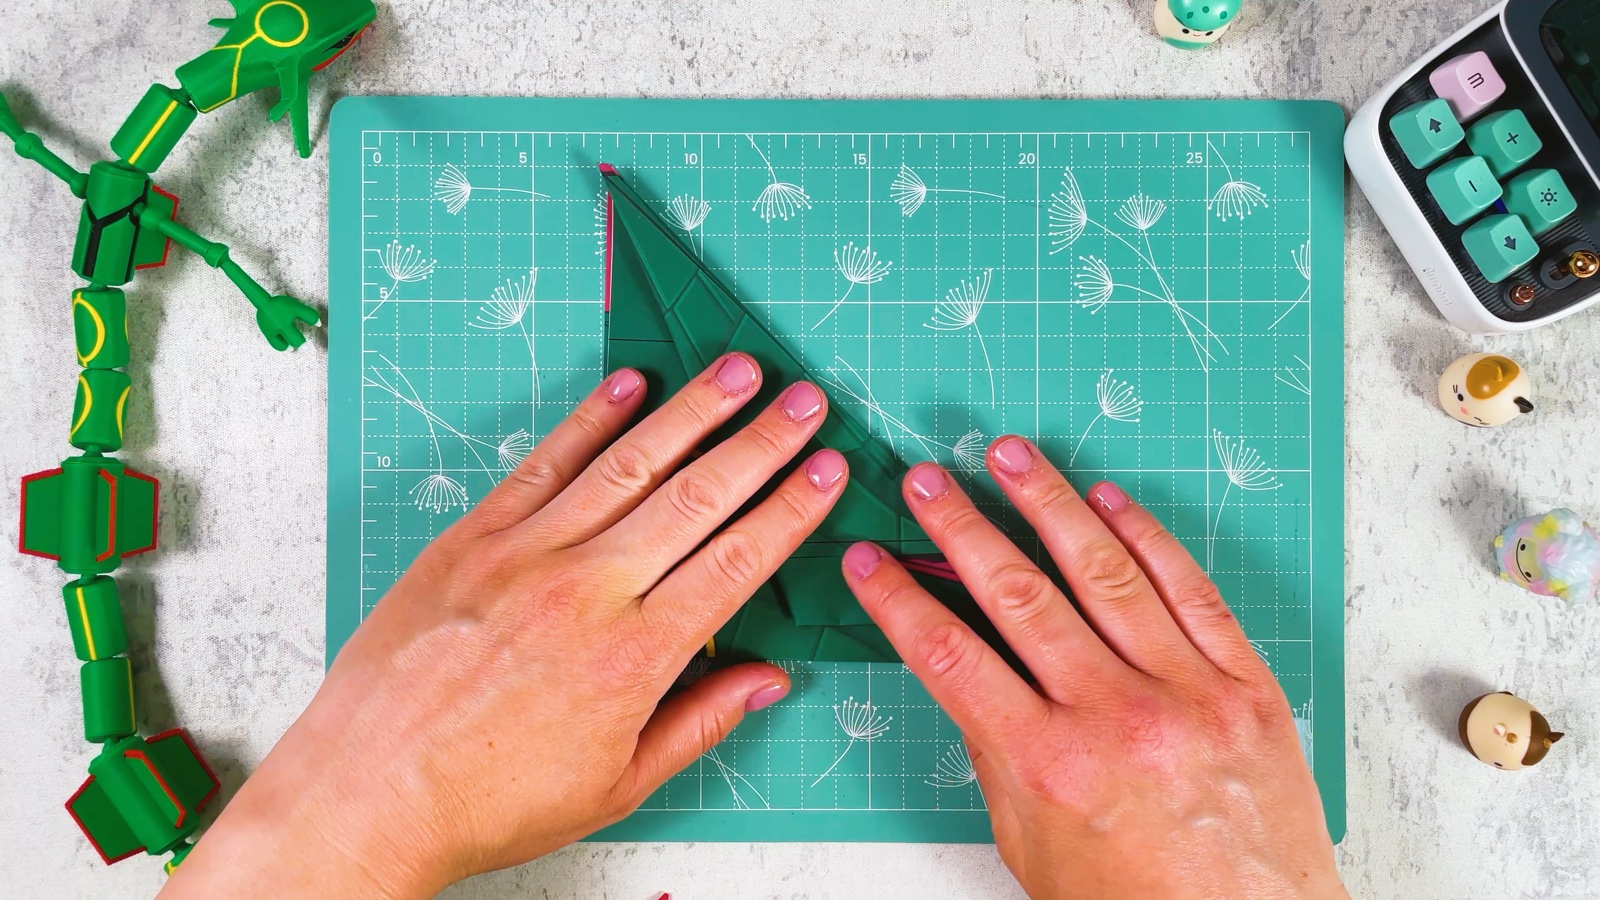
Fold down the first wing
Fold the top layer down along the long printed line to make the first wing. Press the fold firmly, because it goes through many layers.
- 11
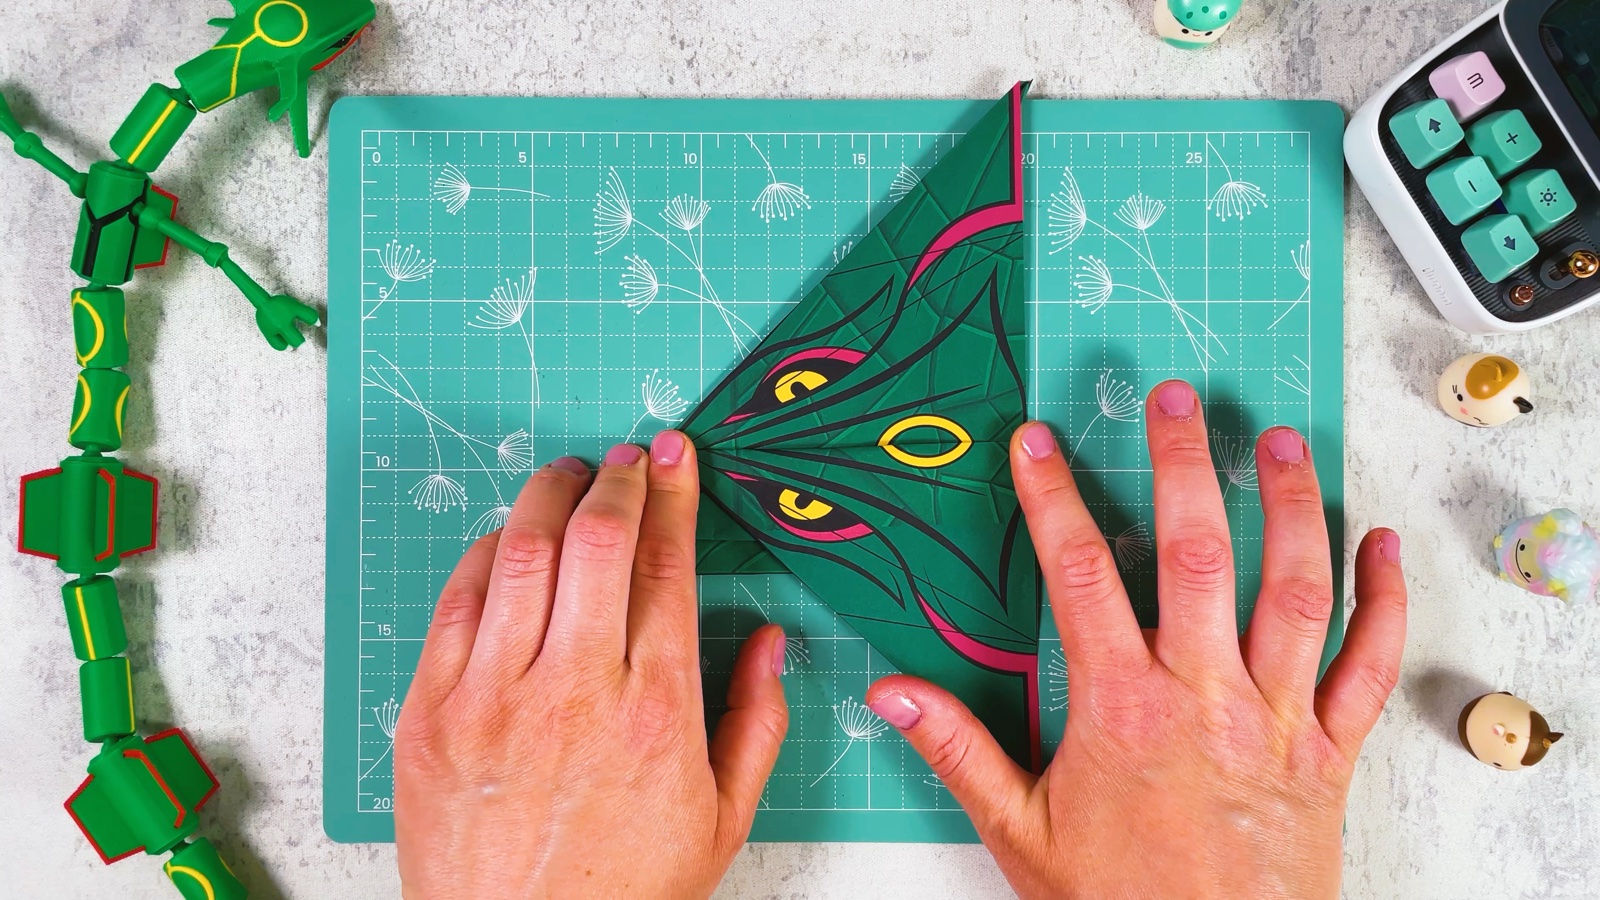
Fold down the second wing
Turn the plane over and fold the second wing the same way. Line it up with the first wing, so both are the same size.
- 12
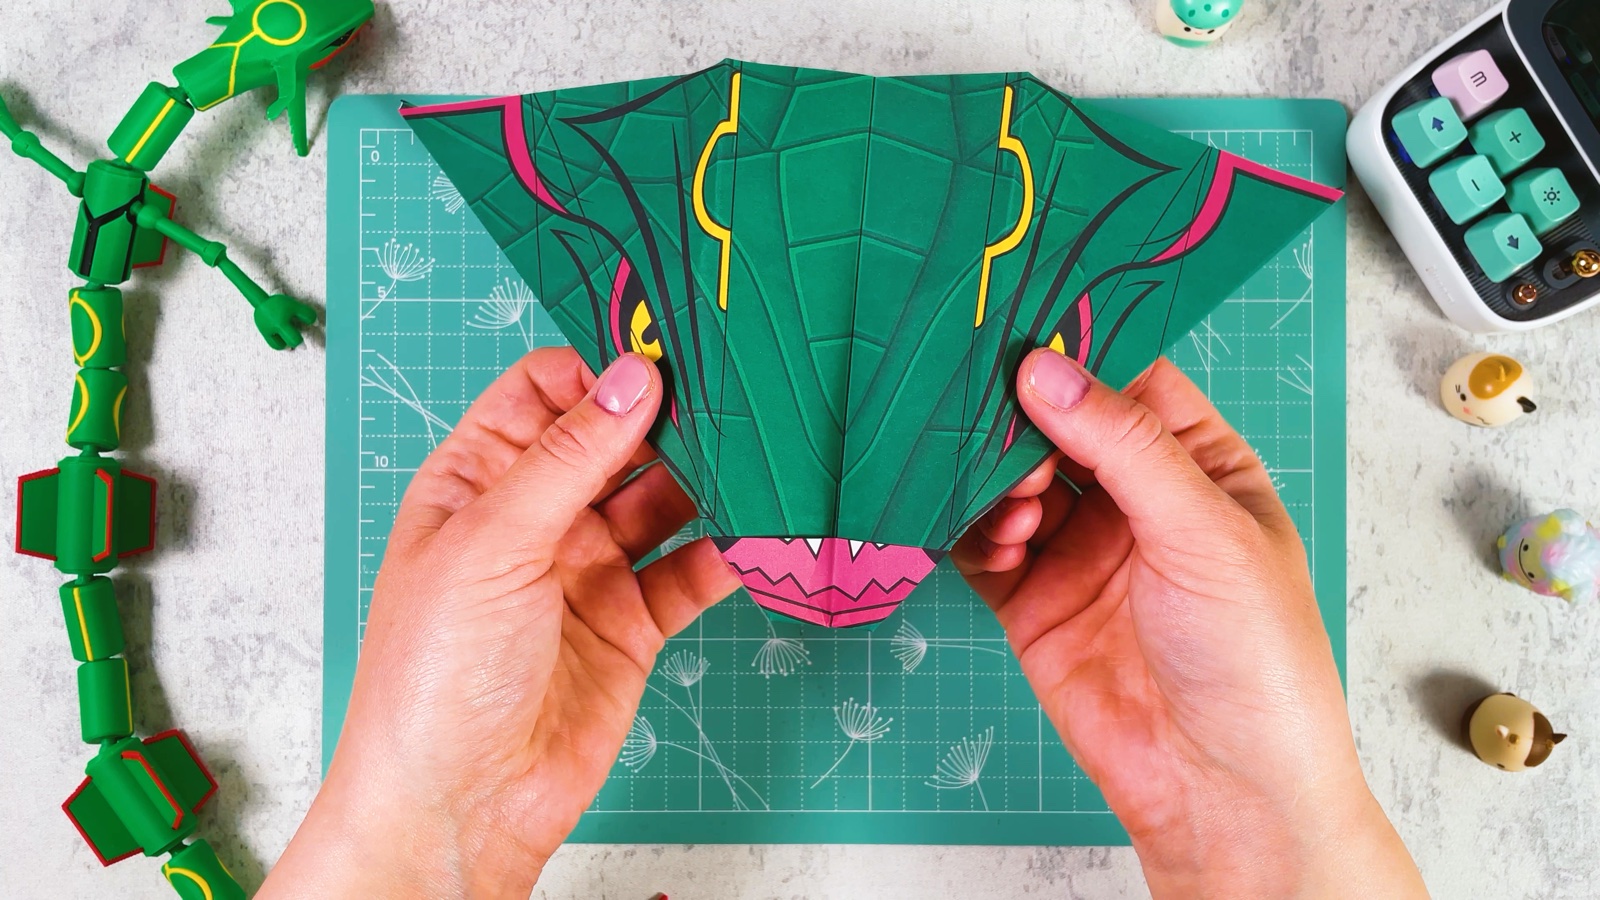
Open the wings
Hold the plane under the body and gently open both wings. Look at the front: Rayquaza’s face and mouth appear at the nose.
- 13
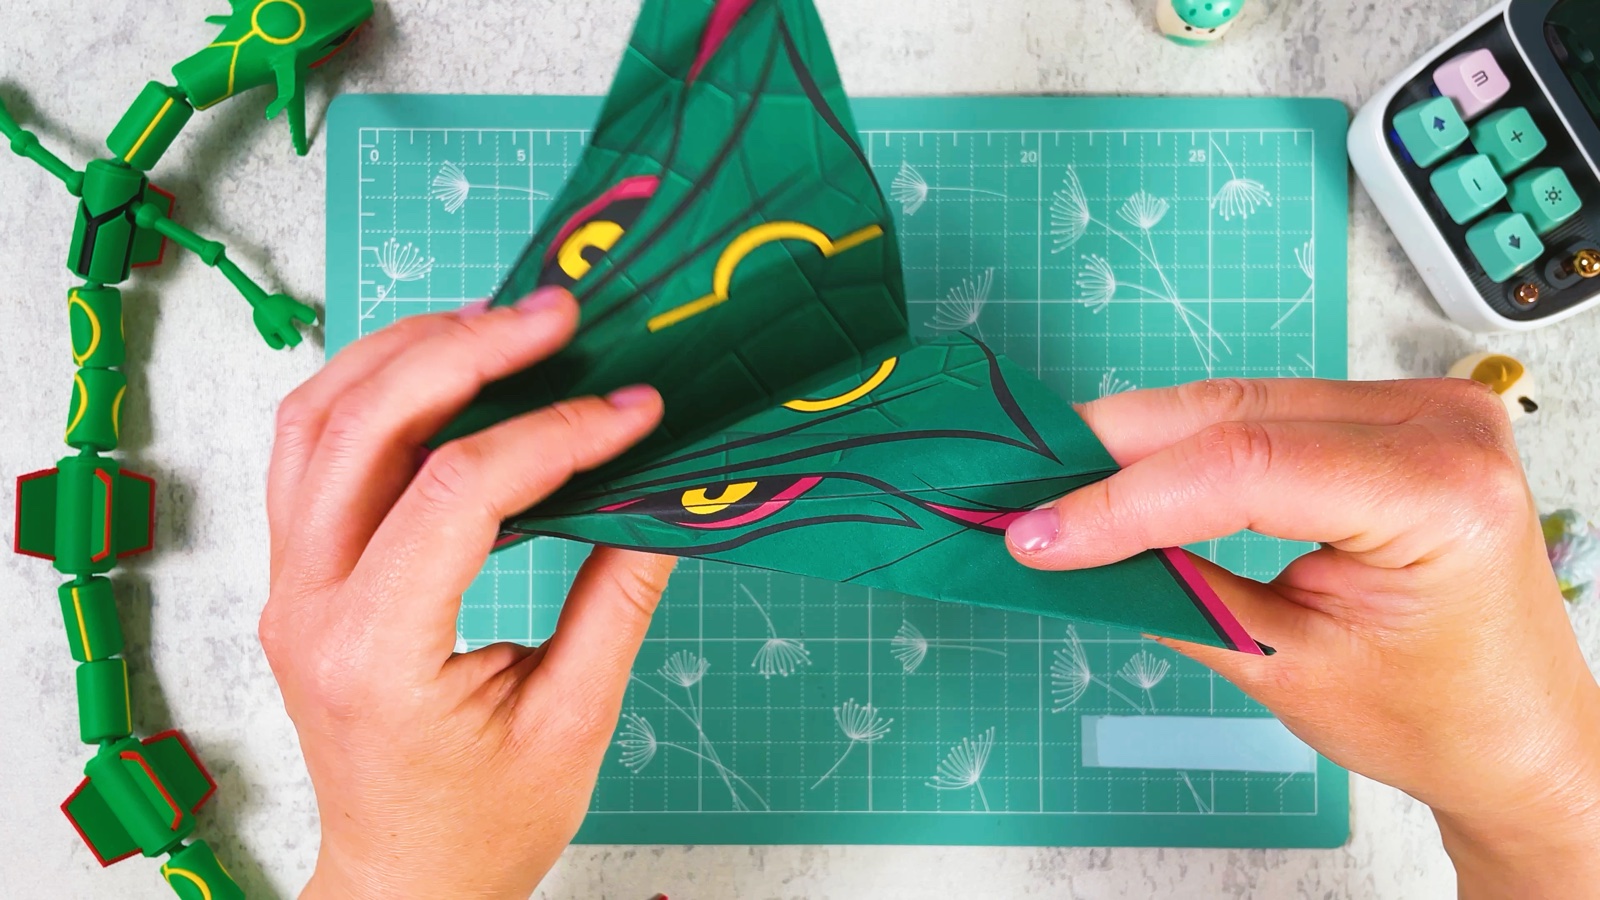
Shape the wings
Run your fingers along each wing to shape it. Make both wings even, so the plane flies straight.
Now hold it under the body and throw it gently forward.
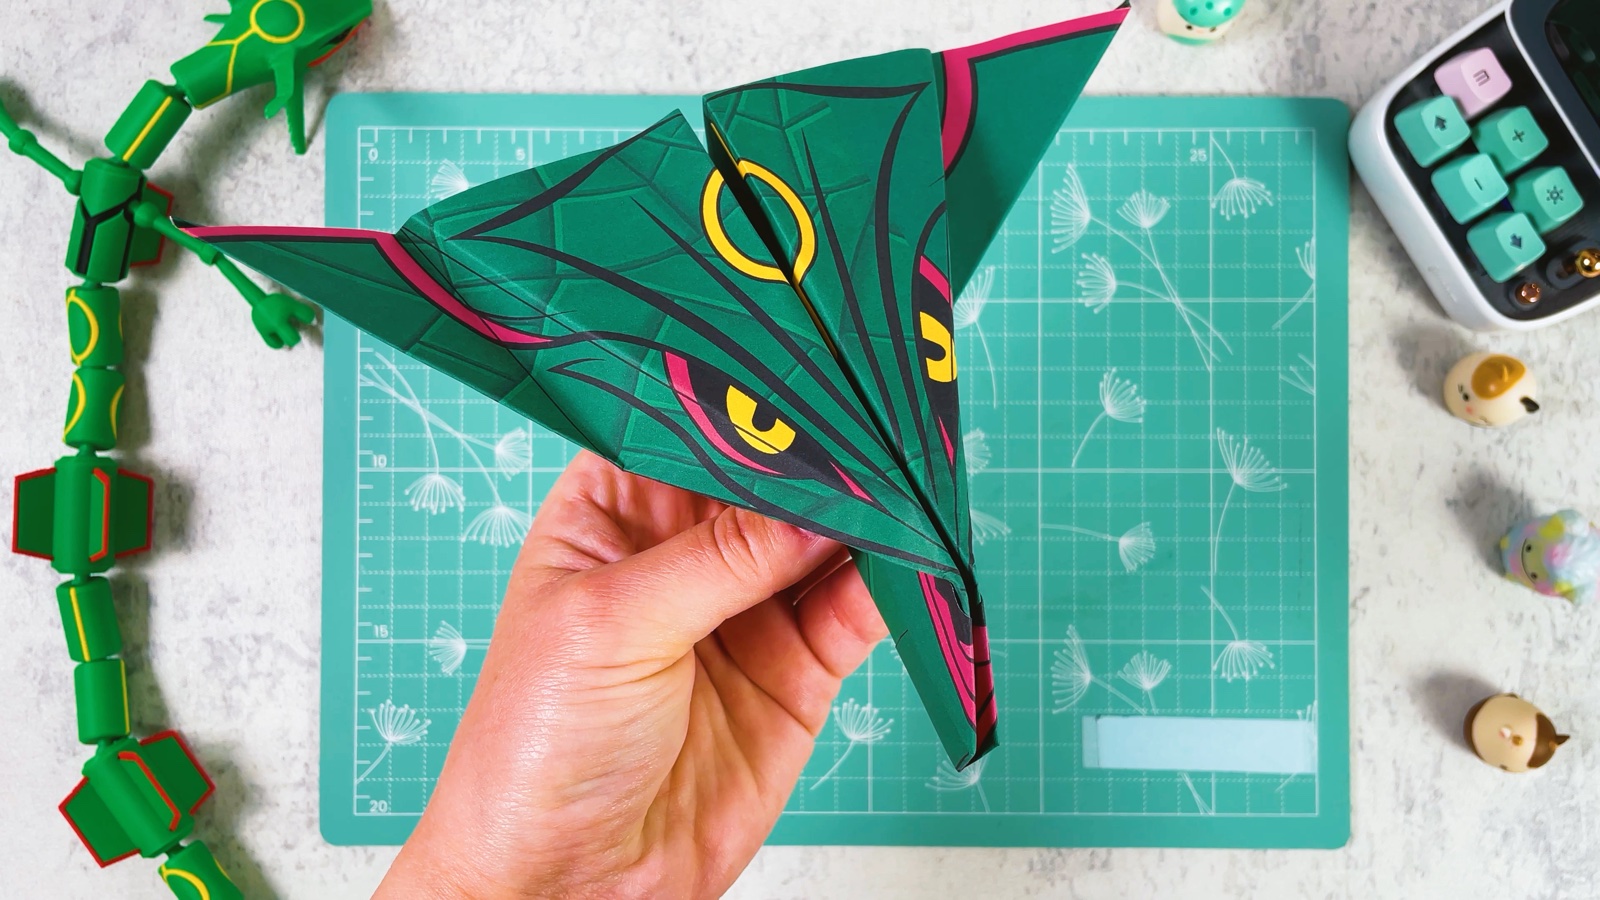
Your Rayquaza is ready to fly.
THREE LITTLE TIPS
Make it easier.
- Follow the printed lines. Every fold has its own line on the print, so the face always ends up in the right place.
- Press every fold hard. Sharp folds make a plane that keeps its shape and flies further.
- Flies to one side? Check that both wings are the same size and open to the same height.

A CUBI MINI MOMENT
Where will your Rayquaza fly?
Cubi is planning a big Rayquaza race with Mini, all the way down the hallway. Where will yours take off?
A paper tape runway on the floor, with a tiny yellow flag at the finish line.
Loved making it?
Catch the next make first, or save this one for a rainy day.