Let’s make a Pokémon origami box using just one square piece of paper! Step by step, we fold a cute paper box and turn it into Pikachu, Bulbasaur or any other Pokémon character you like. It is a good first origami project for beginners.
These mini origami boxes are great for storing small toys, tiny figures, stickers, jewellery, sweets and other little treasures. You can also use them as cute handmade gift boxes or Pokémon party decorations.
You only need one square piece of paper to fold the box. Then add paper details to make Pikachu, Bulbasaur or your favourite Pokémon. Which one comes next: Squirtle, Charmander, Eevee or Jigglypuff?
BEFORE WE START
What you need.
Materials
- Square paper in your Pokémon’s colour
- Printed or drawn Pokémon face and details
- Glue stick or double-sided tape
Tools
- Scissors
- A ruler
PART 1 OF 2
The box
- 1
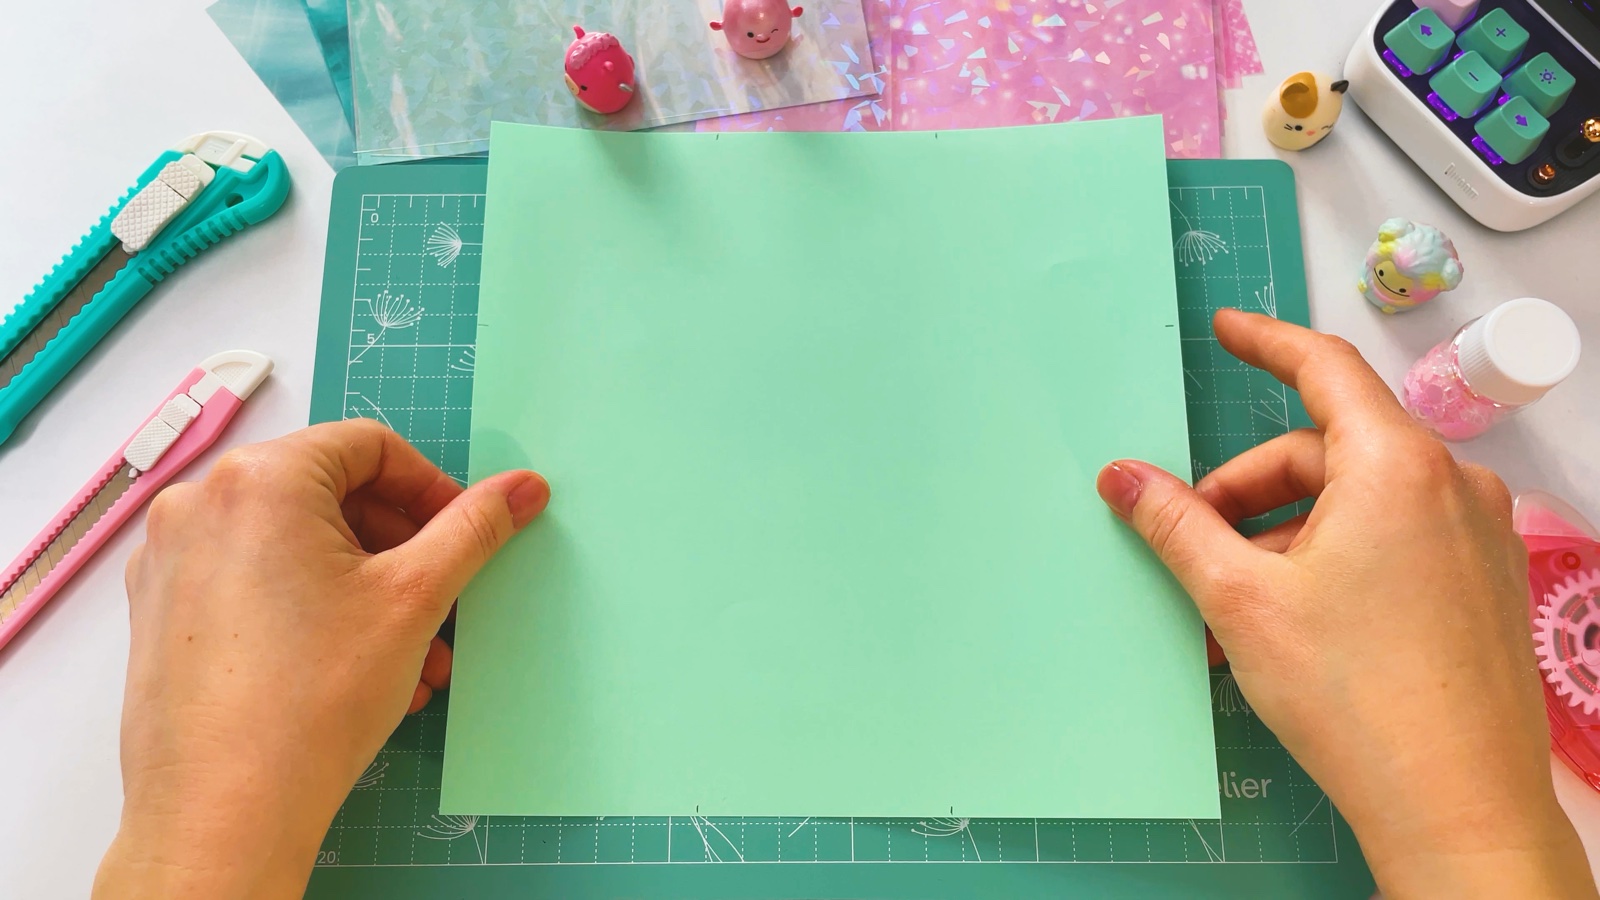
Start with a square
Take one square sheet of paper in the colour of your Pokémon: green for Bulbasaur, yellow for Pikachu, blue for Squirtle, orange for Charmander. A bigger square makes a bigger box.
- 2
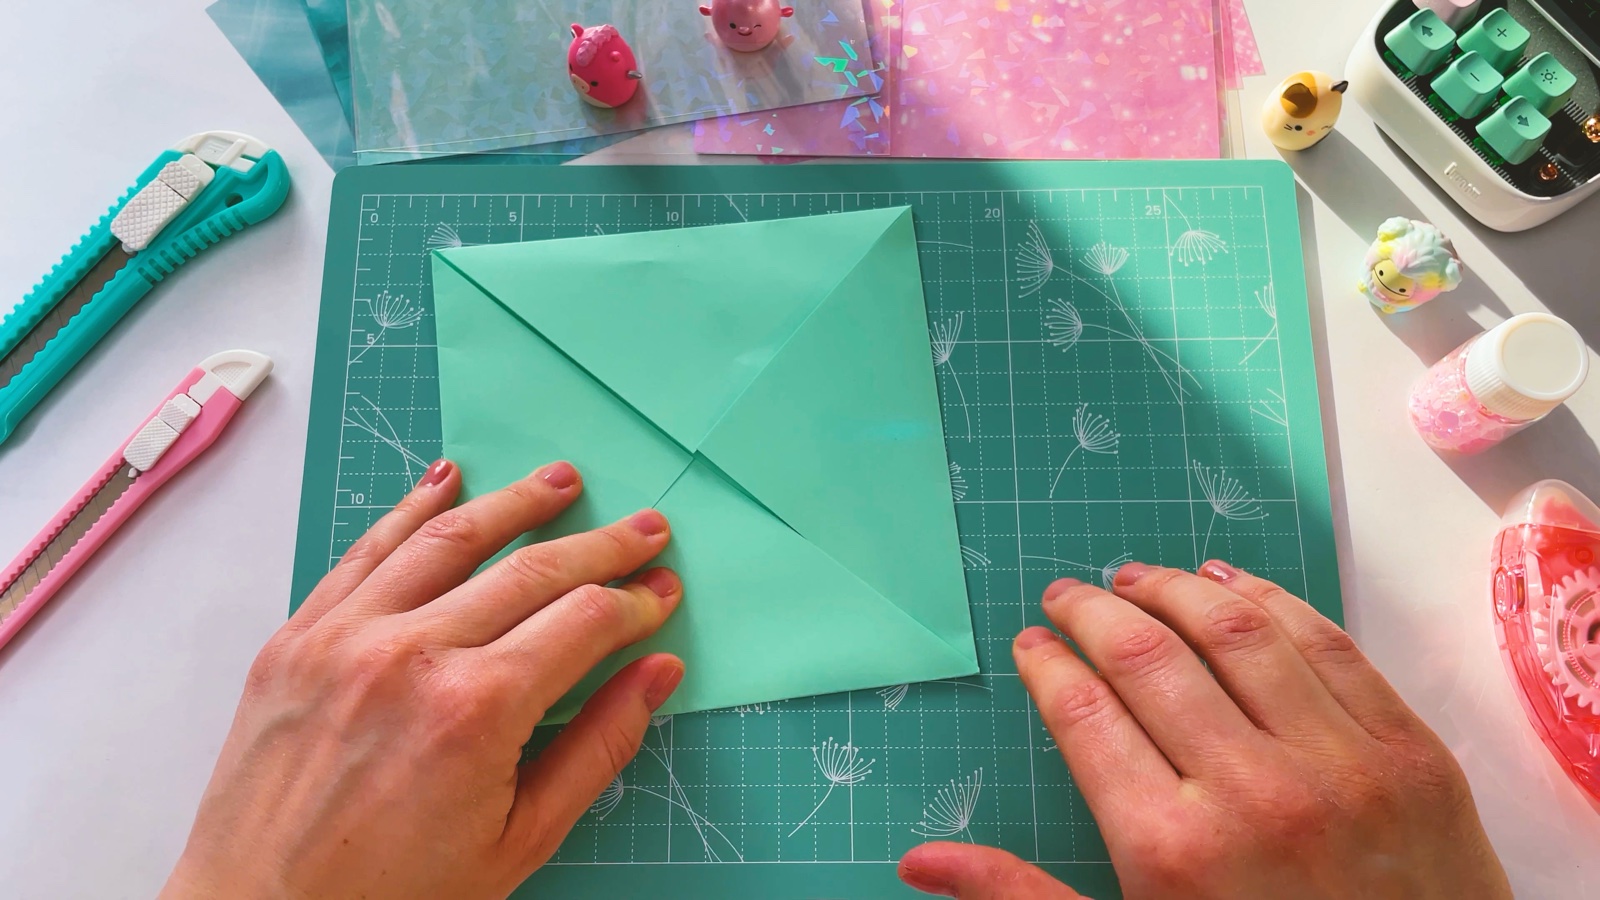
Fold the corners to the centre
Fold all four corners into the middle of the square, so their tips meet in the centre. Press each fold flat.
- 3
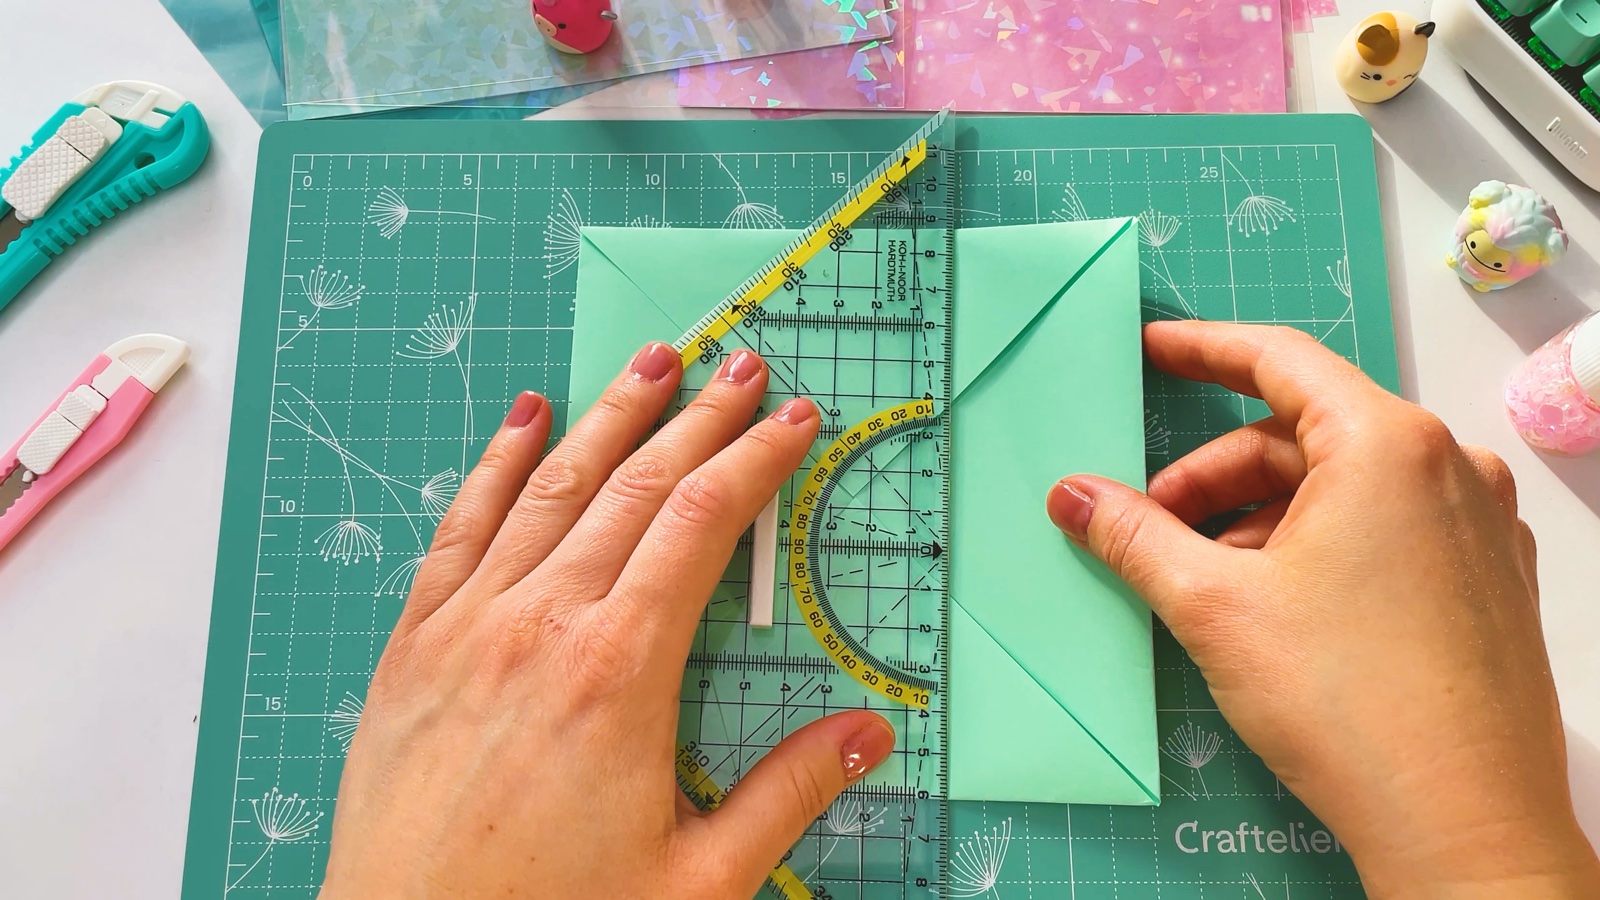
Fold two sides to the middle
Fold one side in so its edge lies on the middle line. Do the same with the opposite side. A ruler helps you make the folds sharp.
- 4
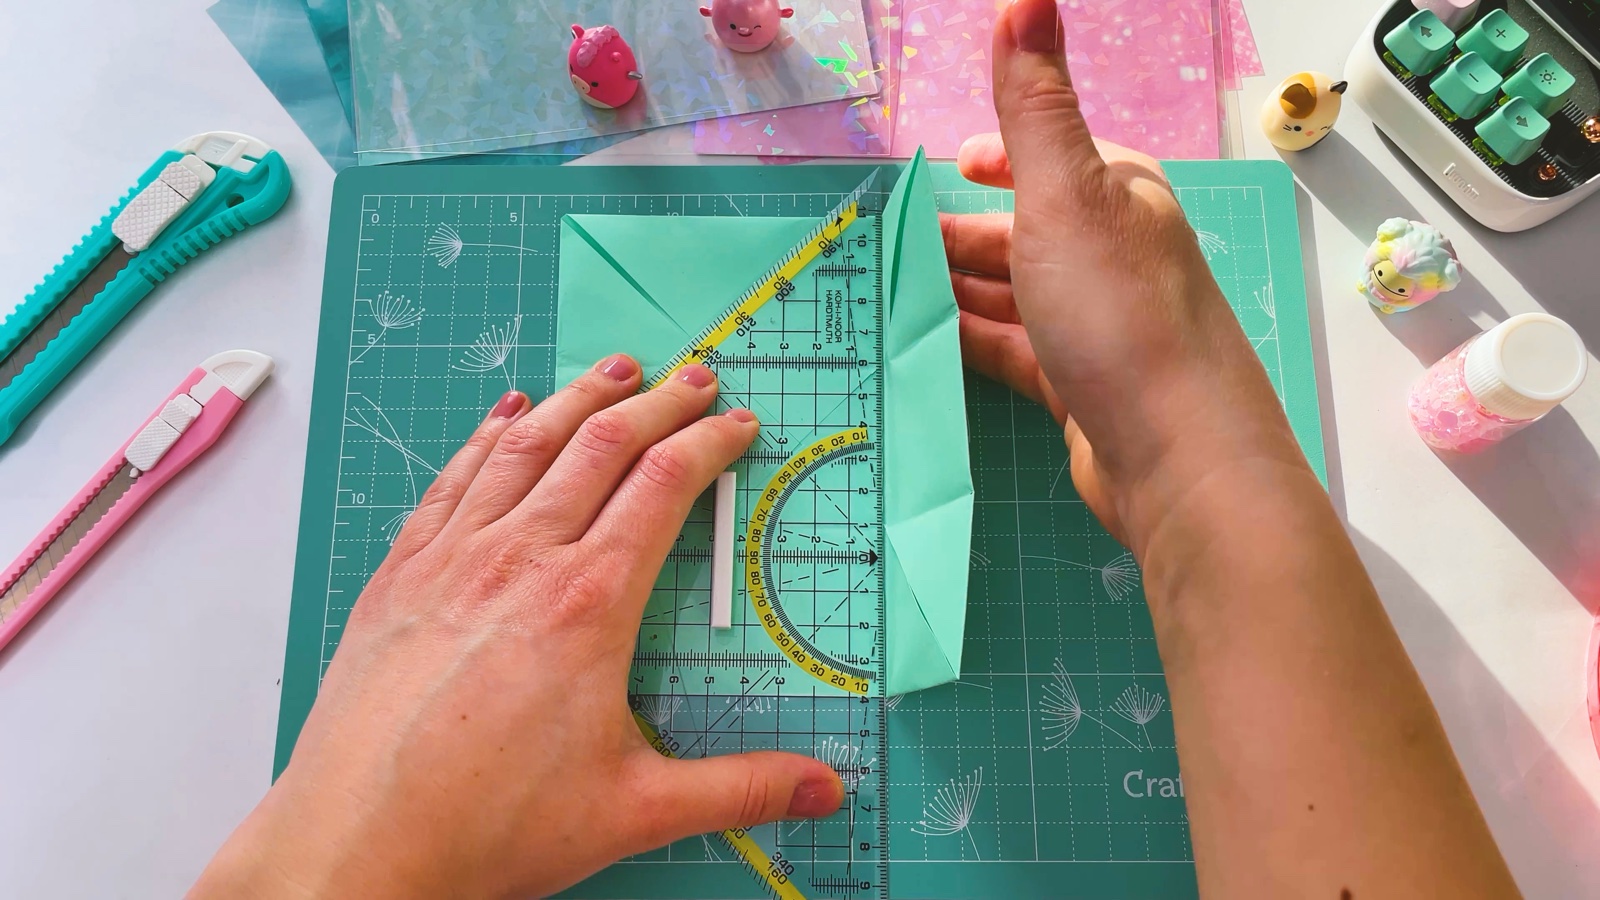
Fold the other two sides
Open the two side folds. Turn the paper a quarter turn and fold the other two sides to the middle in the same way. Then open them again.
- 5
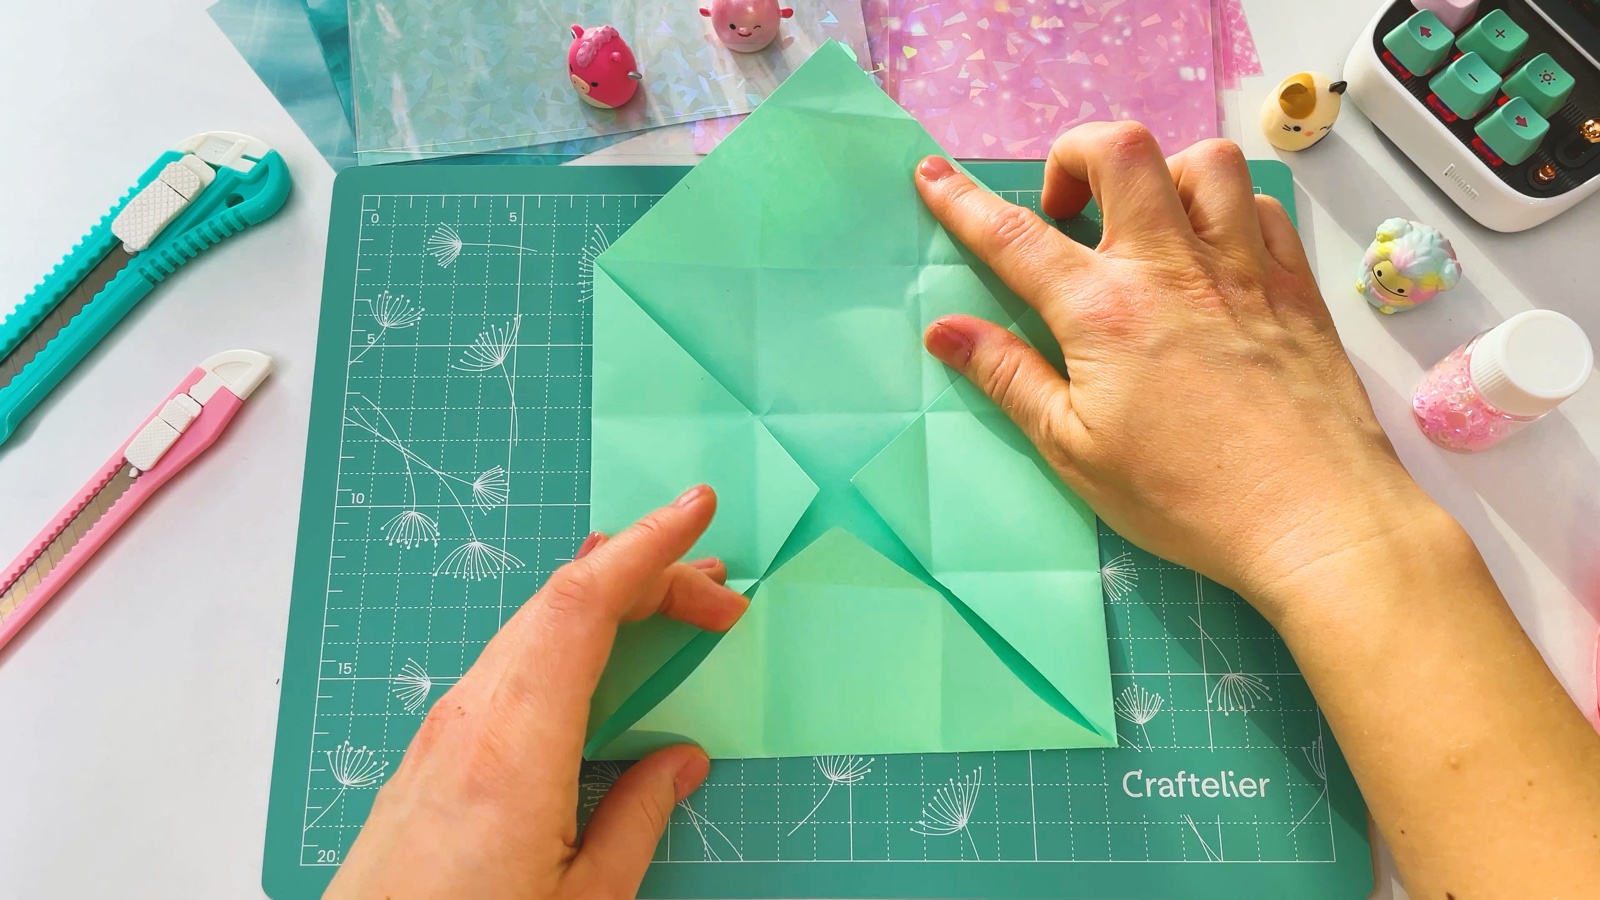
Open two corners
Unfold two opposite corners. Leave the other two corners folded in. Now you can see all the creases you made.
- 6
Lift the walls
Lift the two long sides up along the creases, so they stand up like the walls of a box.
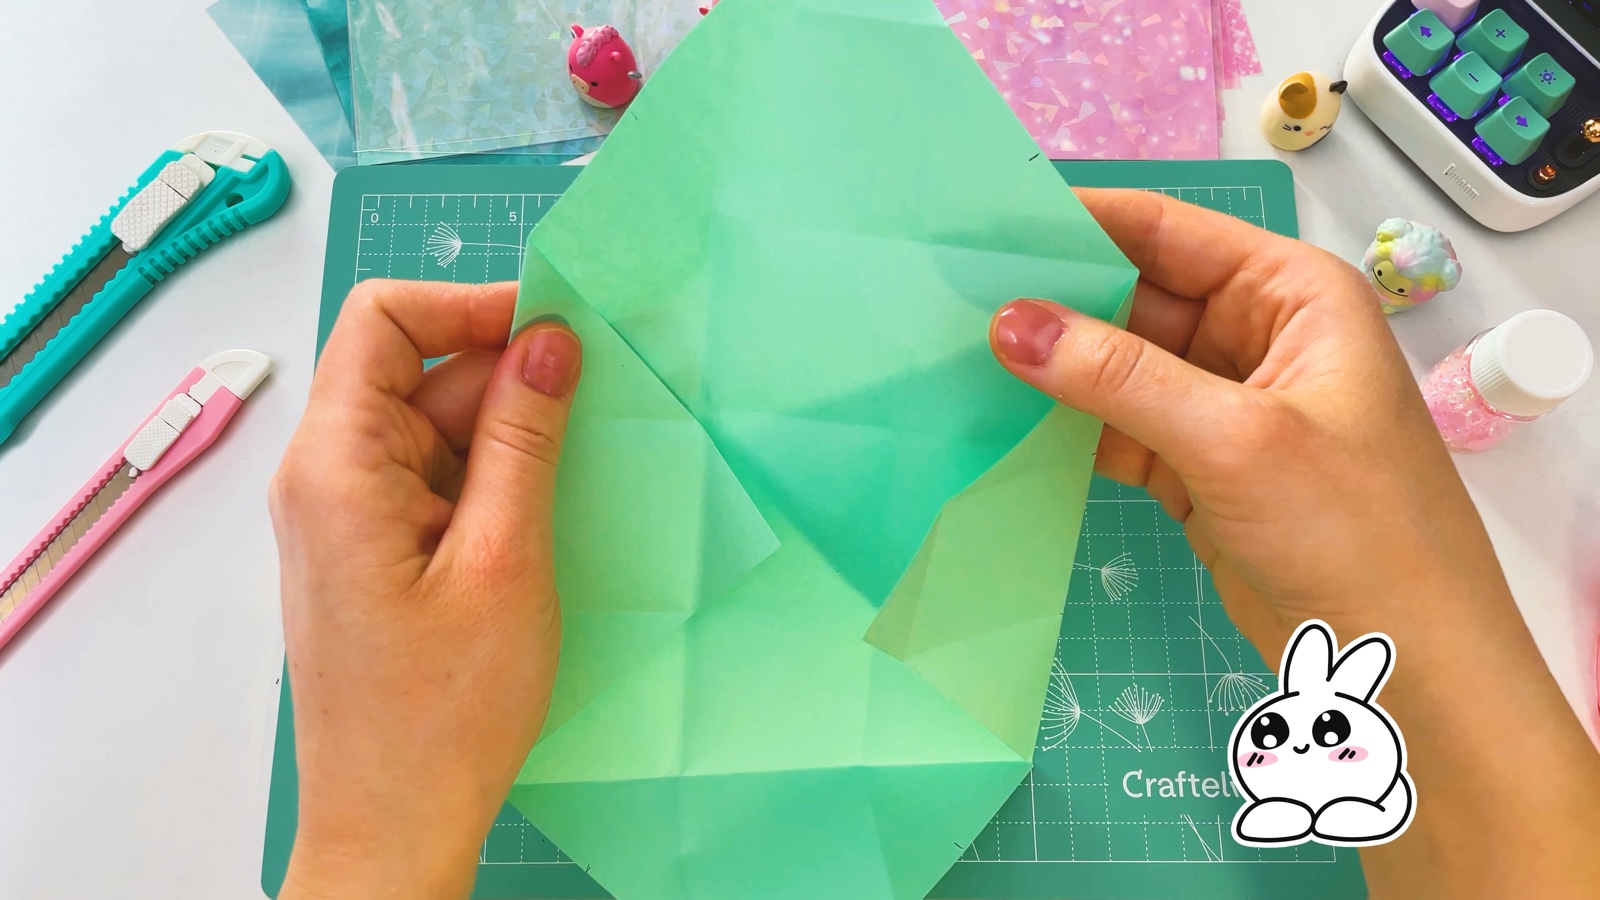
- 7
Fold in the first end
At one open end, push the sides in along the creases so the end stands up as a third wall. The pointed flap sticks up above it.
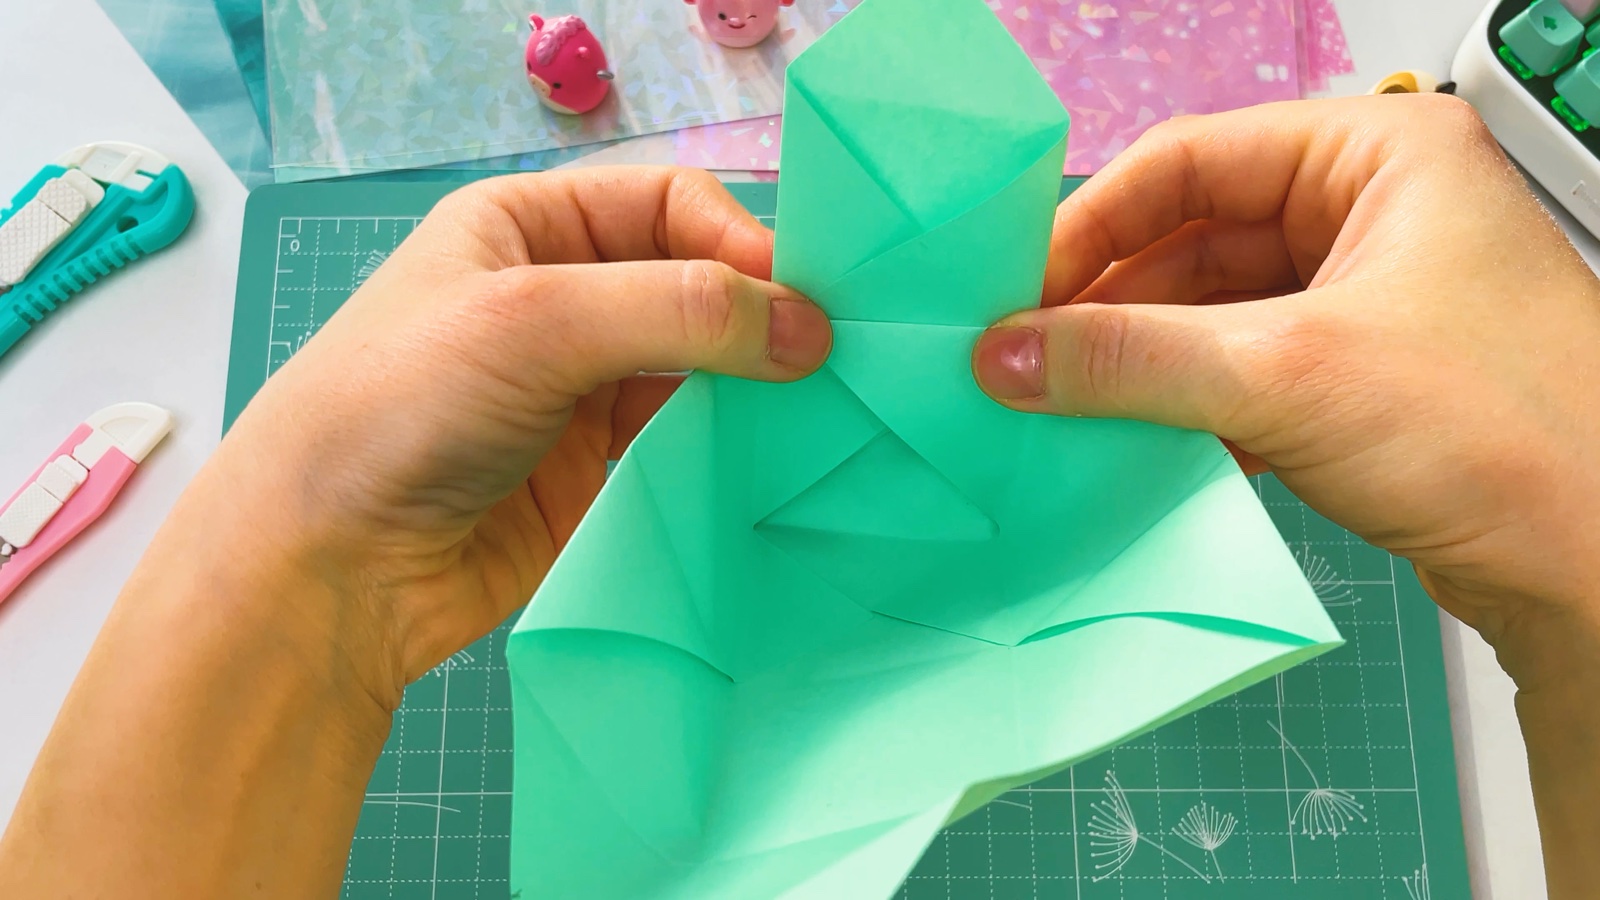
Fold the pointed flap over the wall and down into the box. Press it flat on the bottom.
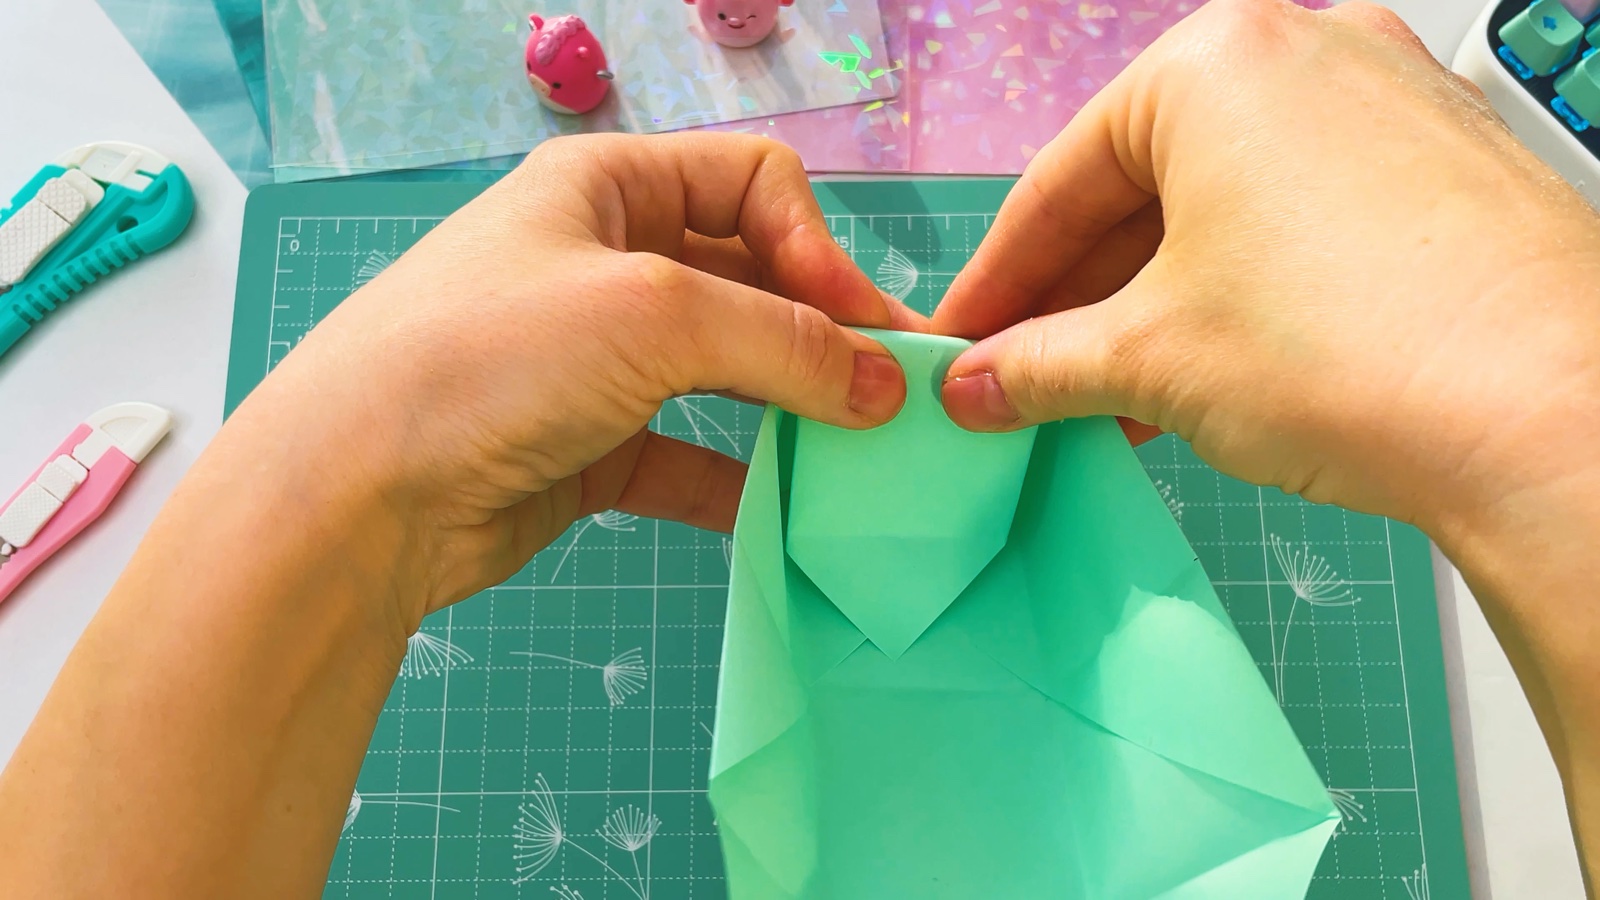
- 8
Fold in the second end
Turn the box around and do the same on the other end. Push the sides in so the end stands up.
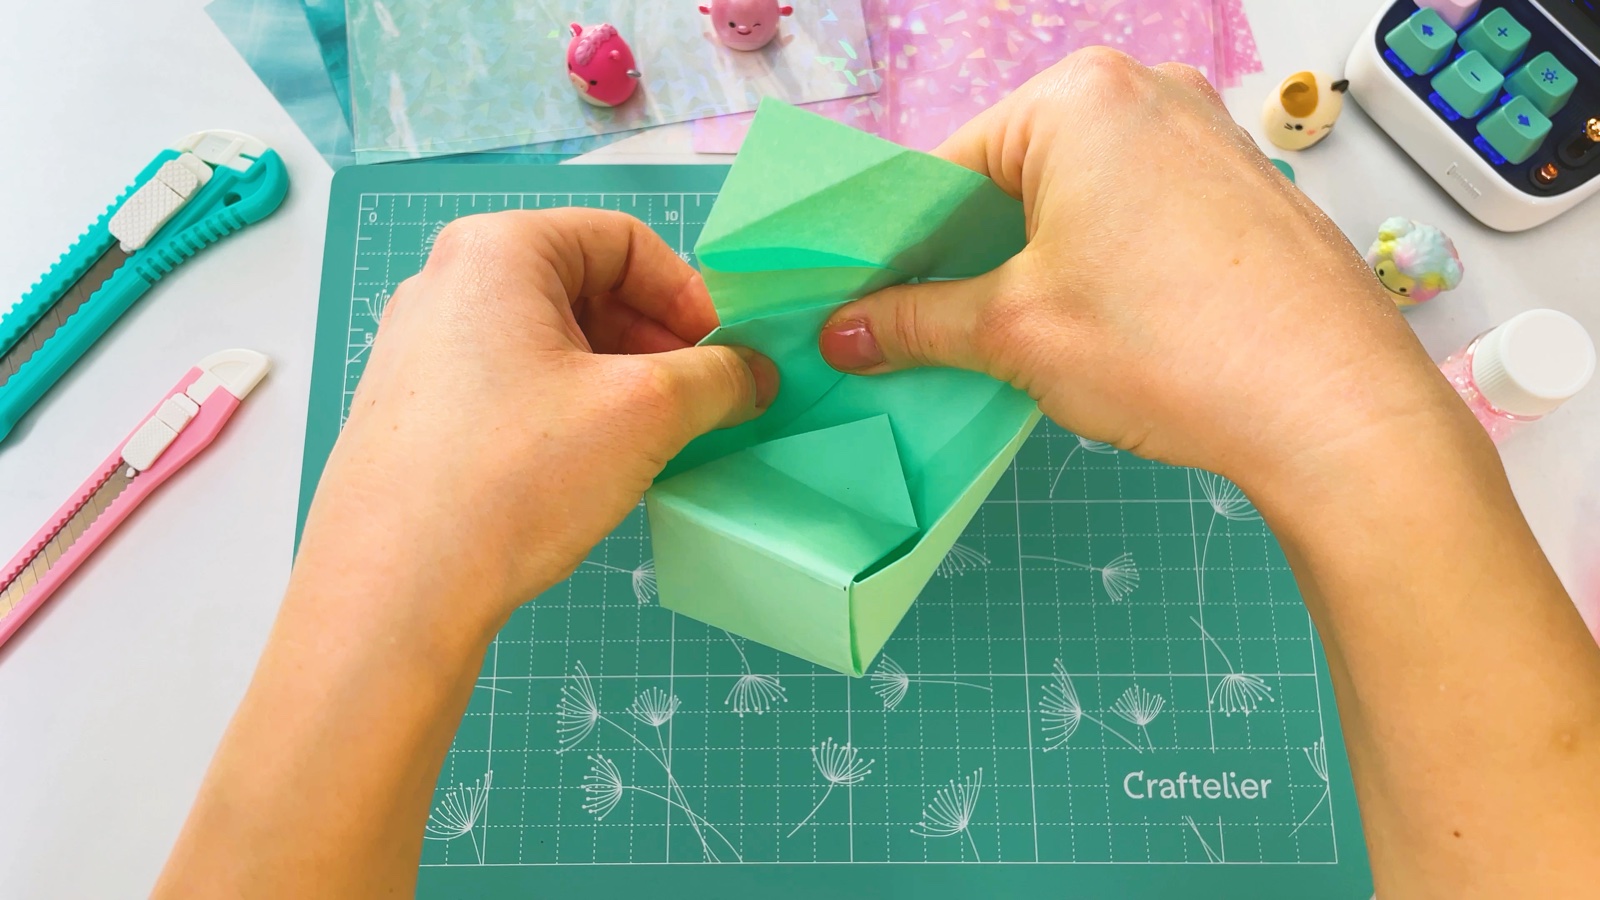
Fold the flap over the wall and tuck it down inside. Press it into the corners so it holds the walls in place.
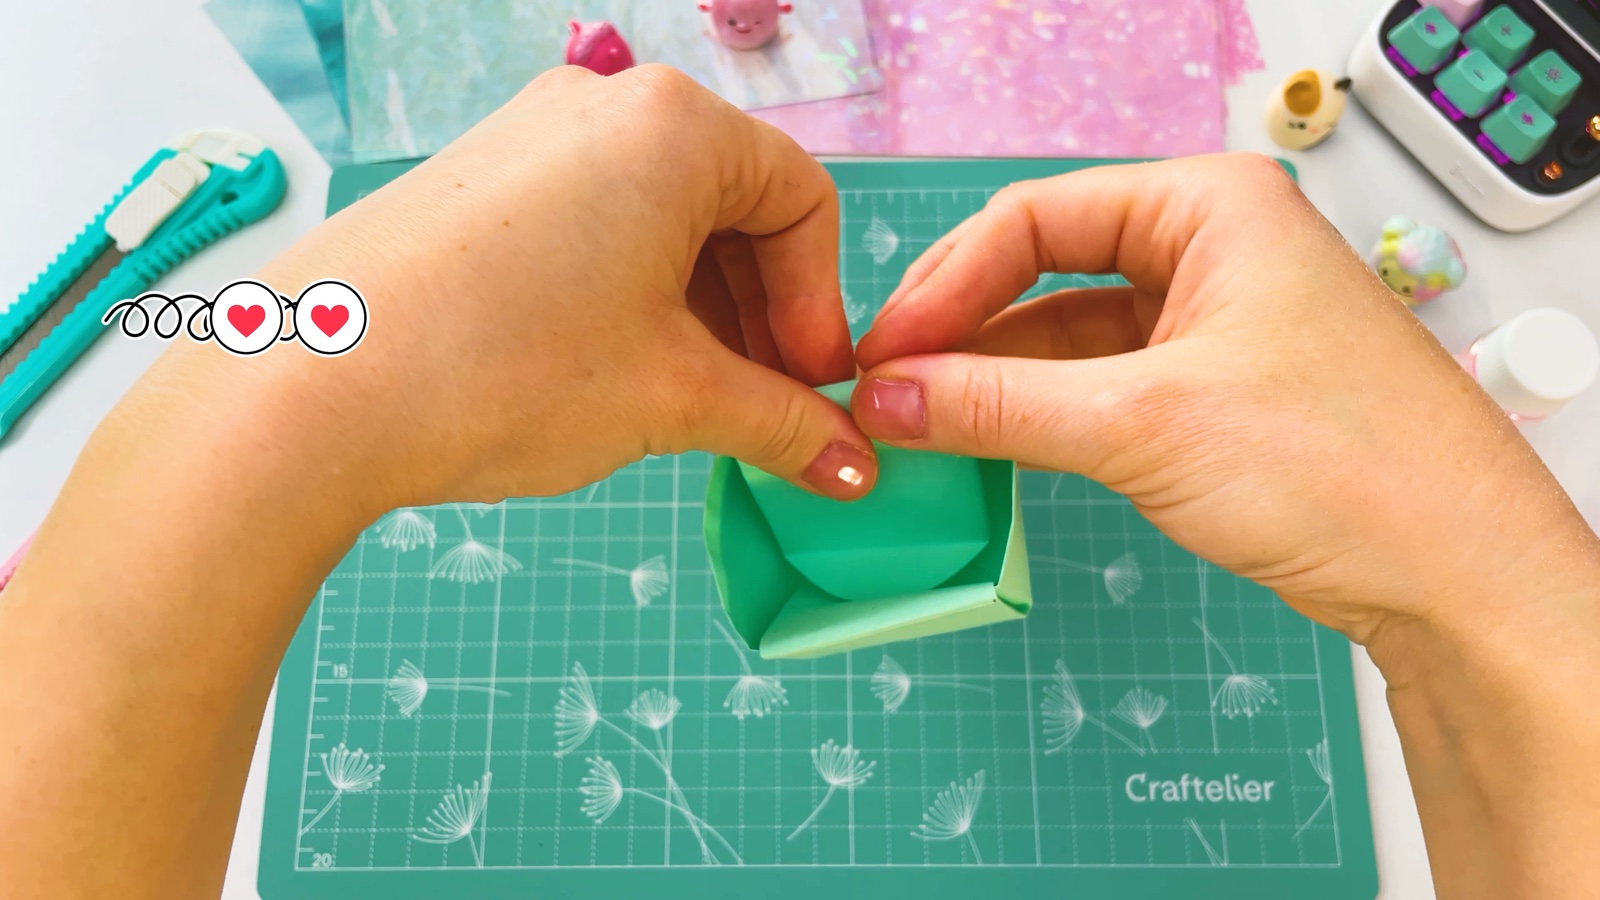
Your origami box is ready.
PART 2 OF 2
The Pokémon
- 9
Check your box
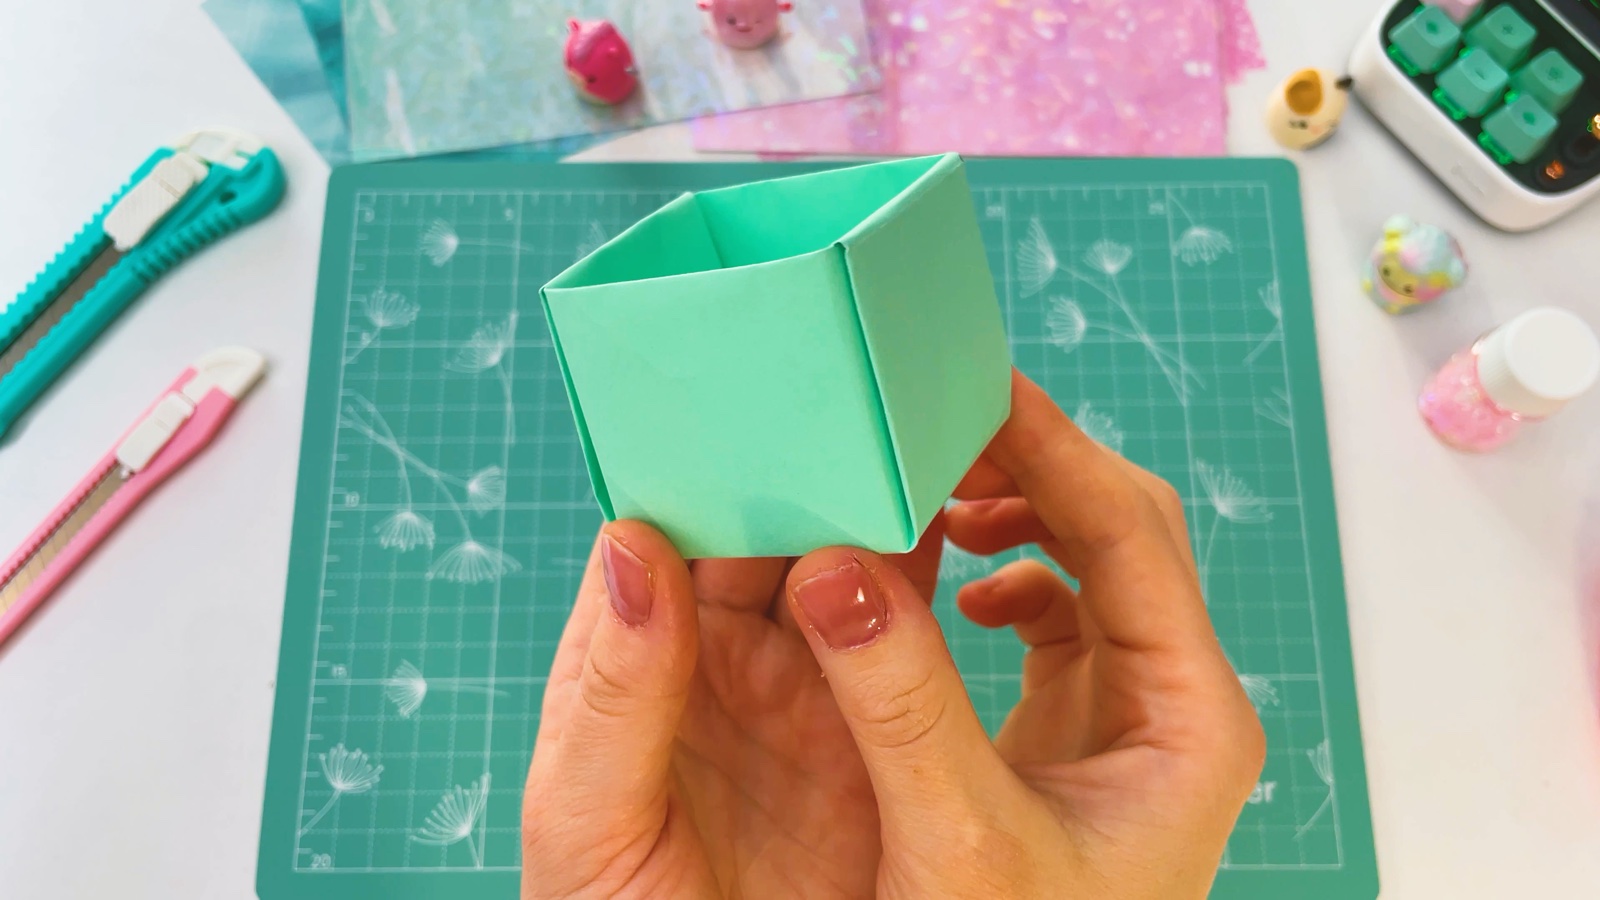
Your box now has four straight walls and a flat bottom. Press the edges once more so the walls stand tall.
- 10
Add the face
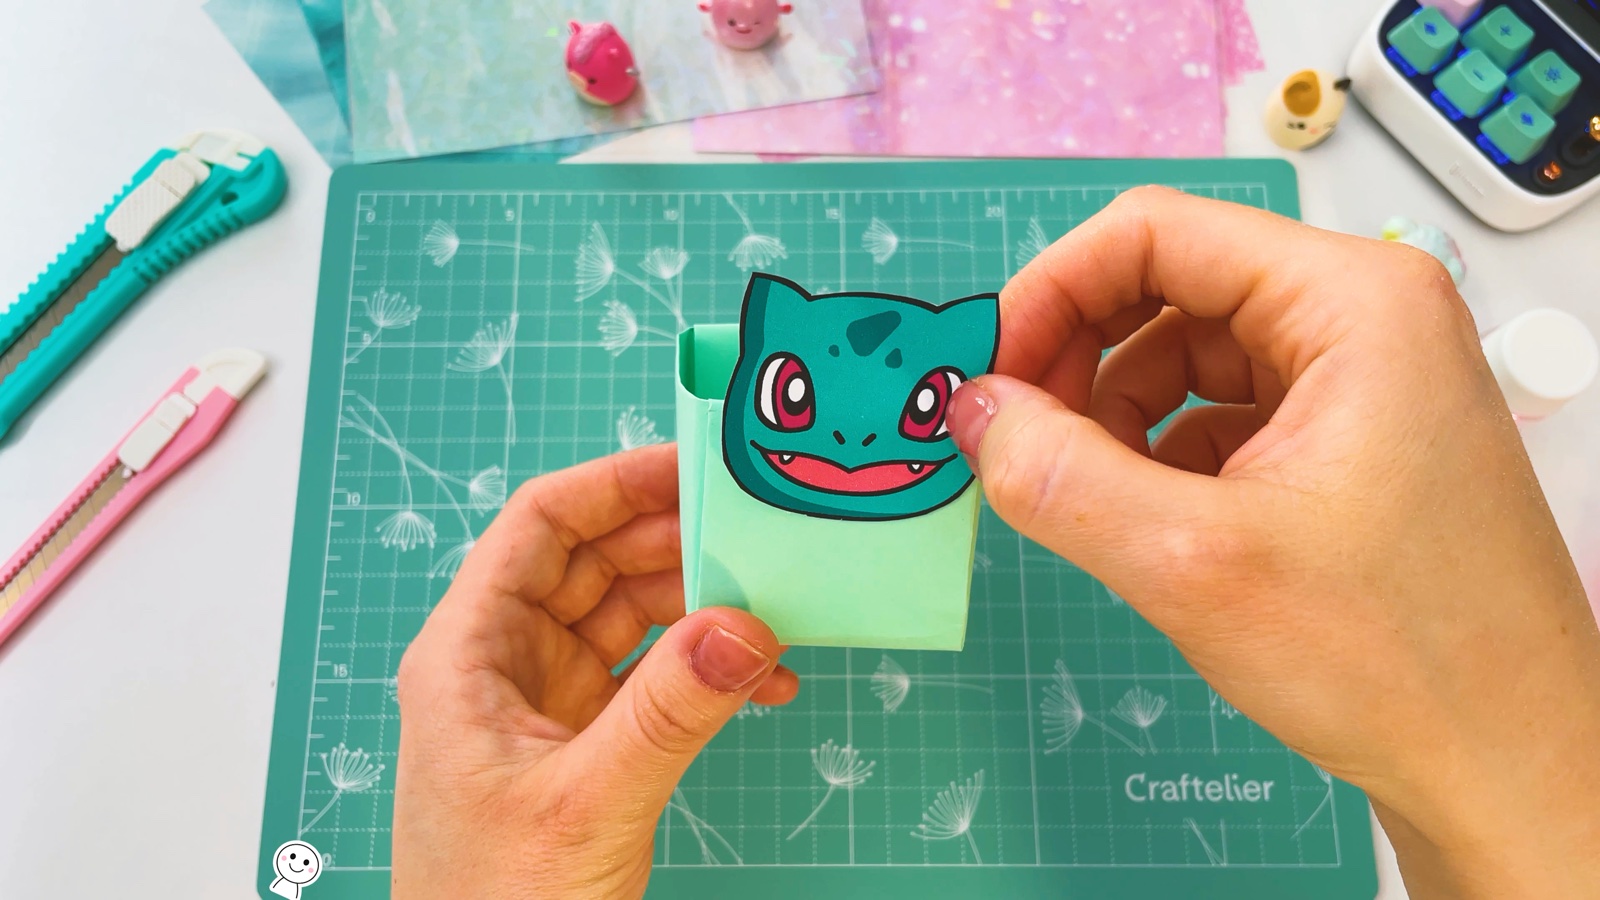
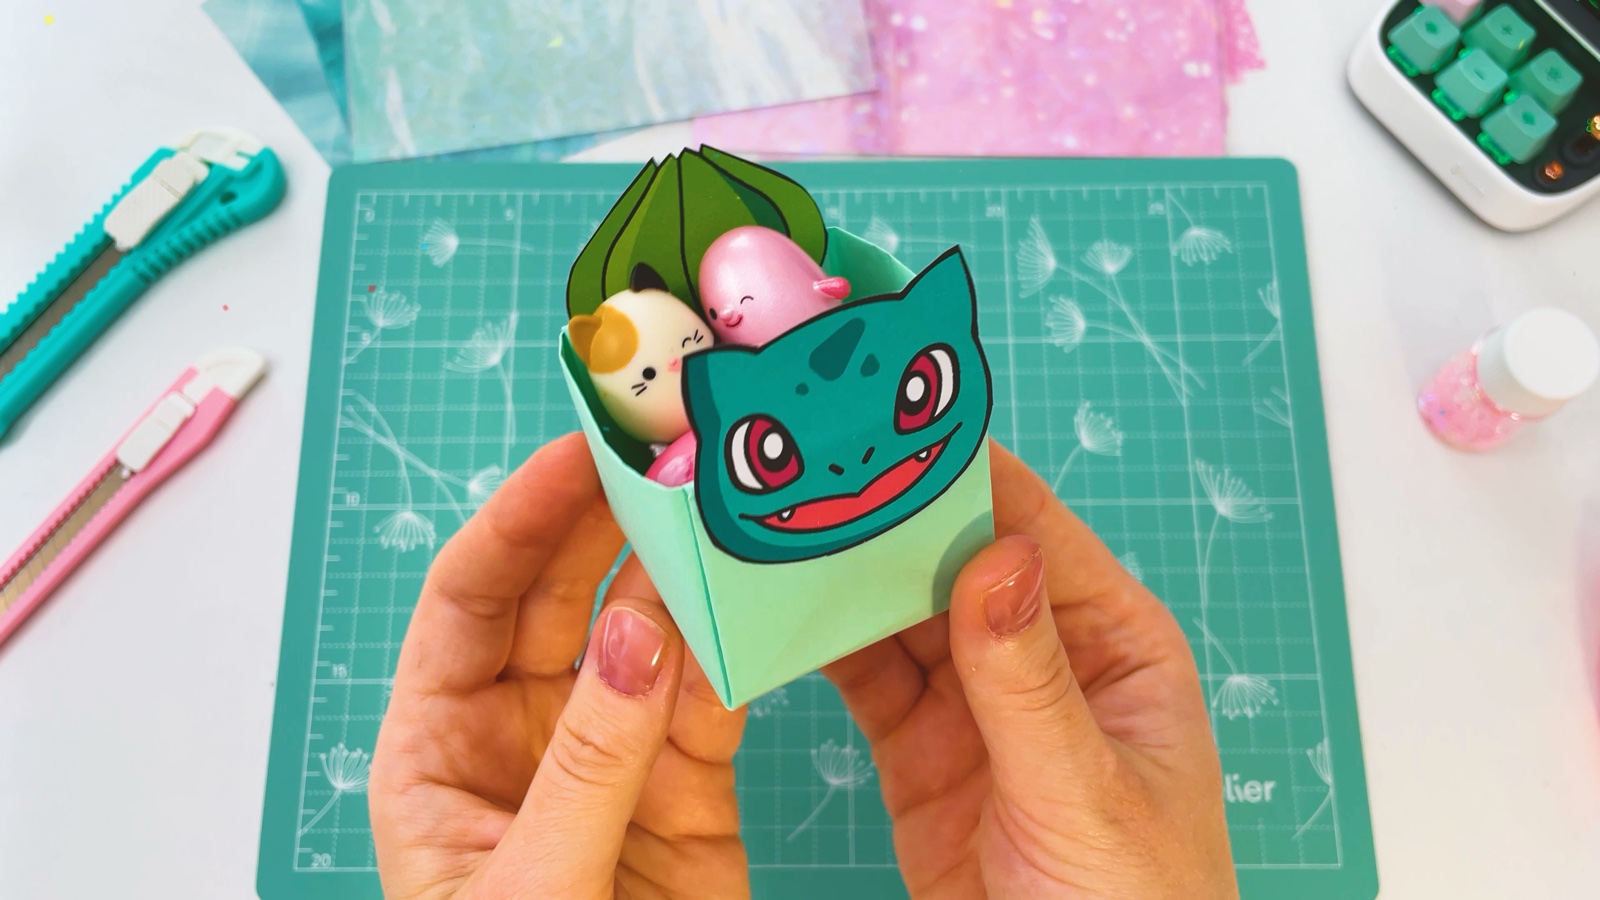
Cut out a Bulbasaur face. Print one or draw your own. Stick it to the front of the box so the top of the head peeks above the edge.
- 11
Add the leaf bulb
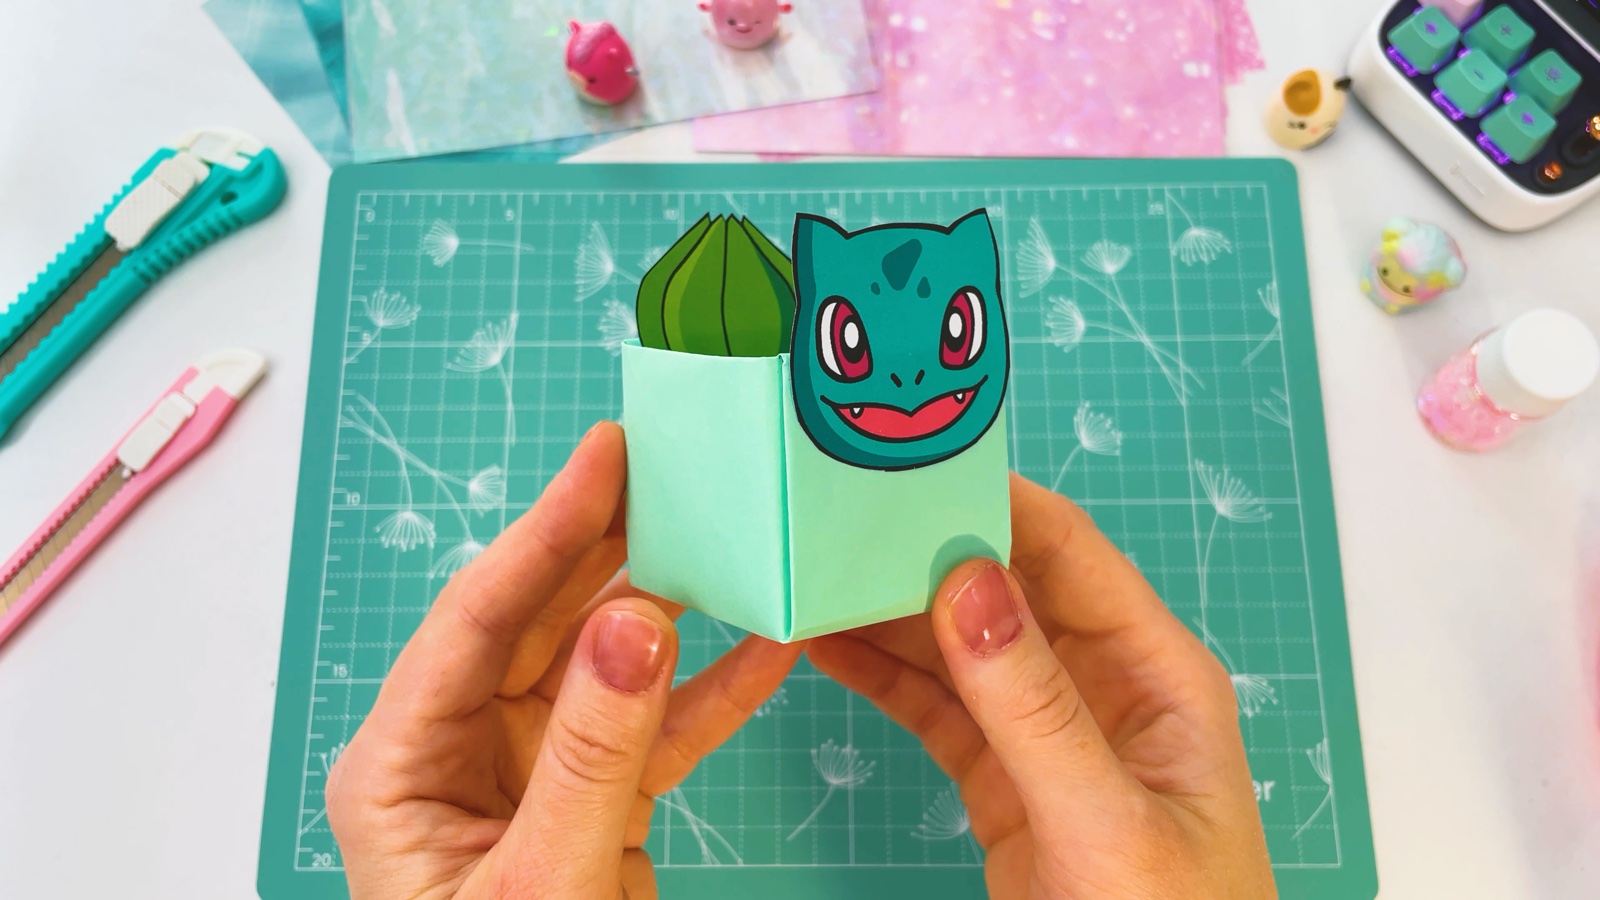
Cut out the green bulb and stick it inside the back wall, so it rises behind the head like Bulbasaur’s bulb.
- 12
Fill it with treasures
Put small toys, stickers, sweets or other tiny treasures inside.
- 13
Make Pikachu too
Fold a second box from yellow paper. Add two red cheeks, a face, pointy ears with black tips and a zigzag tail. Then try your own favourite Pokémon.
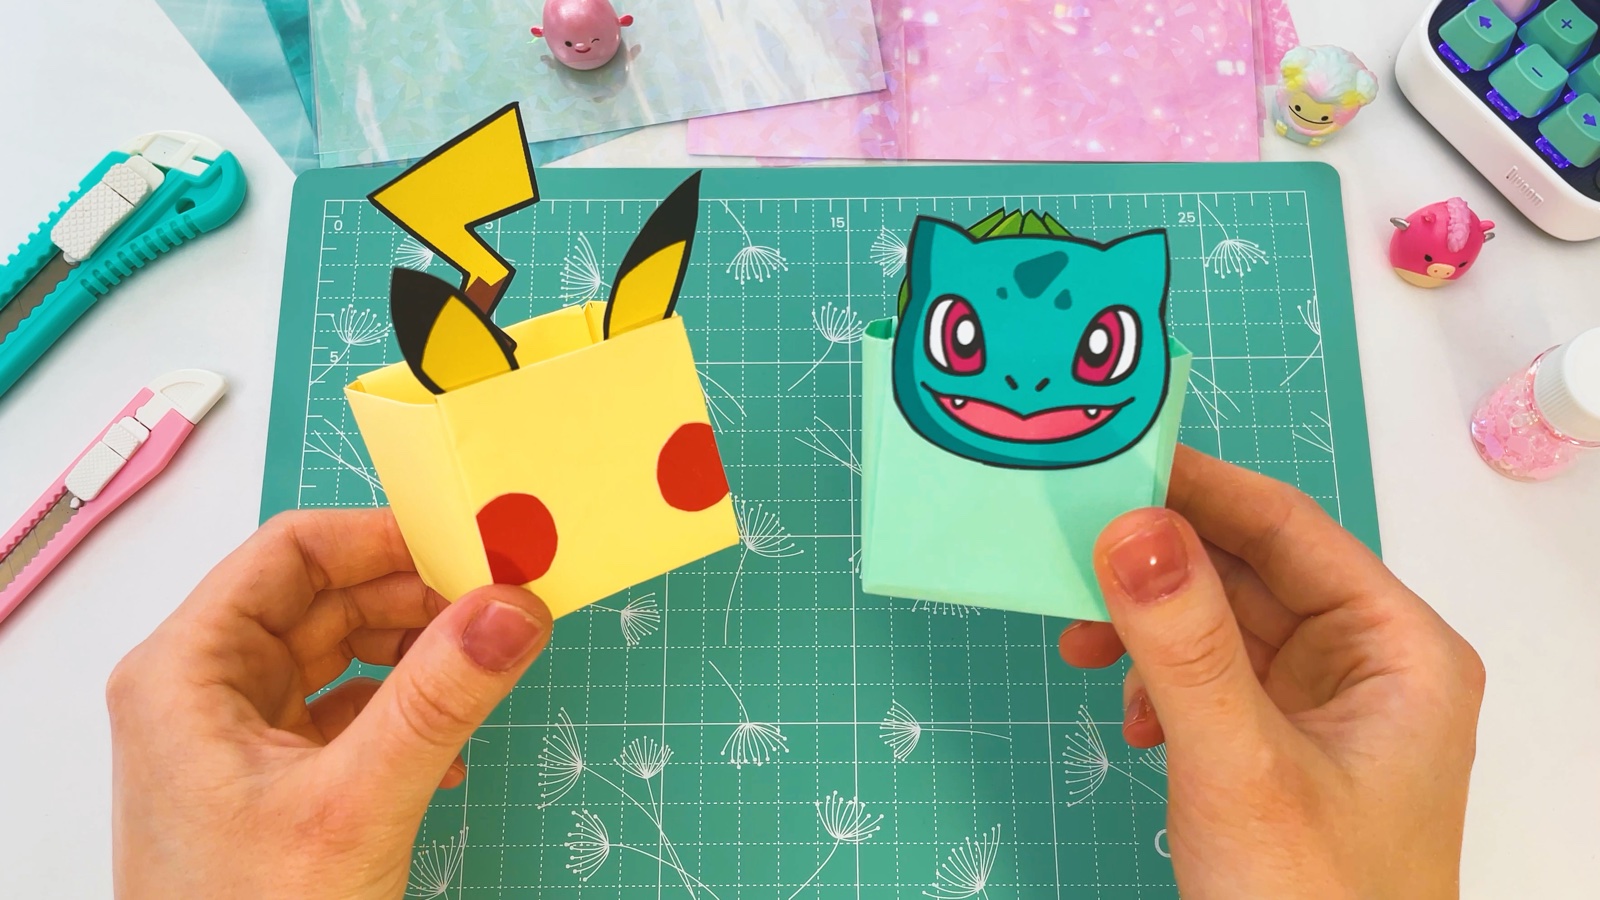
Pikachu and Bulbasaur are ready.
THREE LITTLE TIPS
Make it easier.
- Sharp folds = straight walls. Run a ruler or your fingernail along every fold at the start. The box shapes much more easily later.
- Thin paper folds best. Origami paper or thin printer paper works well. Thick cardstock cracks at the corners.
- Stick the details, not the box. The box holds itself together. You only need glue or tape for the face and the extra parts.

A CUBI MINI MOMENT
What will you hide in your box?
Cubi’s Bulbasaur box has a little surprise for Mini inside. What will you put in yours?
Three shiny star stickers, kept safe for Mini’s birthday.
Loved making it?
Catch the next make first, or save this one for a rainy day.