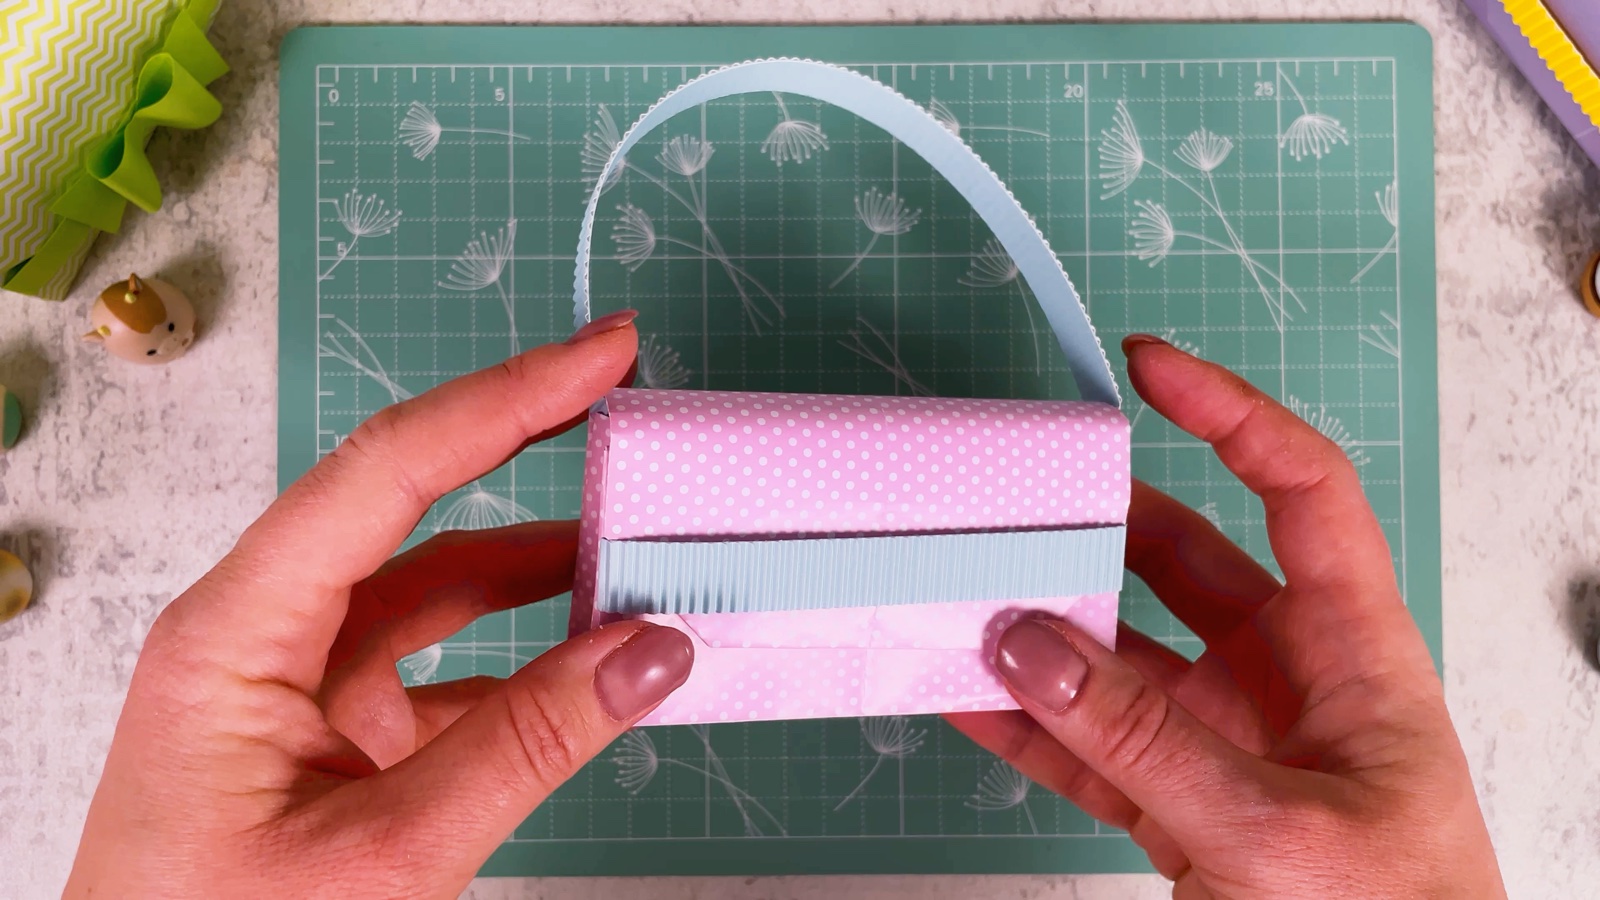
Let’s make a mini paper purse using origami, folded from just one sheet of paper. It looks like a real little handbag, and it can hold plenty of tiny things.
It works as a cute mini handbag for pretend play, a small wallet-style purse, a paper gift purse for a party or a birthday, or a little box for treasures. Decorate it any way you like: a bow, crystals, gems or stickers.
BEFORE WE START
What you need.
Materials
- Patterned paper, A4 or US Letter
- Corrugated paper strips× 2
- Pink paper for the bow
- Glue stick
- Heart gem or sticker (optional)
Tools
- Scissors
PART 1 OF 3
The purse
- 1
Fold in half and open
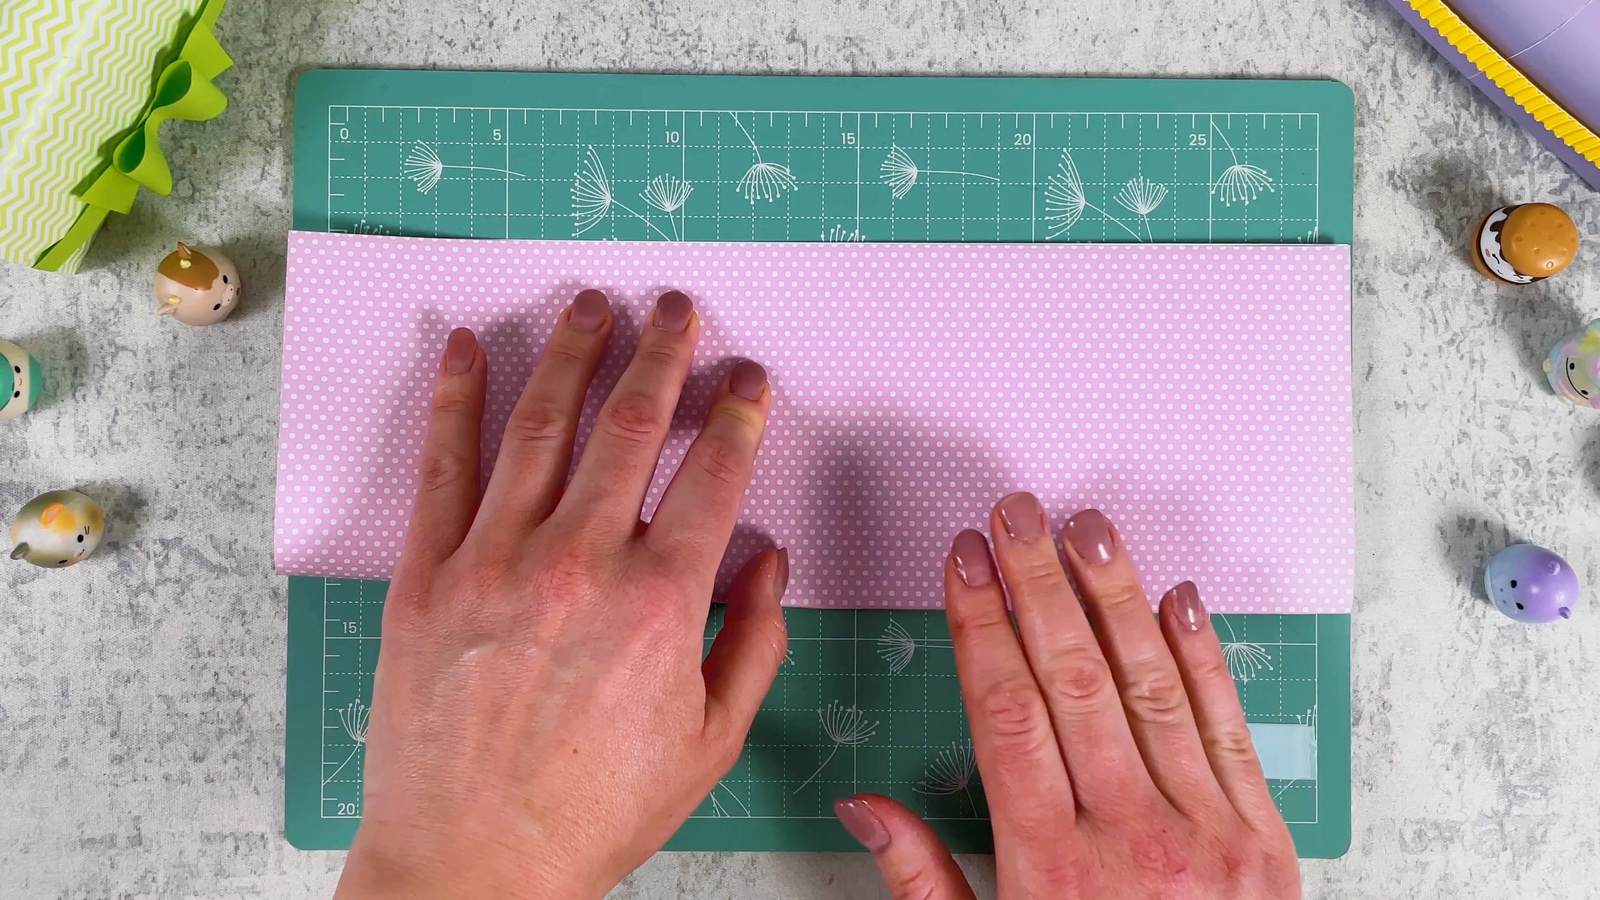
Lay the paper landscape, white side up. Fold it in half from bottom to top, press a sharp crease and open it again.
- 2
Fold the edges to the middle
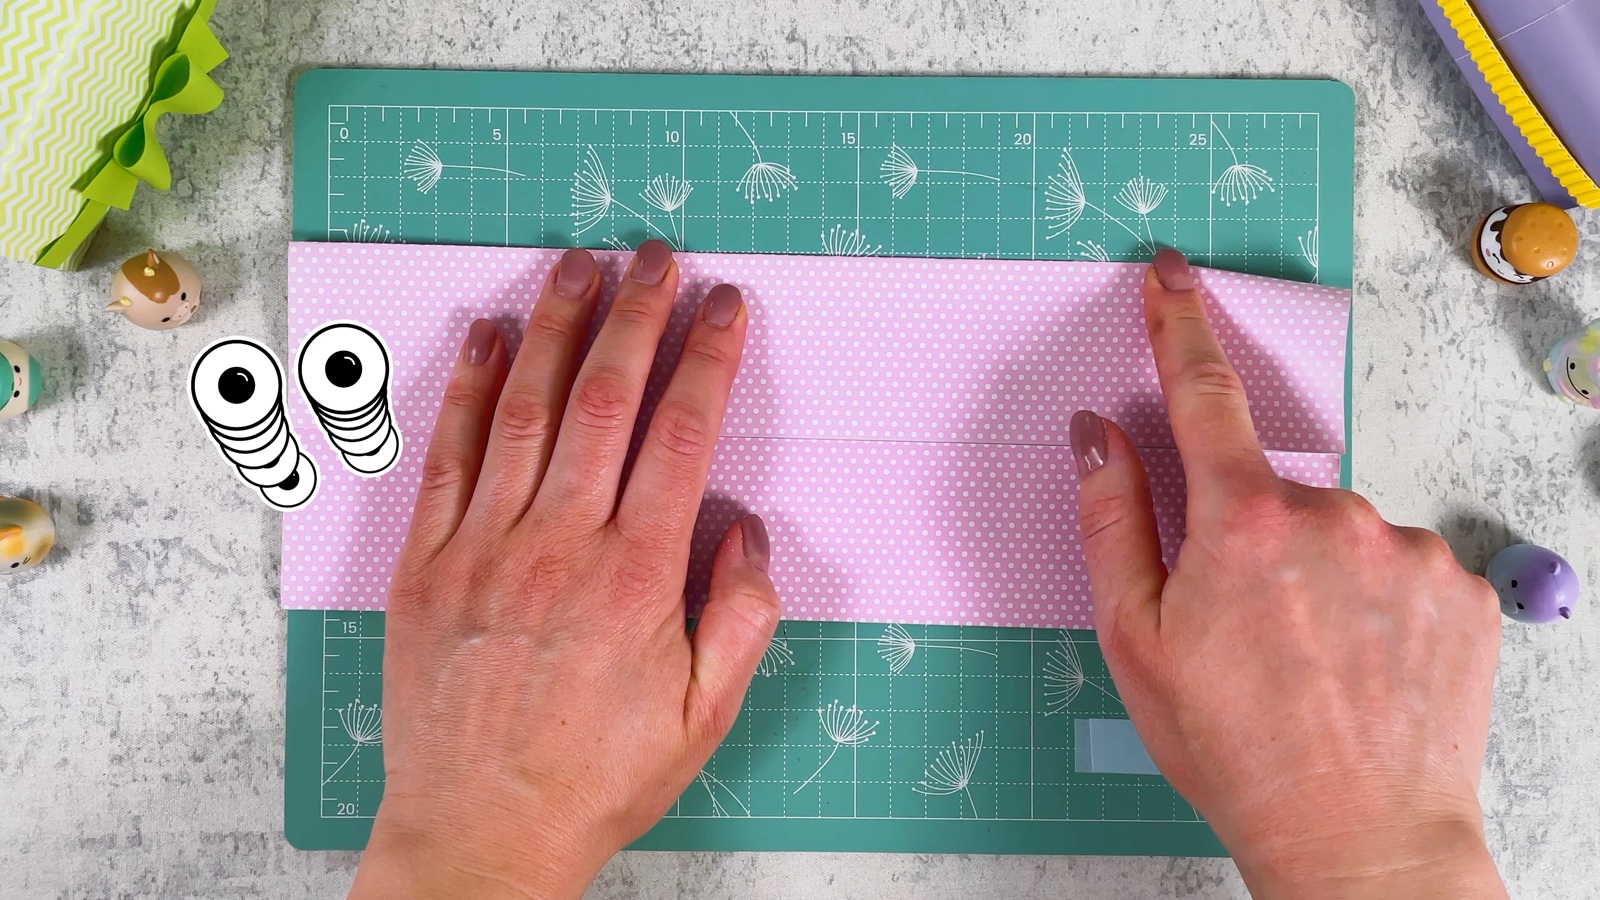
Fold the bottom edge up to the middle crease. Then fold the top edge down to the middle crease too. Now you have a long, narrow strip.
- 3
Make the side creases
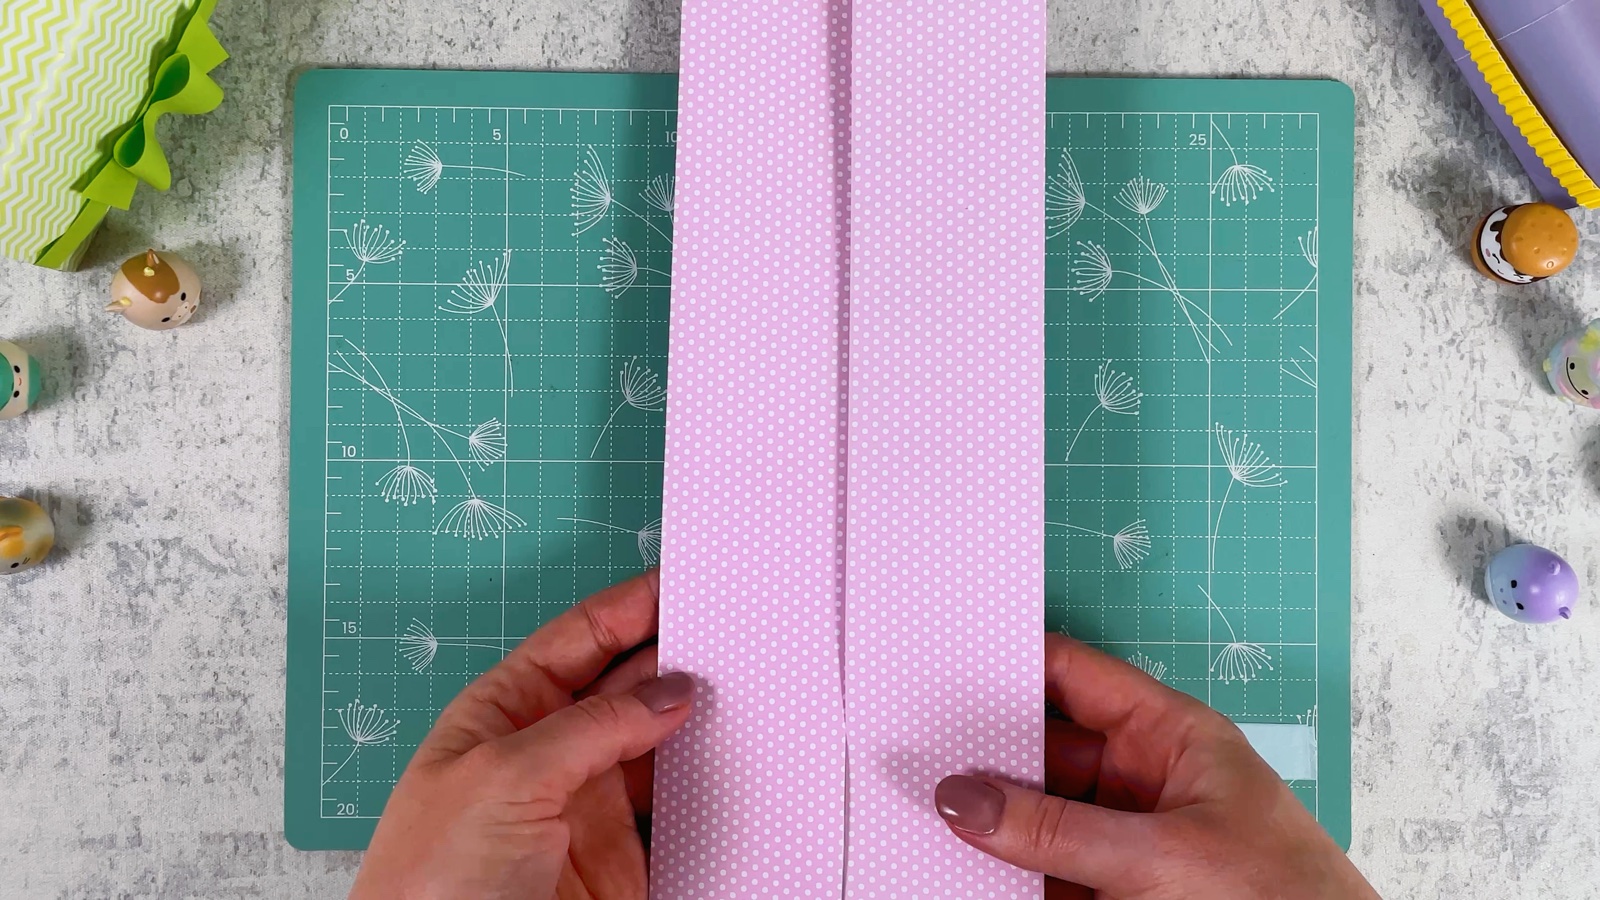
Fold the strip in half the short way, then in half again. Press each fold well and open the strip. These creases mark the sides of the purse.
- 4
Fold a narrow edge
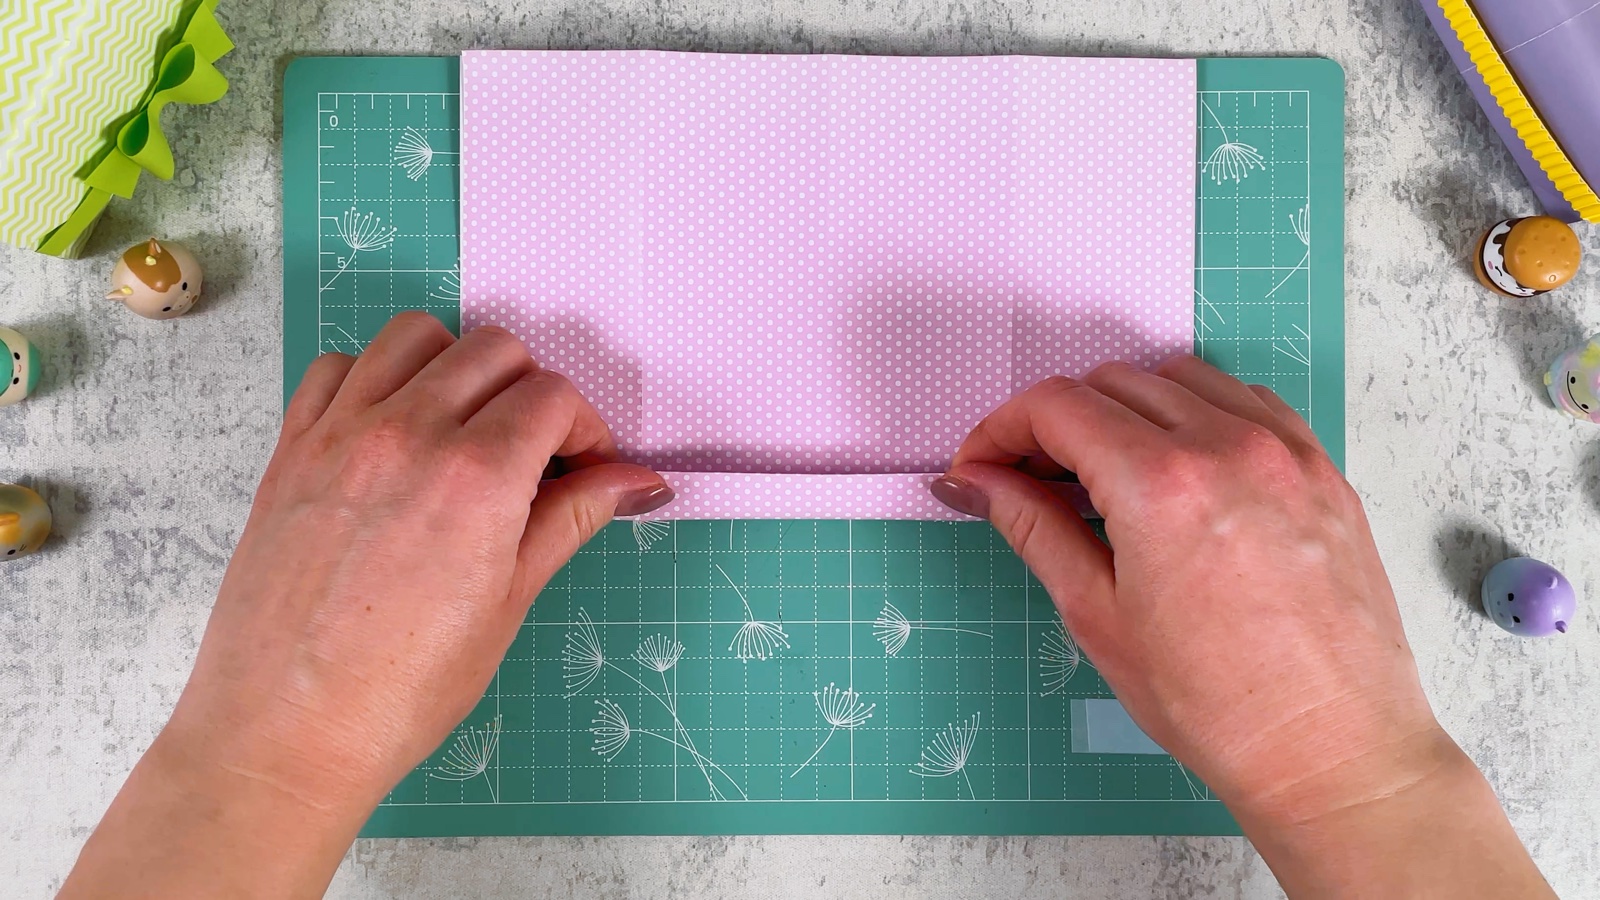
Fold the paper in half along the first crease again, pattern outside. Fold the bottom edge up just a little, to make a narrow band.
- 5
Fold the bottom corners
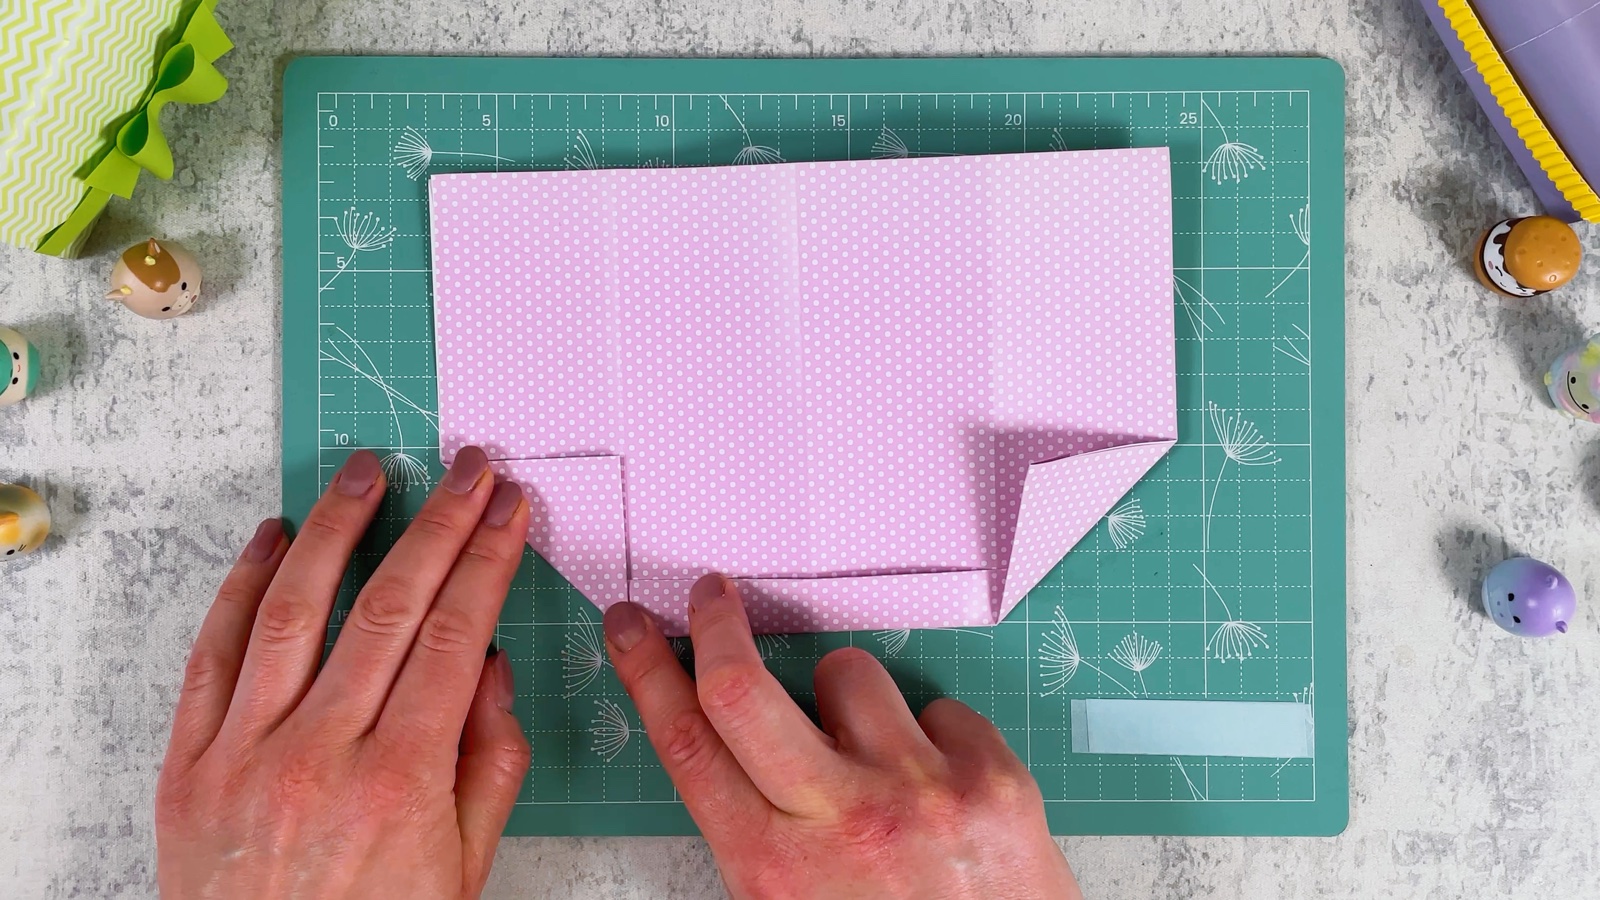
Fold both bottom corners up into small triangles, so the edge of each triangle sits on the side crease.
- 6
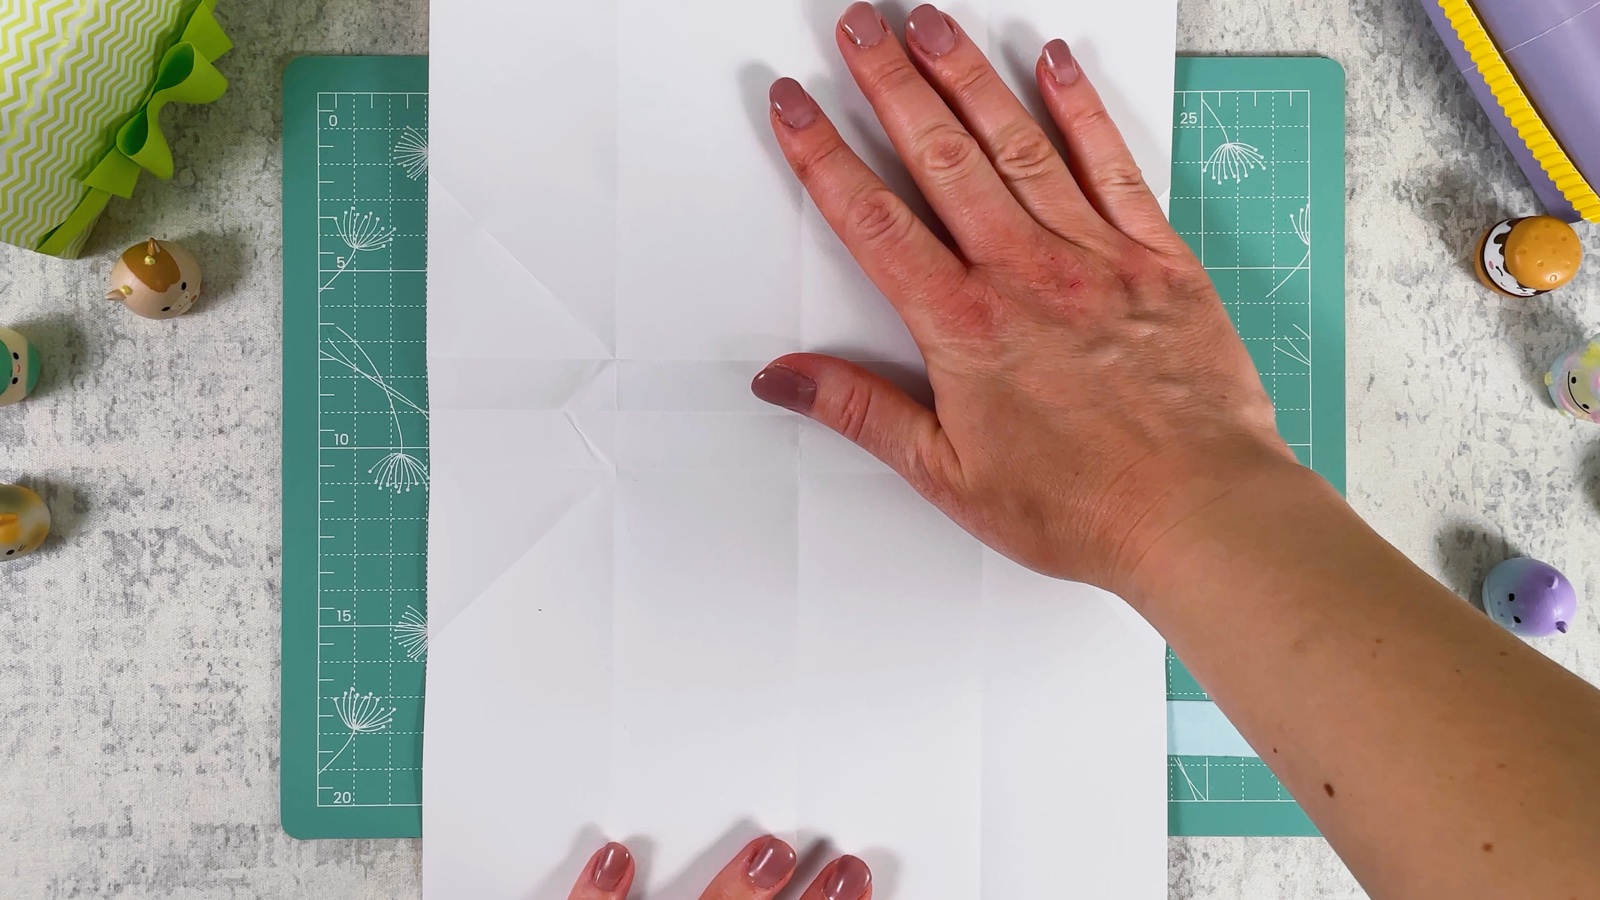
Open it all up
Unfold everything and lay the paper flat, white side up. You will see a grid of creases. They guide every next fold.
- 7
Fold in the sides and glue
Fold both long sides in along the creases, so they meet in the middle. Put glue on the edge where they overlap and press them together.
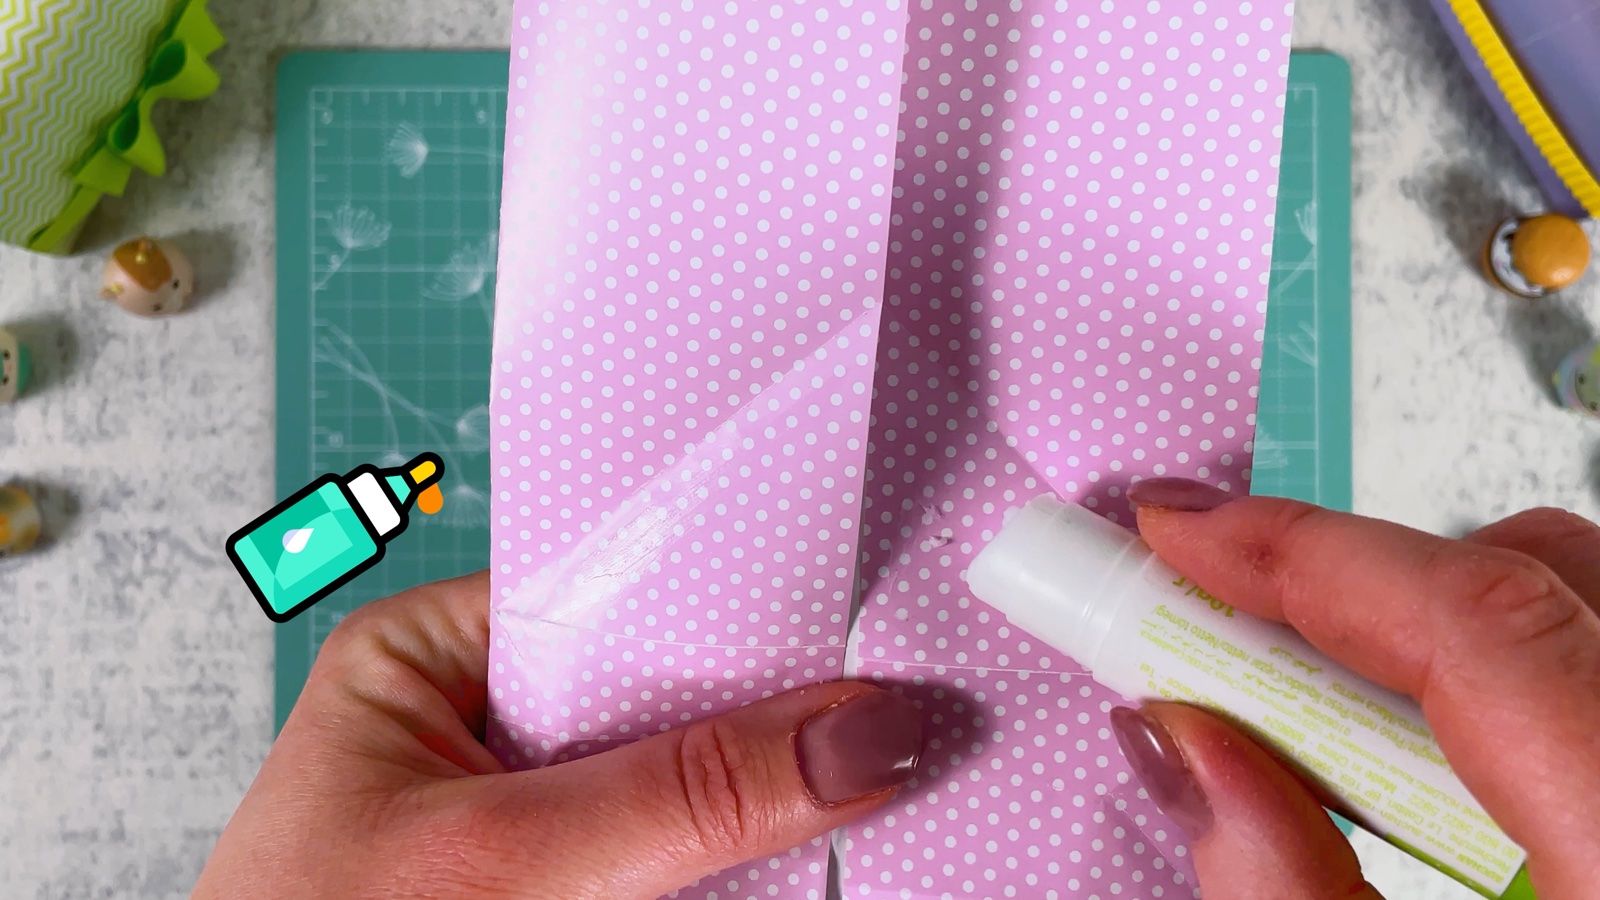
Now the paper is a long tube, open at both ends.
- 8
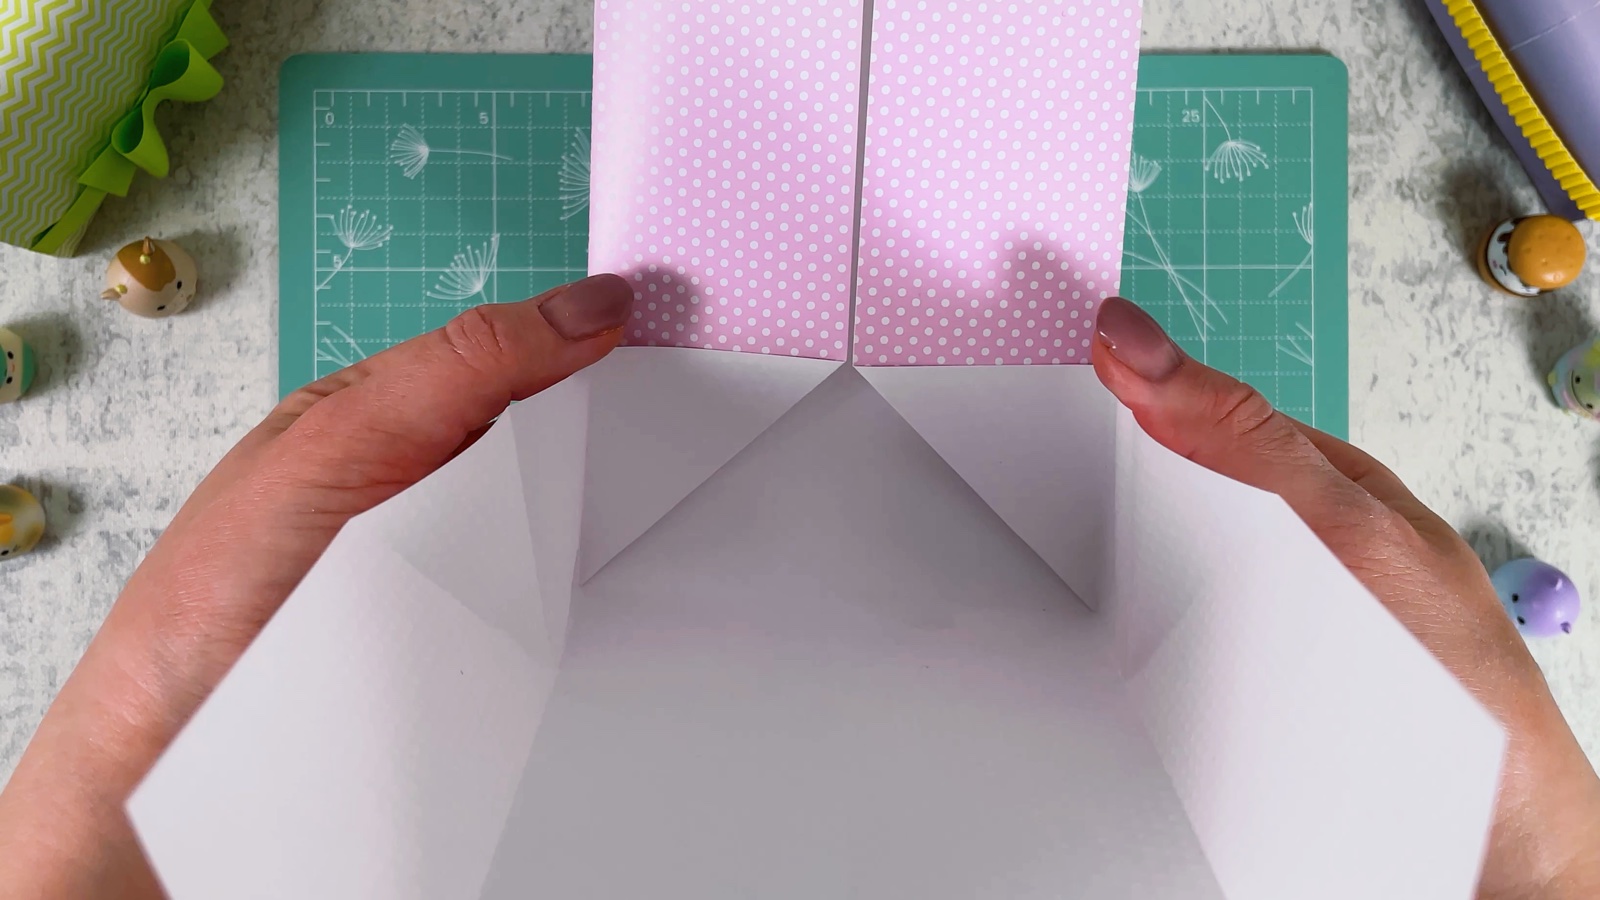
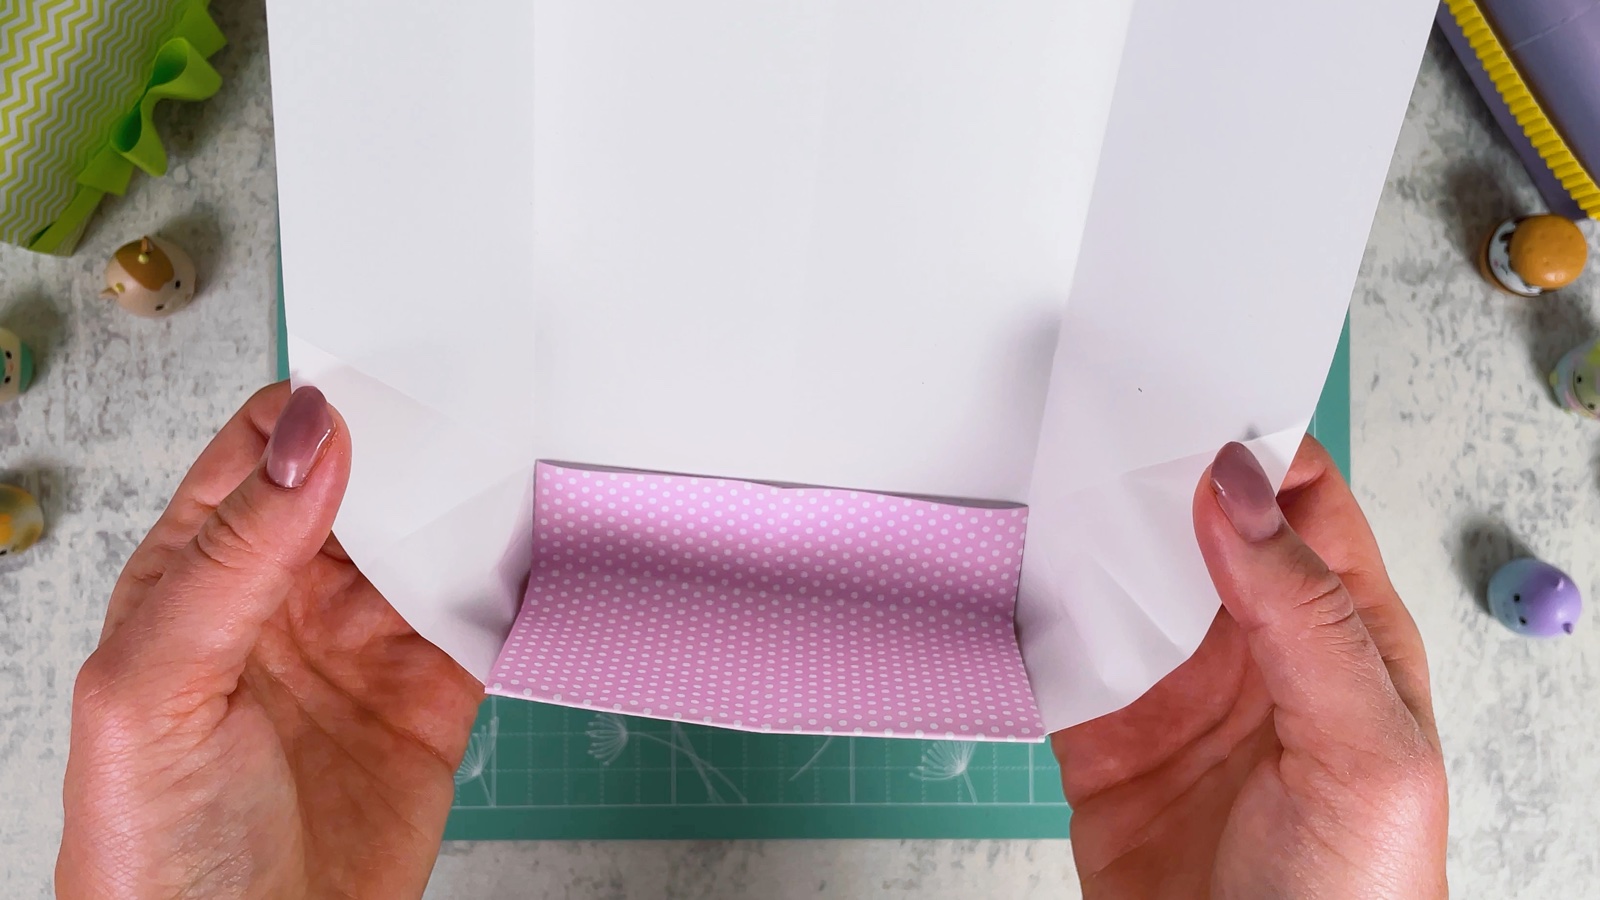
Shape the bottom
Fold up the bottom along the crease. Open the tube and push the sides in, following the triangle creases from step 5.
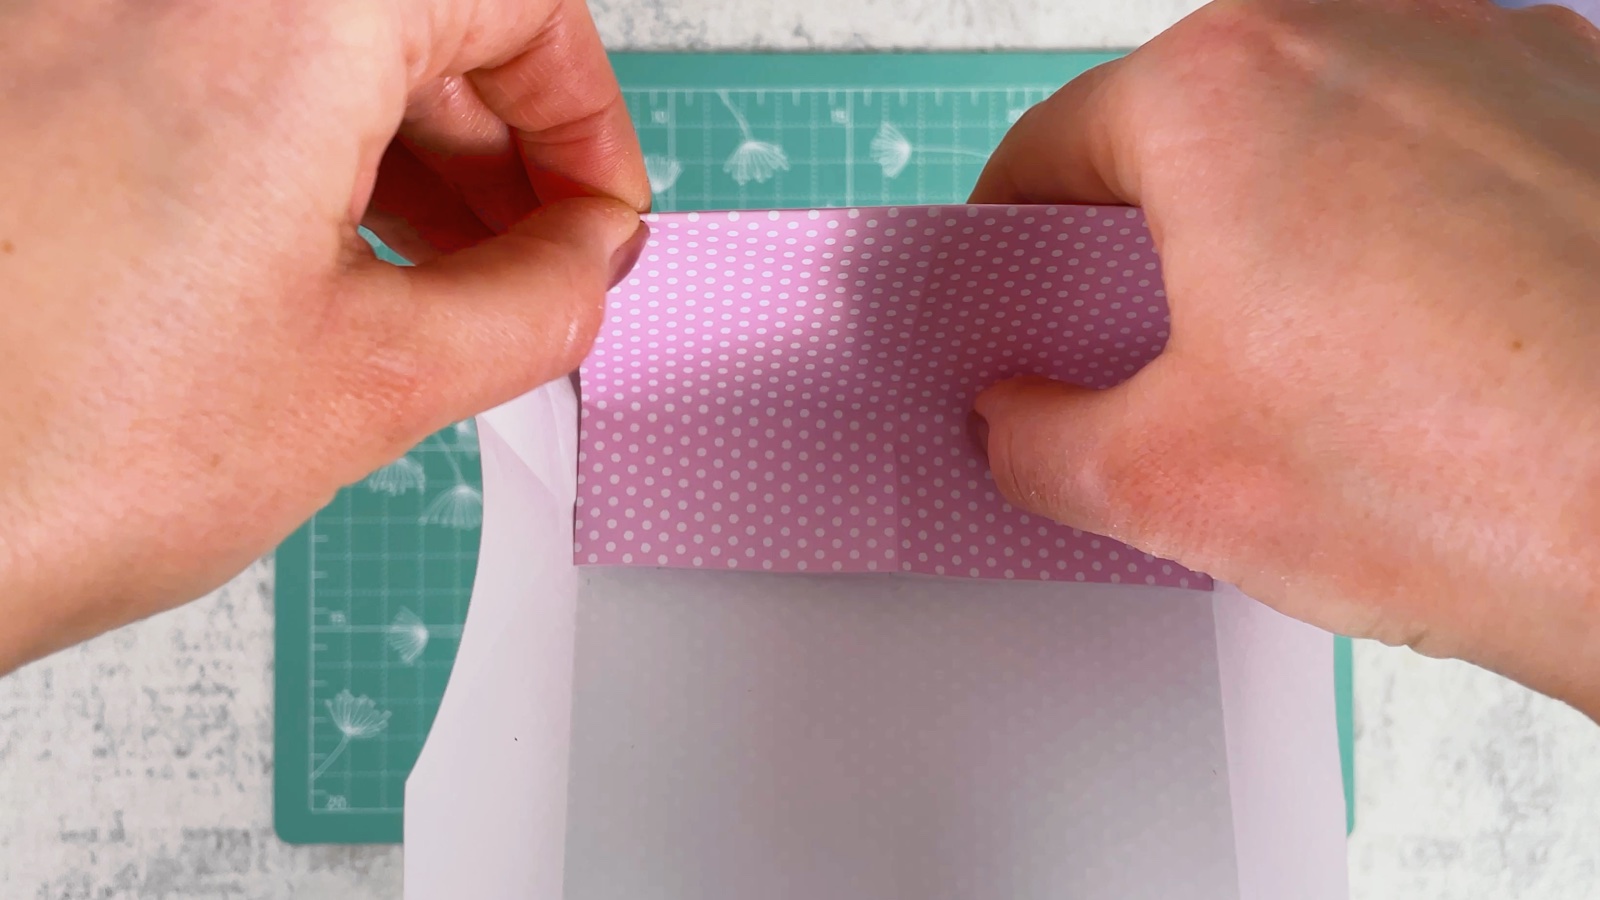
Press along the creases until the bottom forms a small, flat box.
- 9
Tuck in the corners
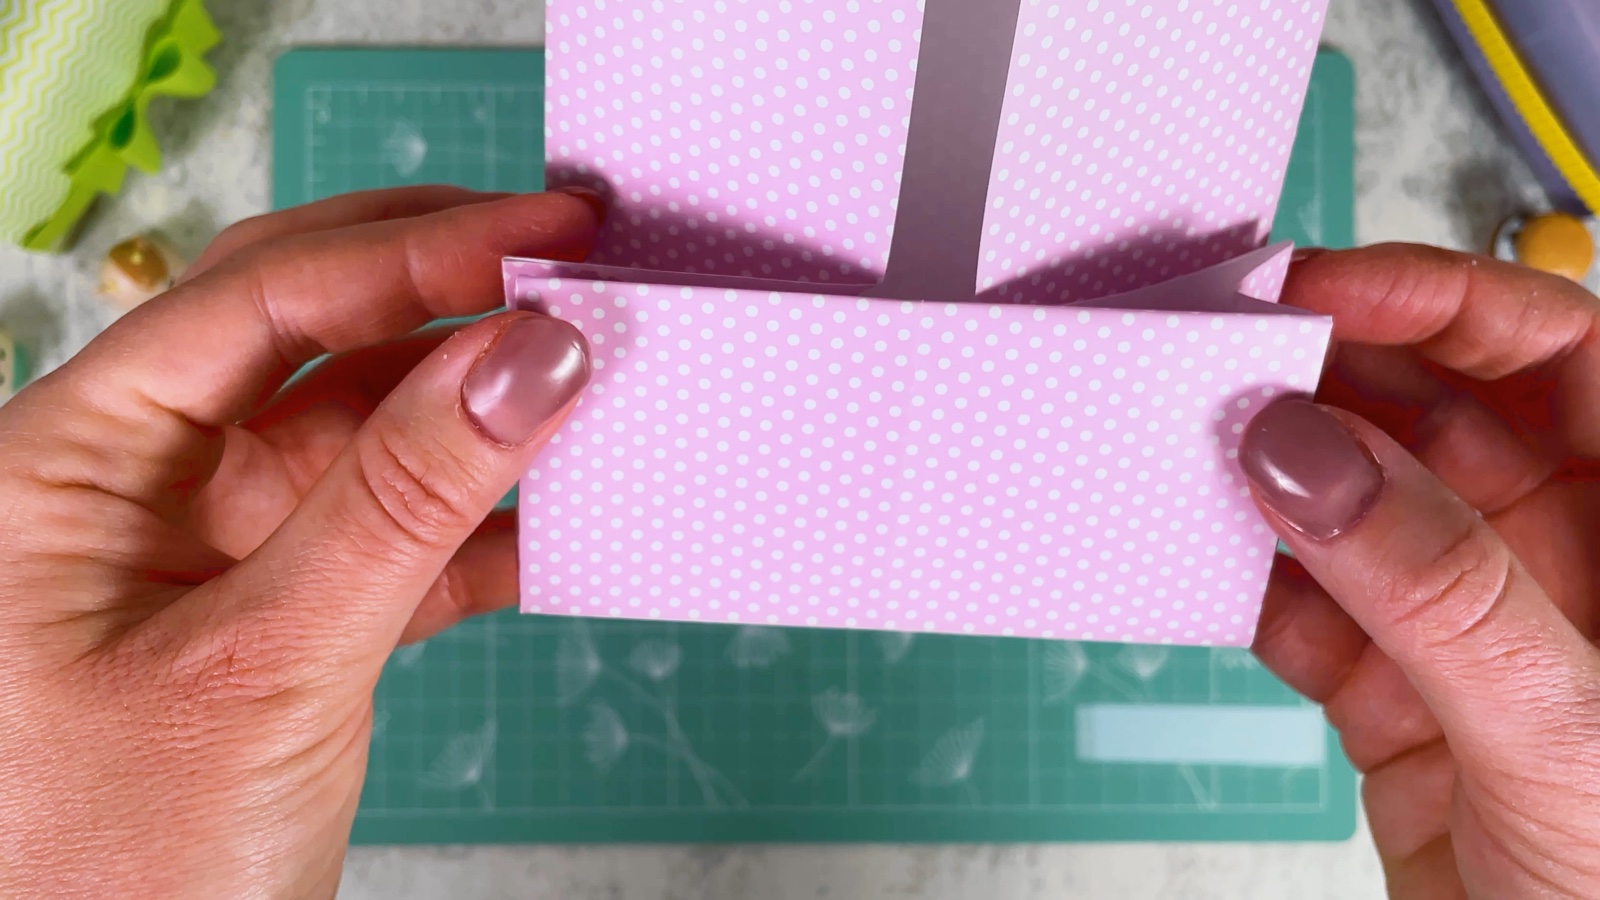
Push the side corners of the box inwards along the creases, so they fold flat inside. This makes the front pocket of the purse.
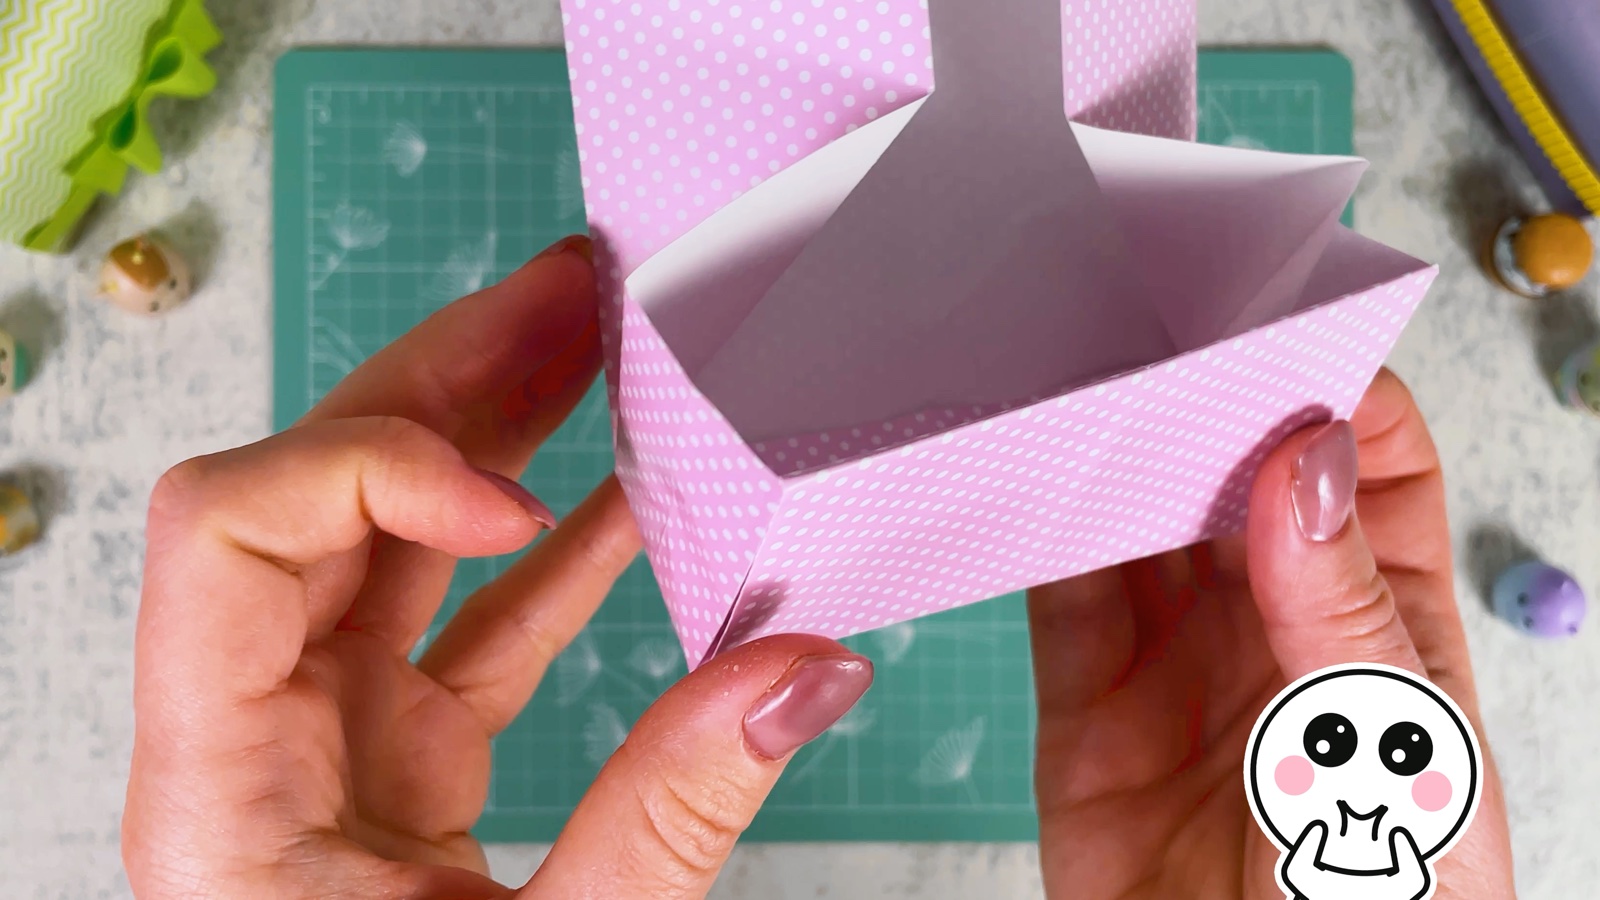
Press the front so it stands straight.
- 10
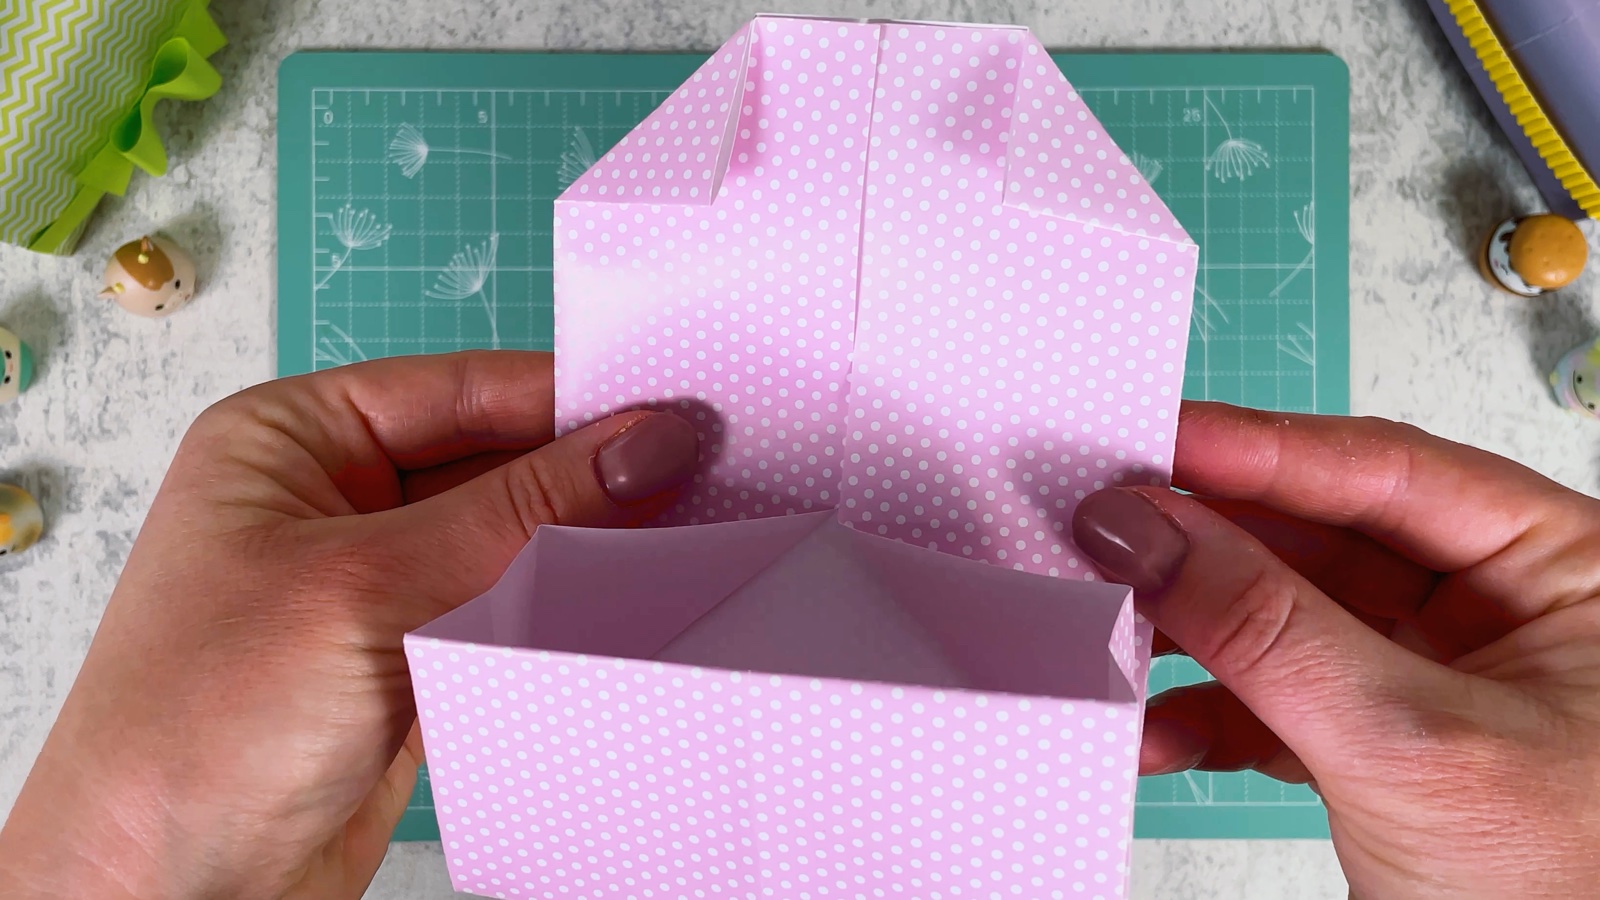
Shape the flap
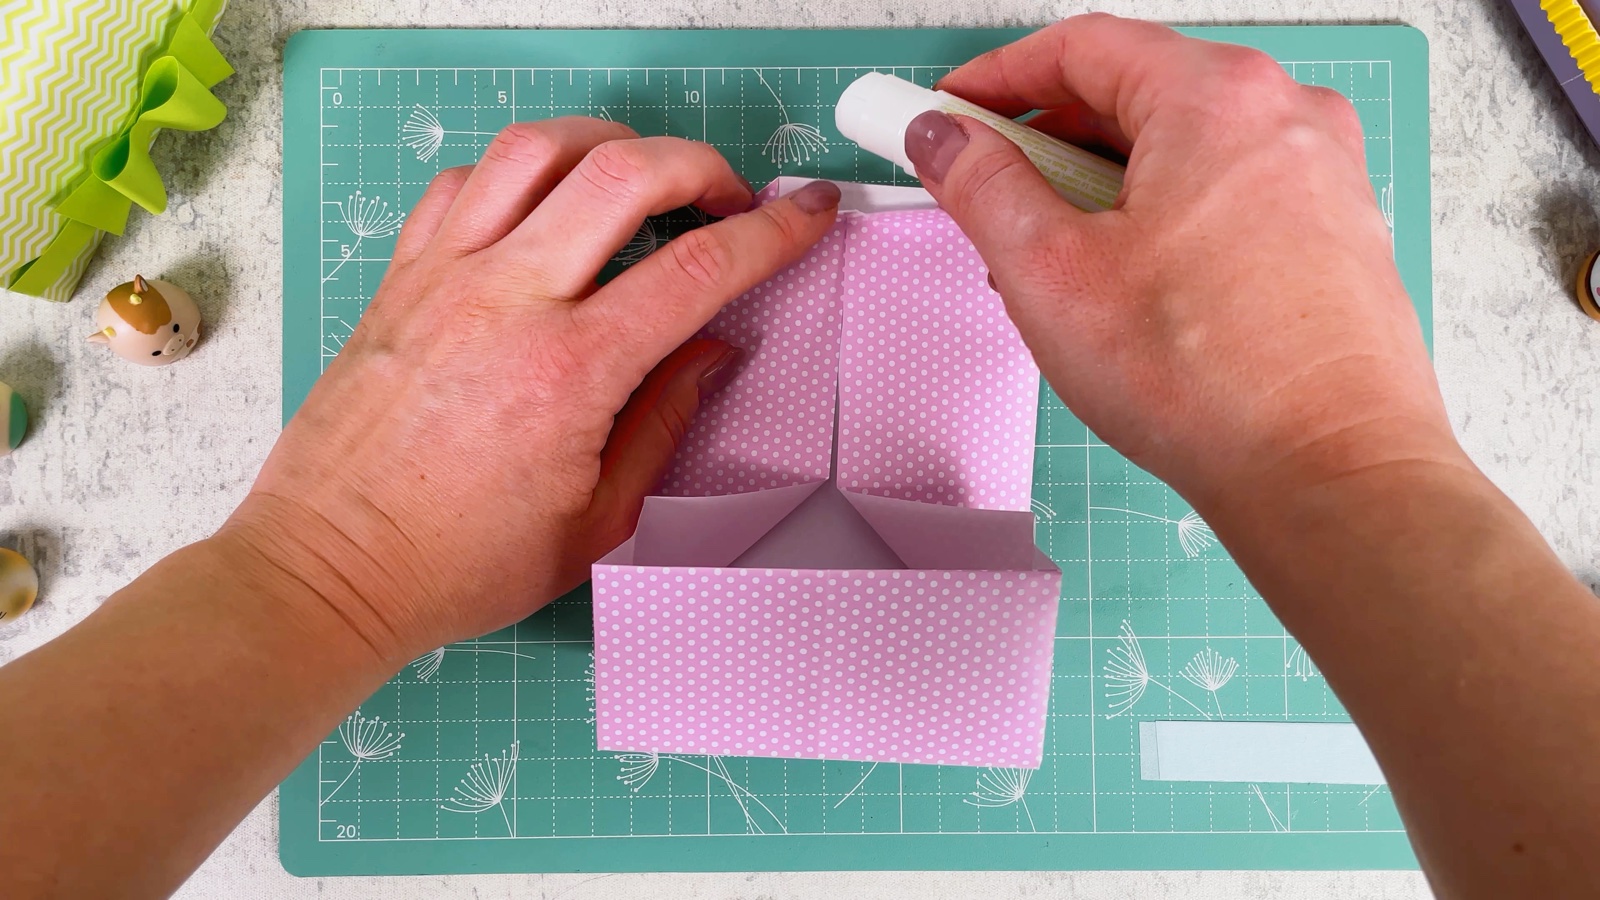
Now work on the long top part, which becomes the flap. Fold its two top corners down into small triangles, so the flap gets a rounded look.
- 11
Glue the flap
Lay the purse down and add a little glue under the folded corners of the flap. Press for a few seconds so they stay in place.
- 12
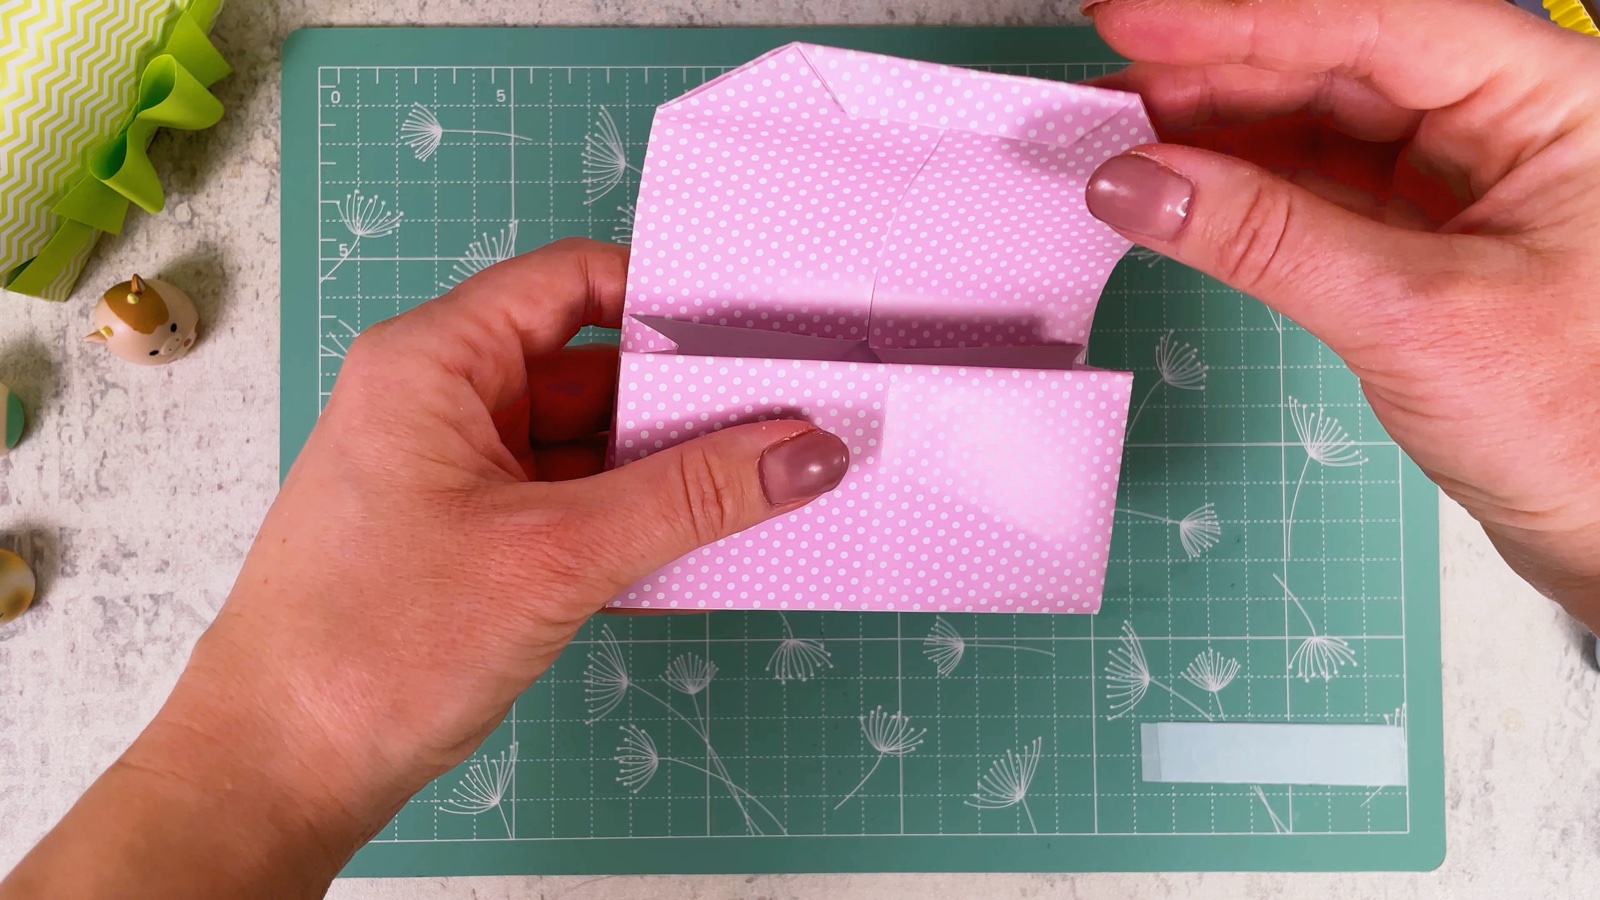
Close the purse
Fold the flap down over the front pocket. The purse is closed.
PART 2 OF 3
The handle and band
- 13
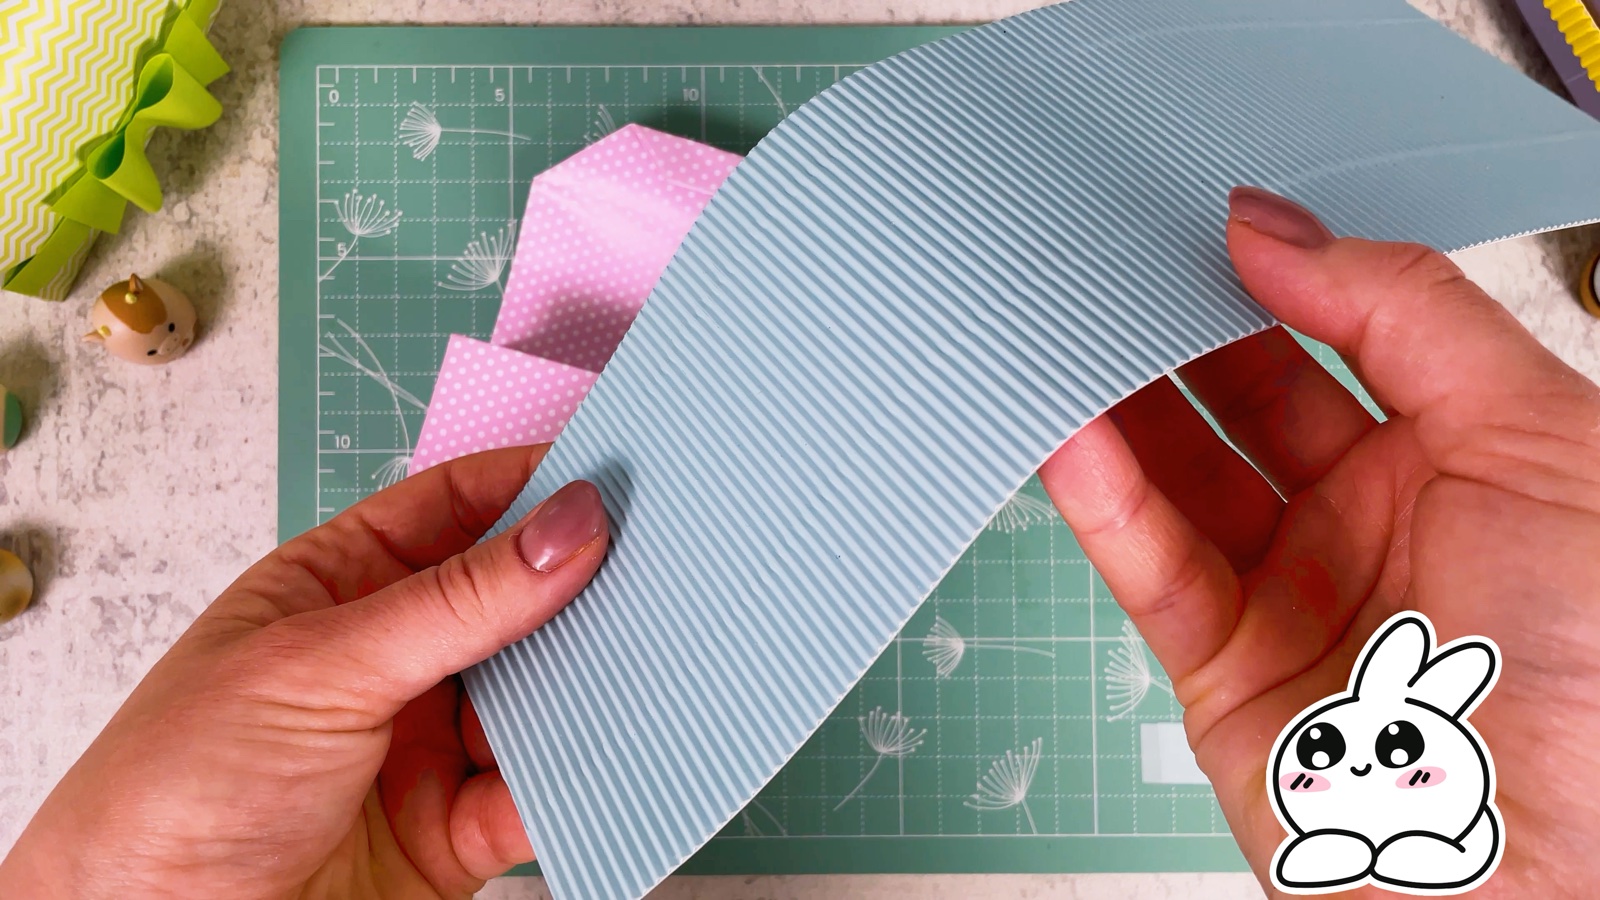
Cut two strips
Cut two long strips from corrugated paper: one for the handle and one for the band. Thin cardstock works too.
- 14
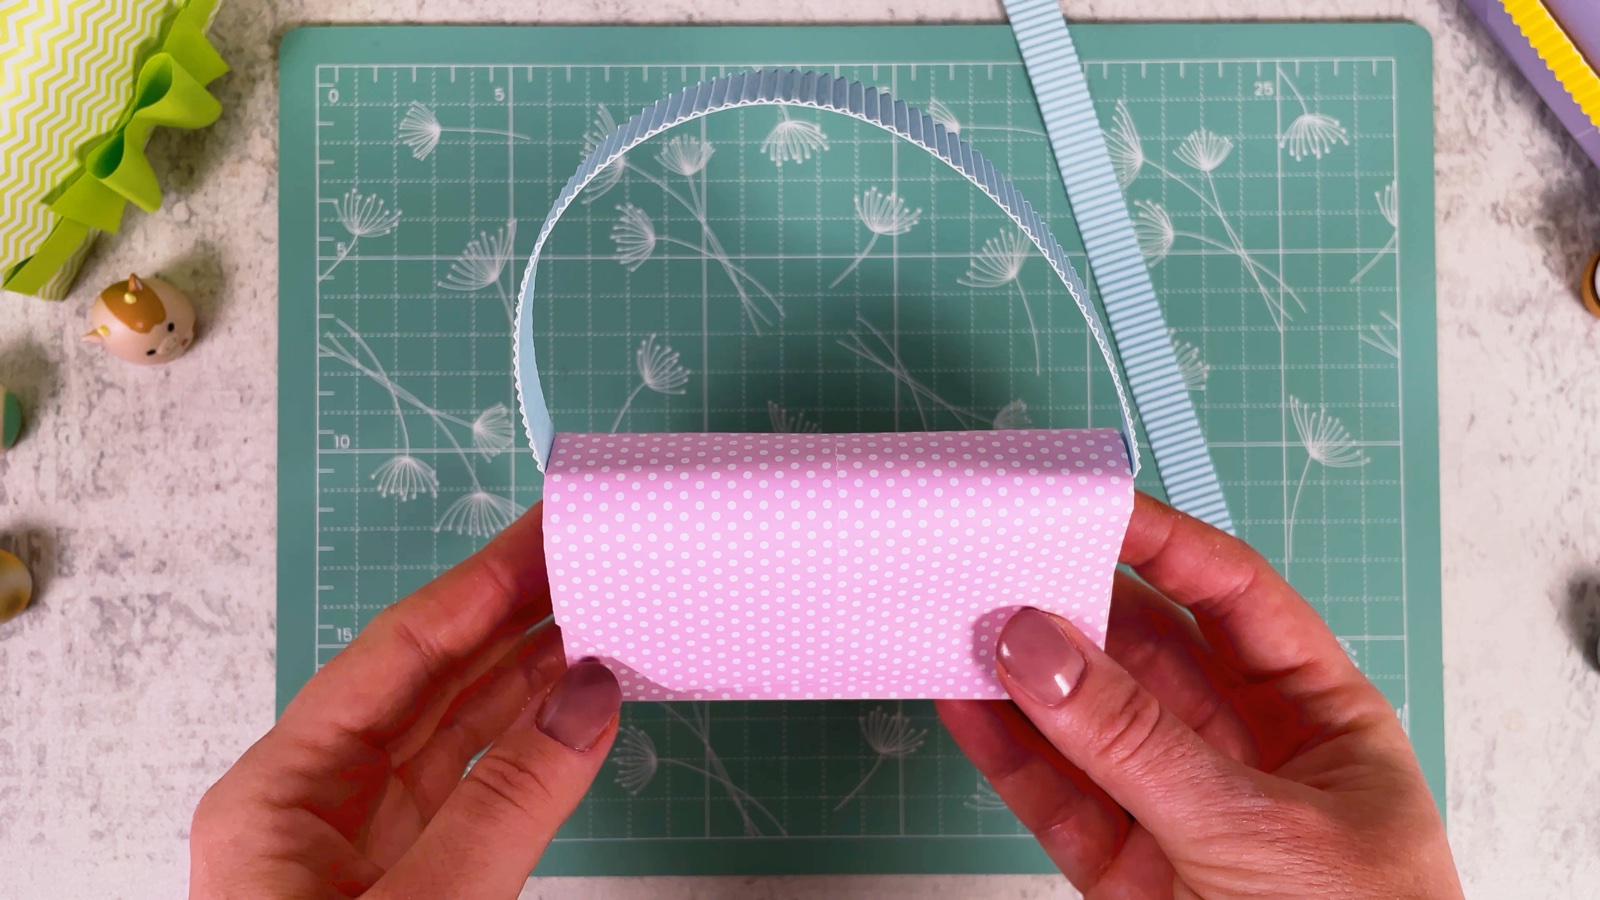
Add the handle
Open the flap. Glue one end of the handle strip inside each side of the purse, then close the flap again.
- 15
Wrap the band
Wrap the second strip around the front of the purse, just under the flap. Tuck the ends in at the sides and glue them.
PART 3 OF 3
The bow
- 16
Fold a paper rectangle
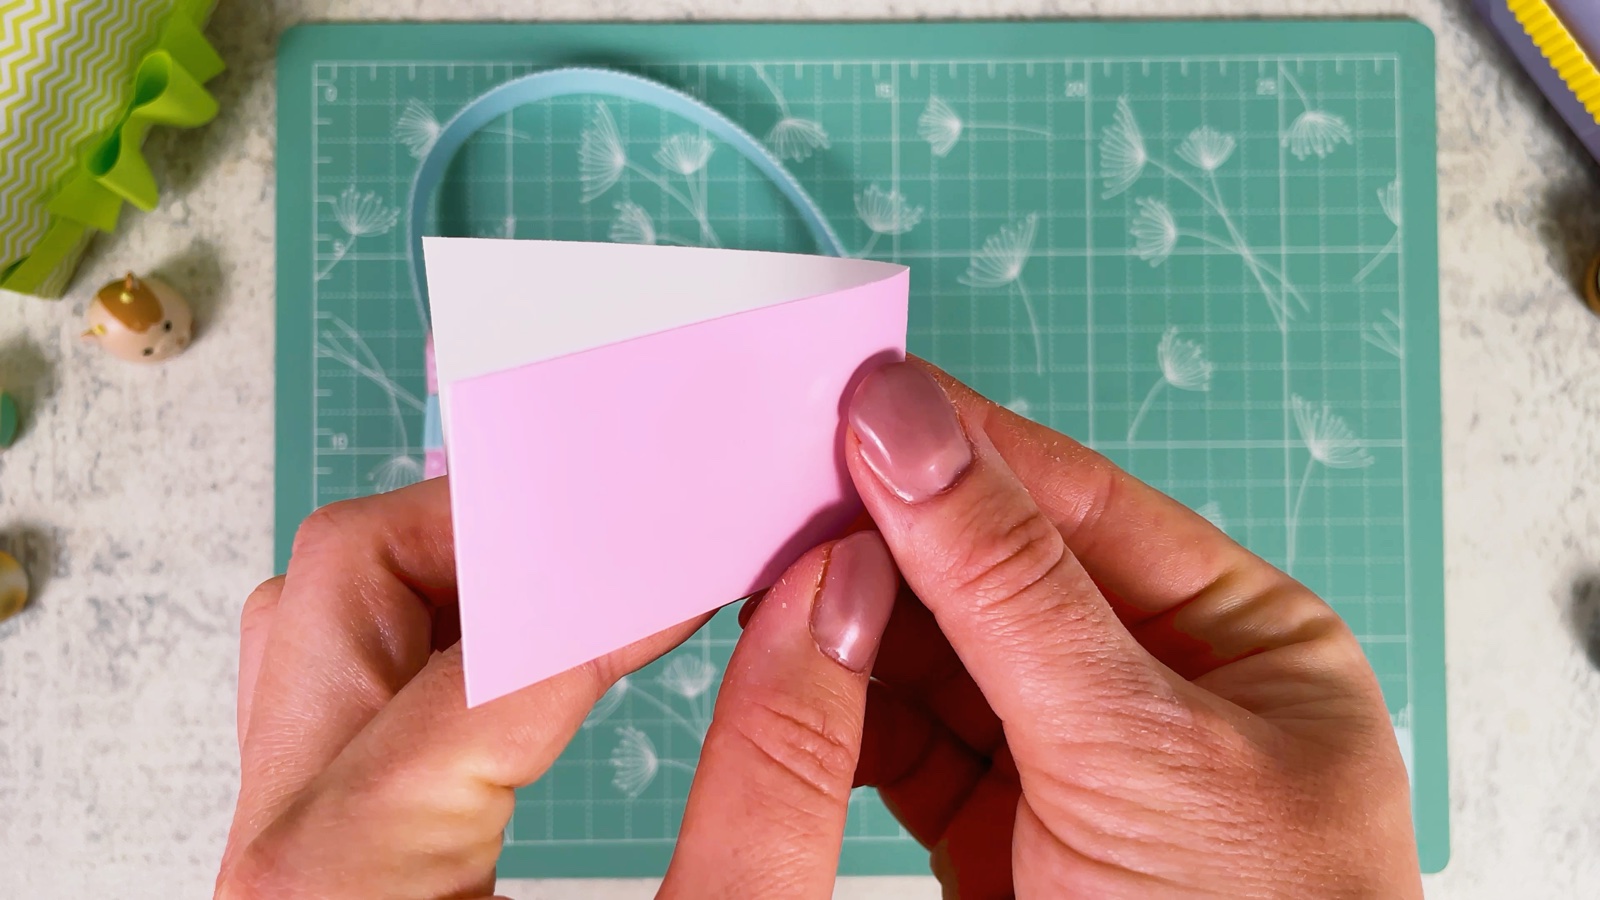
Cut a rectangle from pink paper and fold it in half.
- 17
Cut the bow shape
Cut a wavy shape along the open side, so it is narrow in the middle and wide at the ends.
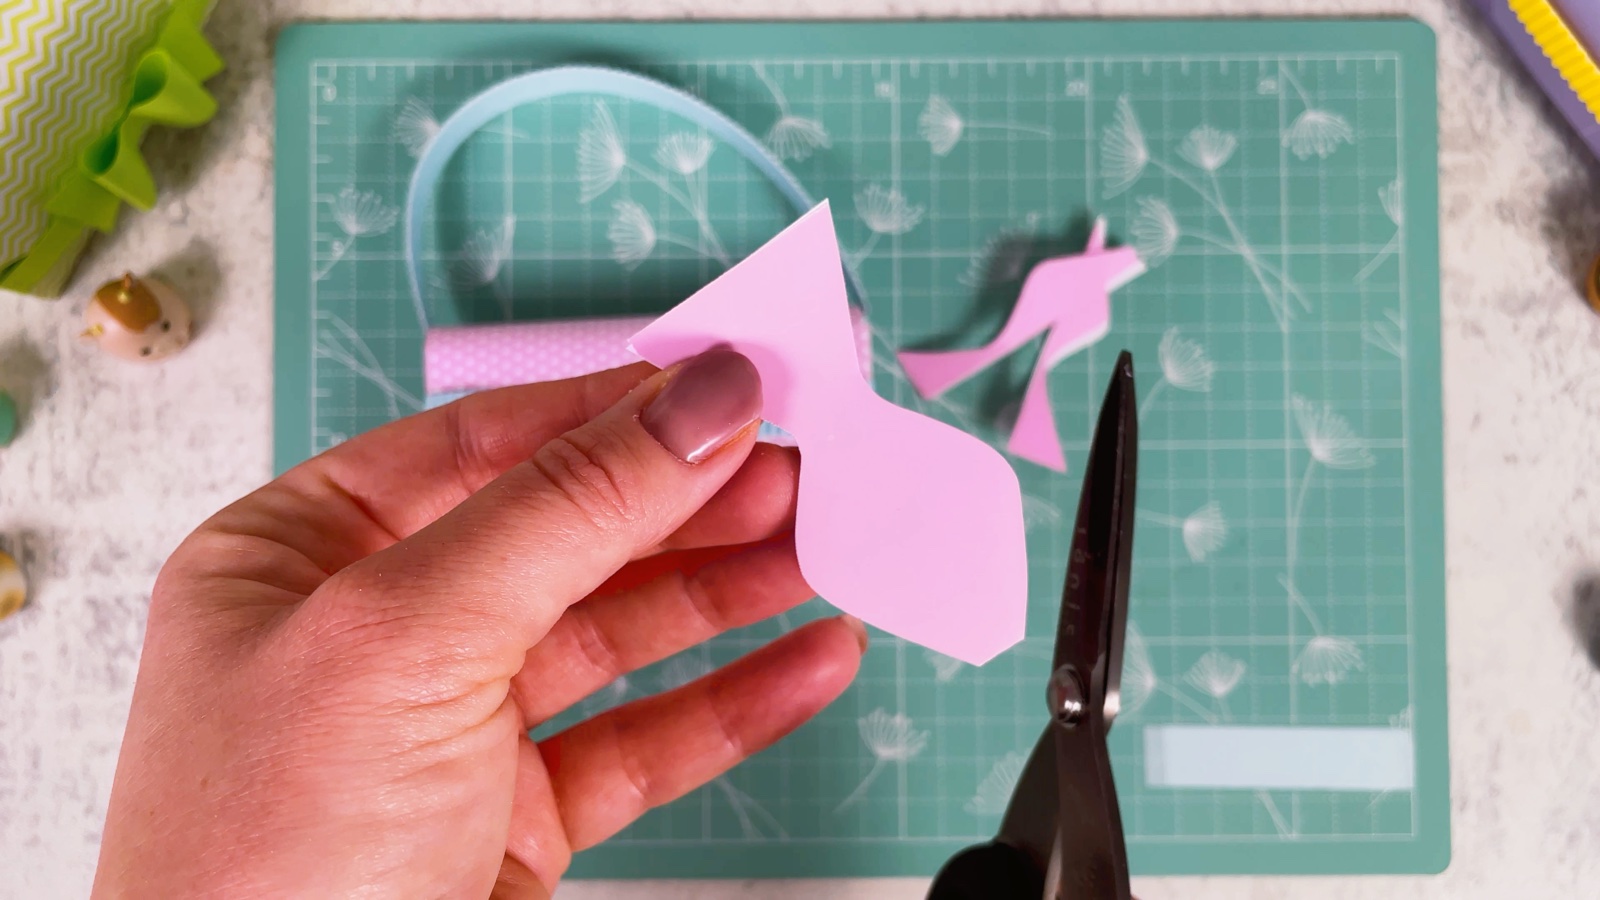
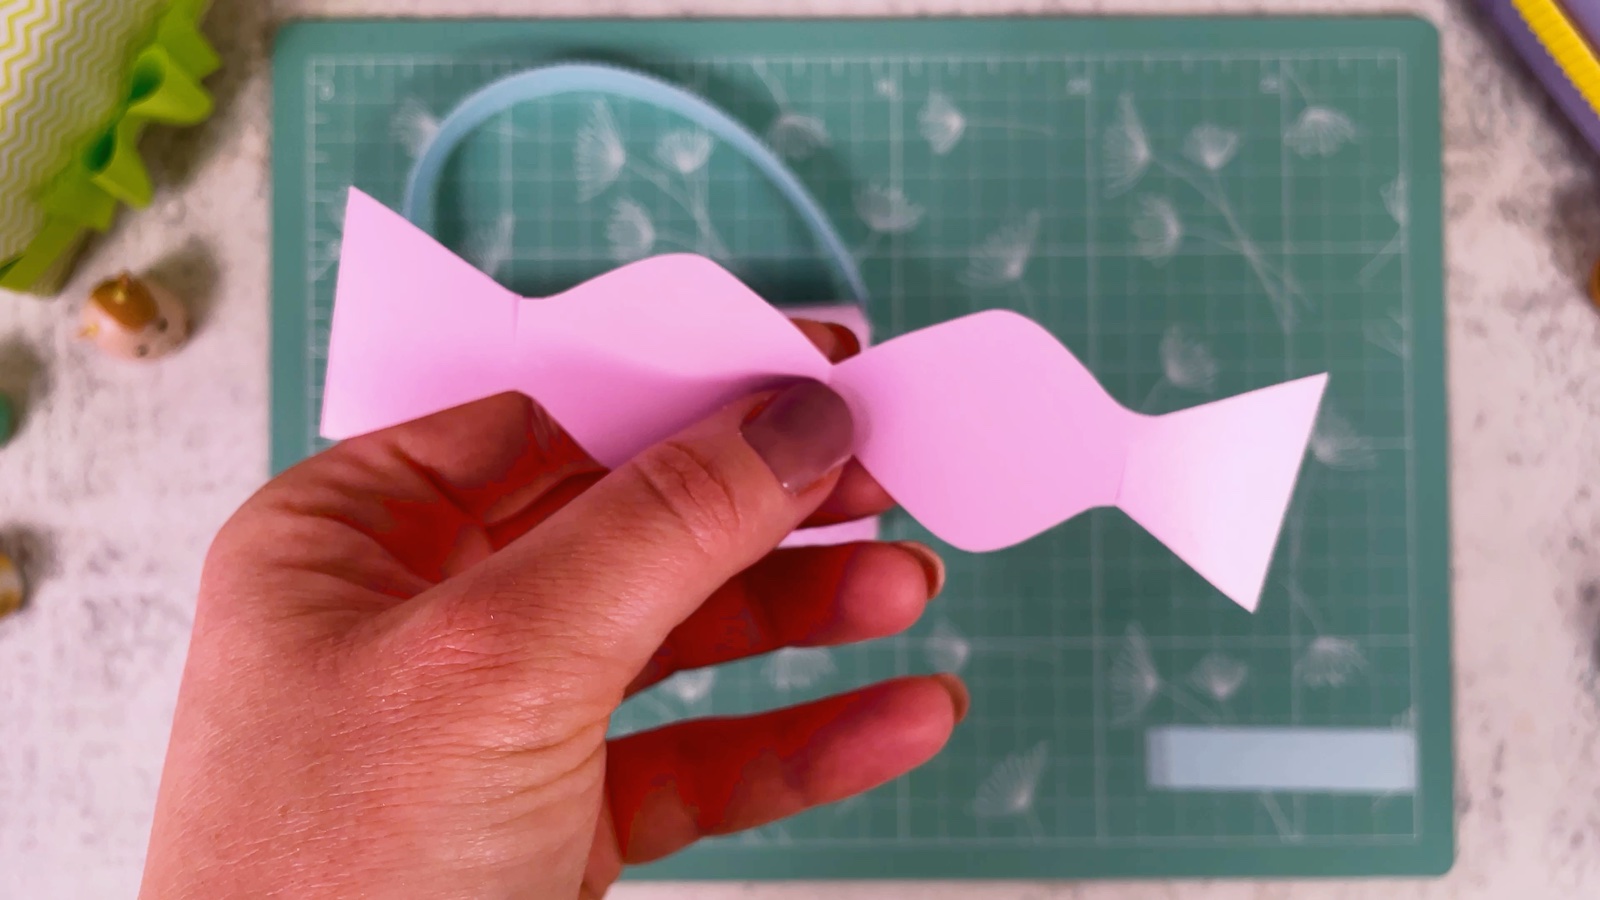
Open it up. Now you have a long bow shape, like a wrapped sweet.
- 18
Fold the bow
Fold both ends to the middle to make two loops, and glue them in the centre.
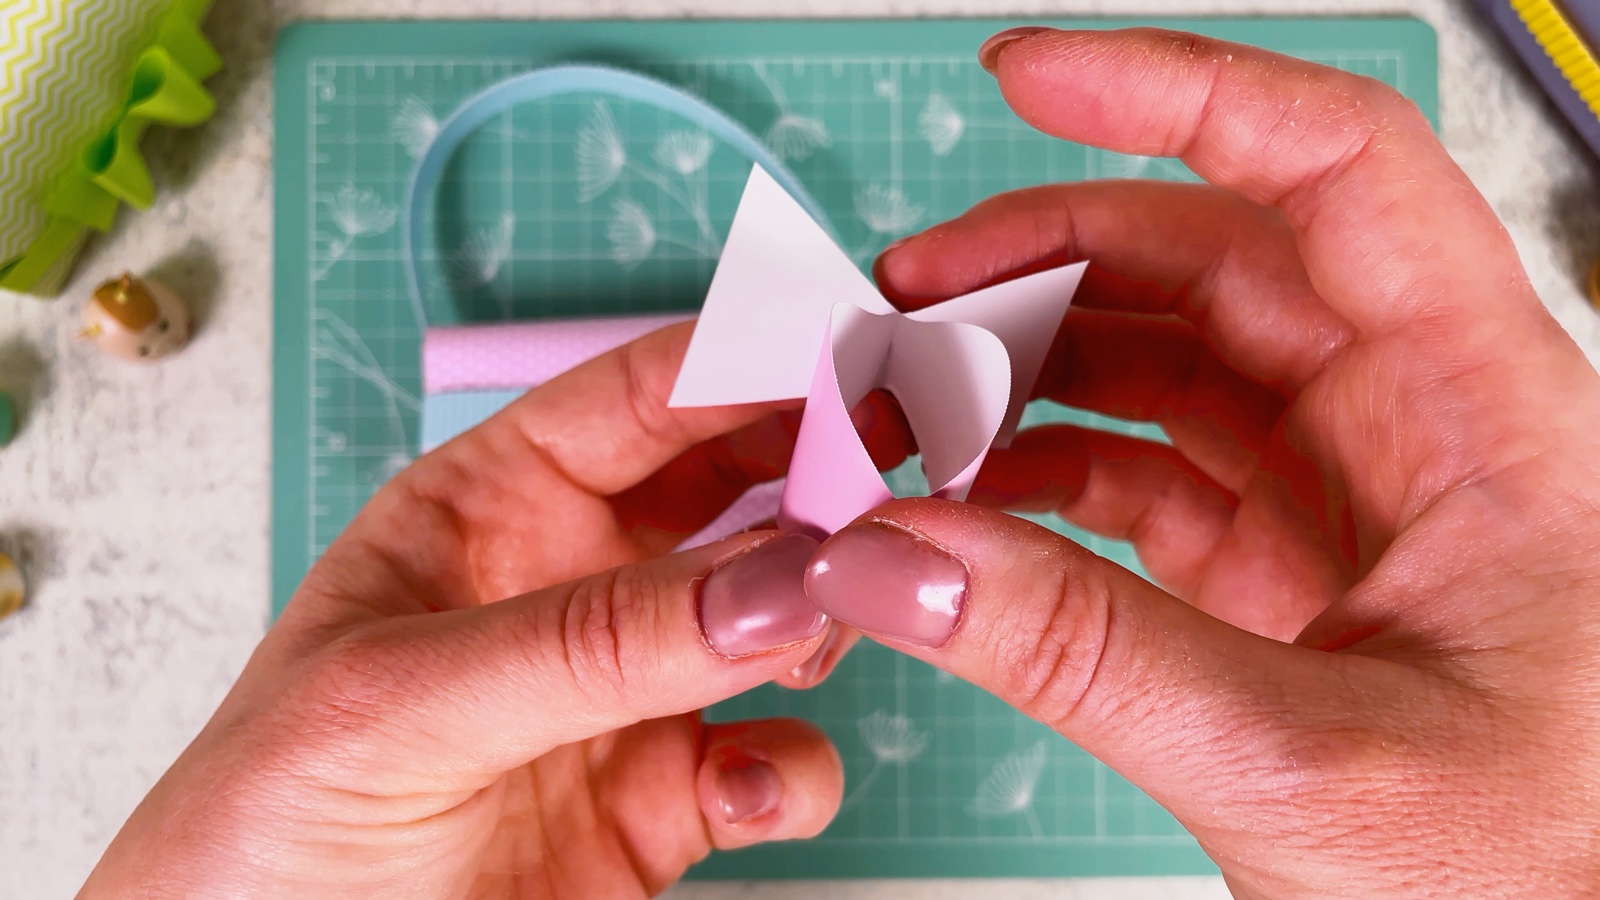
Pinch the middle a little so the bow stands up.
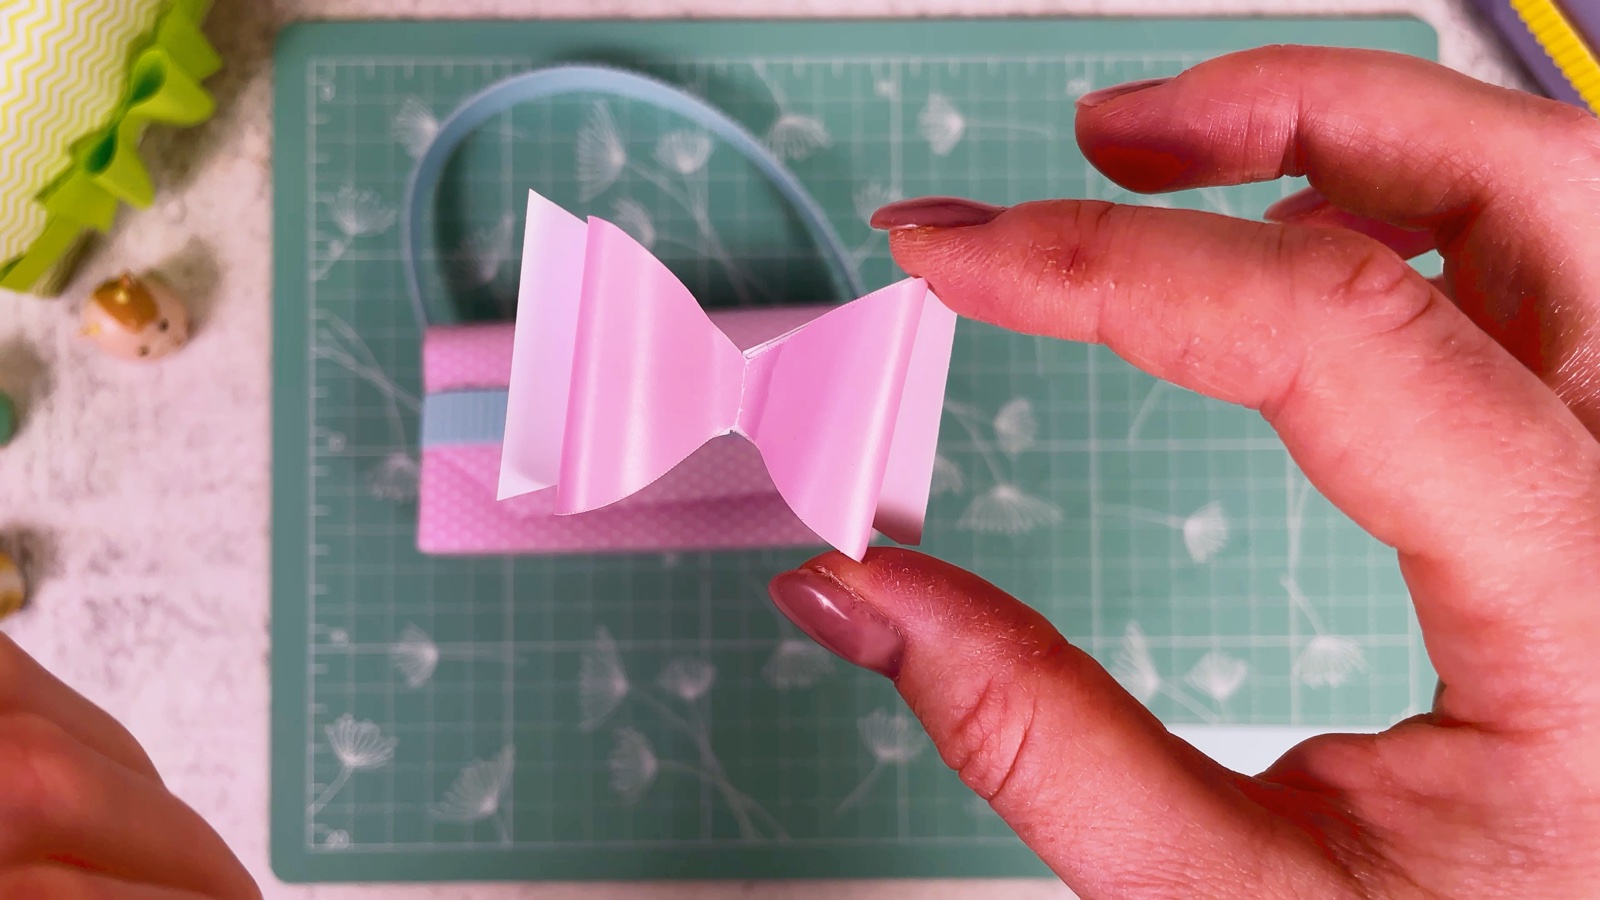
- 19
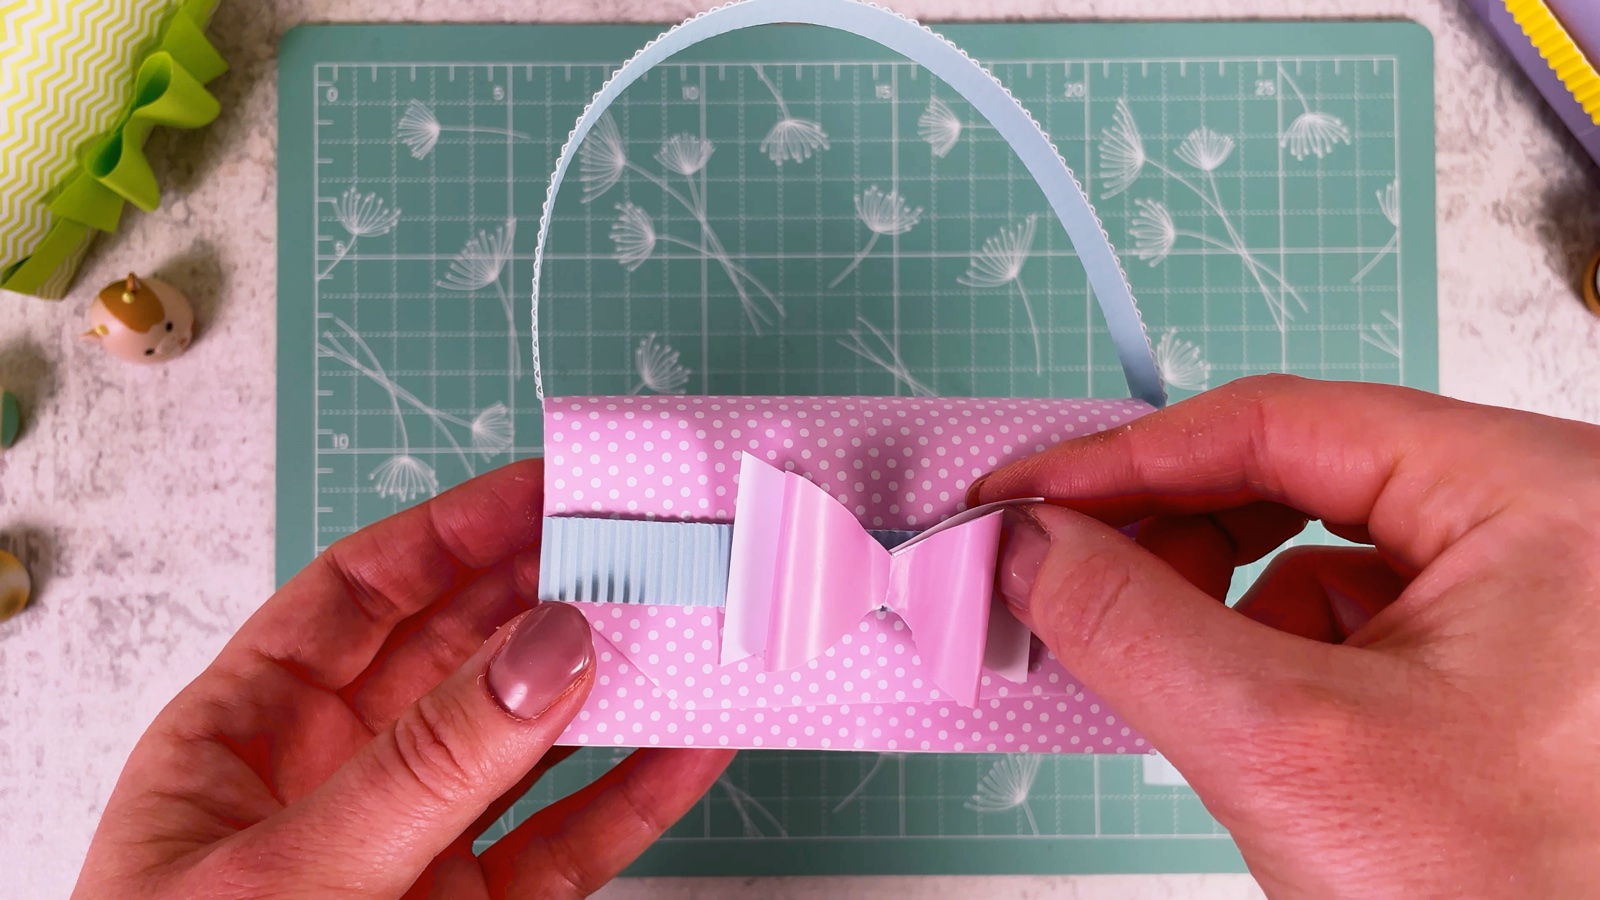
Glue the bow on
Glue the bow onto the middle of the band.
- 20
Add a gem
Stick a heart gem, a crystal or a sticker in the centre of the bow.
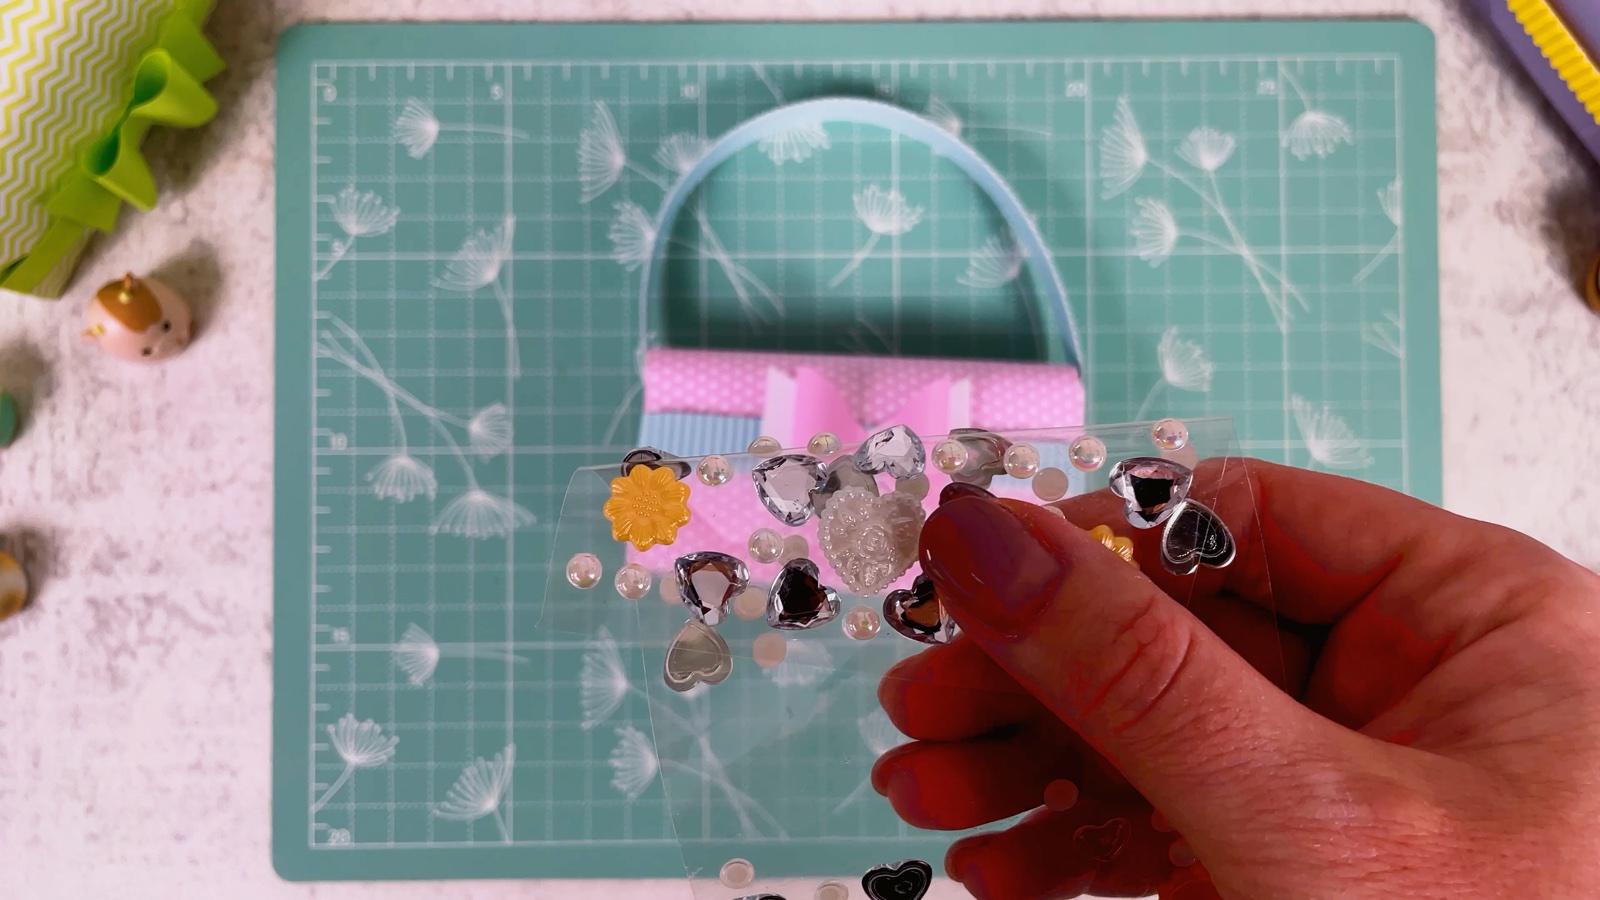
Your mini purse is done. Open the flap and fill the pocket with tiny treasures.
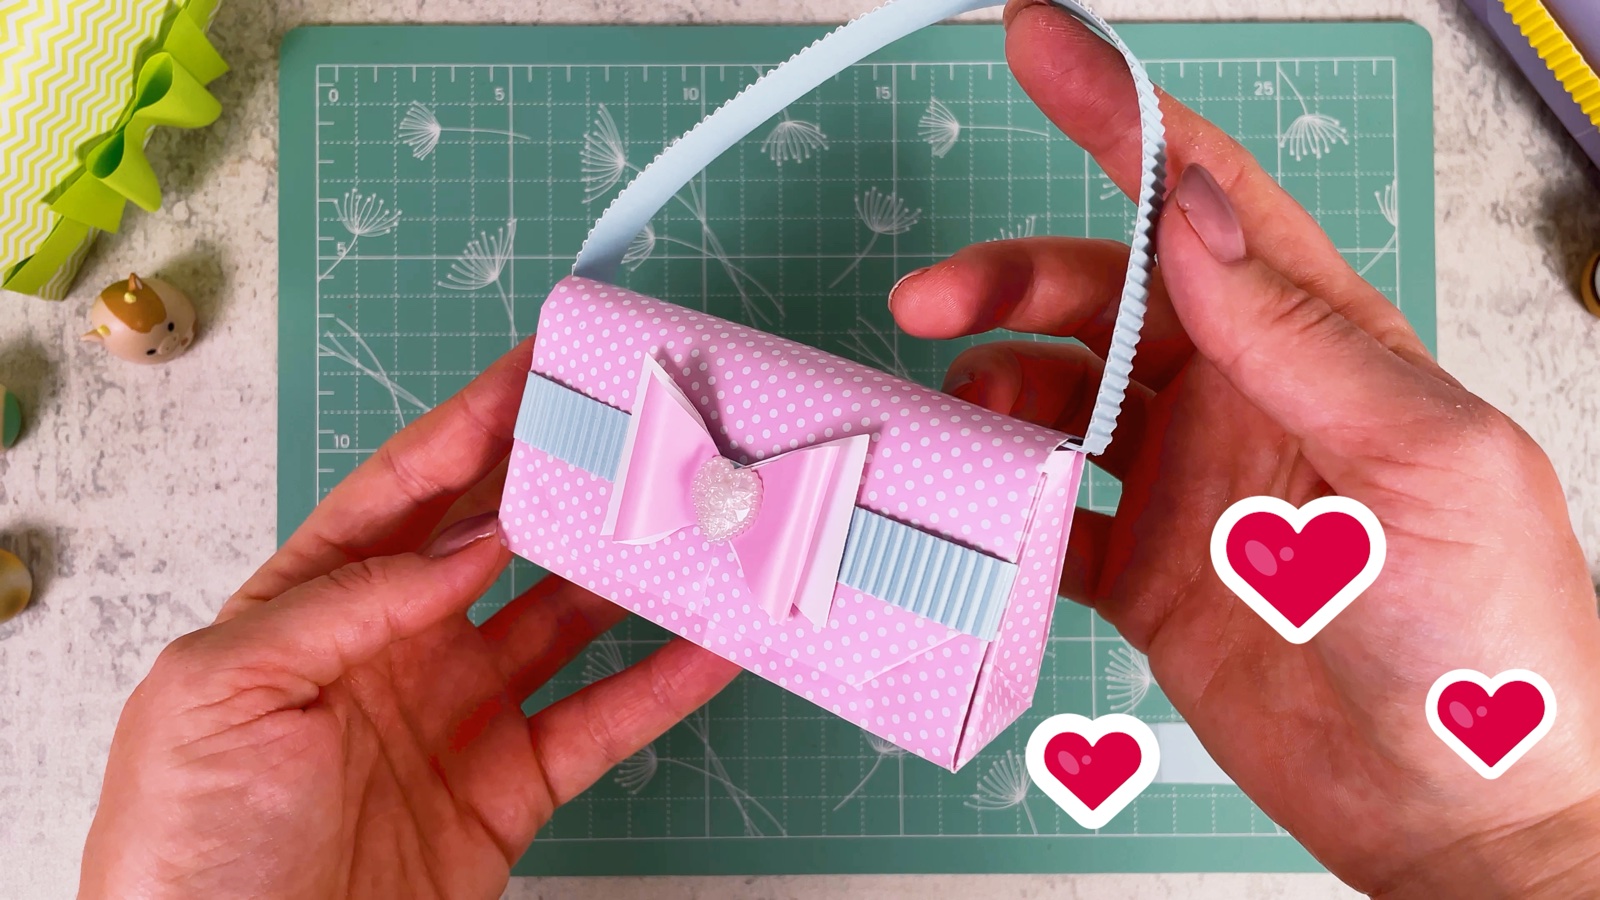
Your mini paper purse is ready.
THREE LITTLE TIPS
Make it easier.
- Sharp creases make a neat purse. Press every fold with your nail. The bottom and the corners only fall into place when the creases are clear.
- Paper weight matters. Use thin patterned paper, about 80–120 g/m² (about 20–32 lb bond or 50–80 lb text). Card is too stiff to fold the corners.
- Make a matching set. Try different papers and handle colours, like a green zigzag purse with a green bow or a purple one with a yellow handle.

A CUBI MINI MOMENT
What will you keep in your purse?
Cubi made a purse for Mini and hid a little surprise in the pocket. What will you hide in yours?
A tiny folded note that says “Let’s make another one together!”
Loved making it?
Catch the next make first, or save this one for a rainy day.