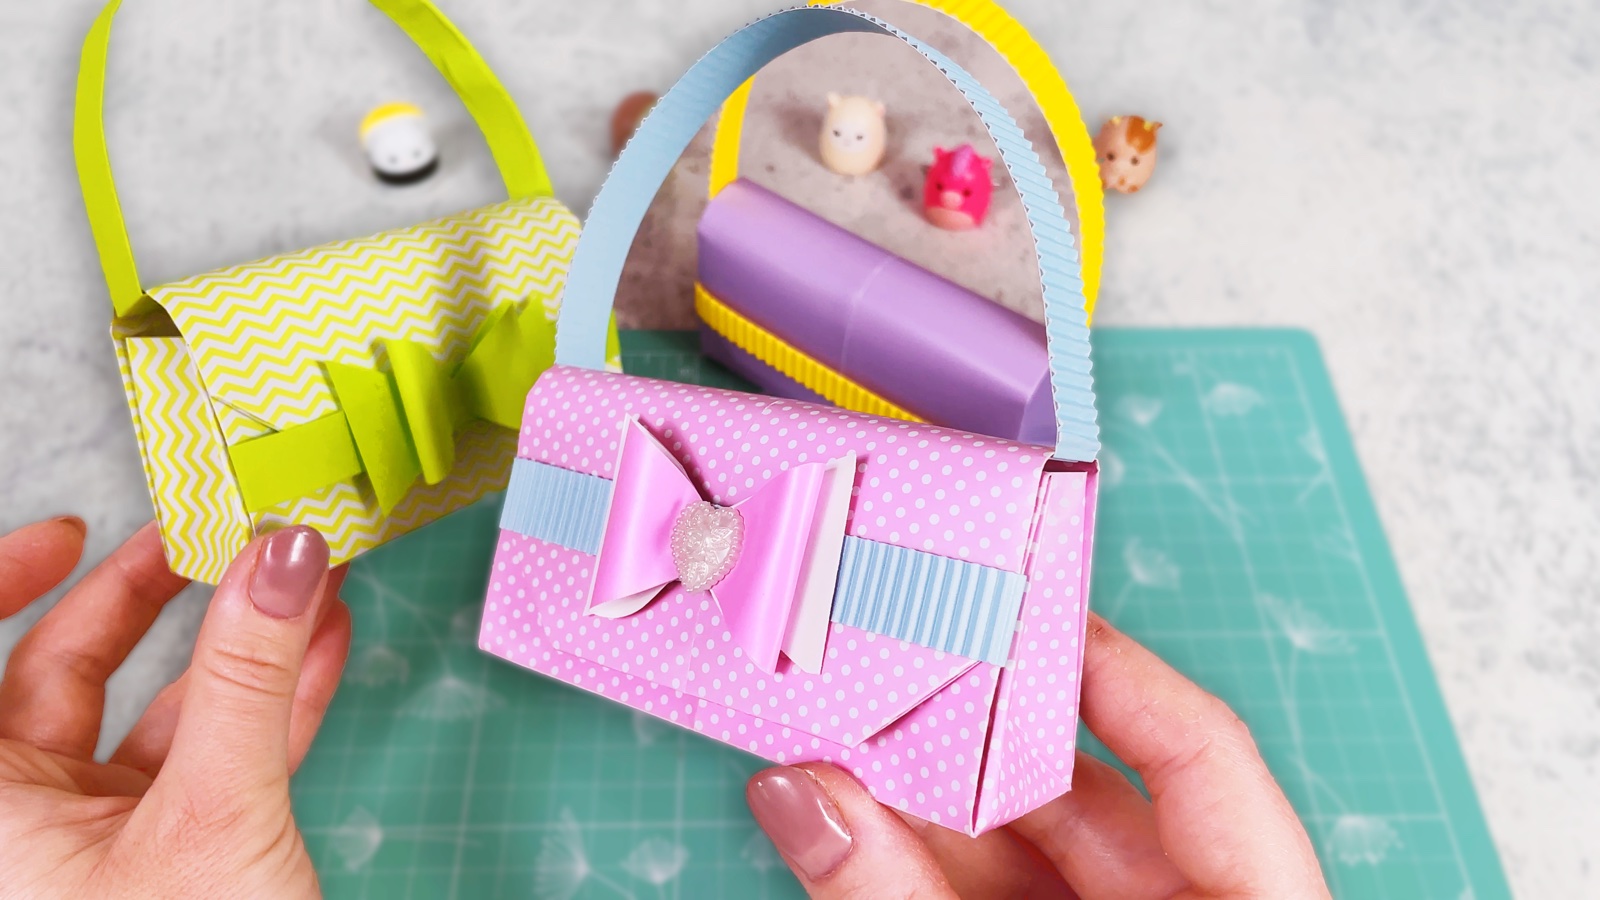
Let’s make a cute mini shopper bag together, folded from one sheet of paper with the origami method. It is just the right size for tiny things: Squish-a-Longs, hair ties, hair clips, mini gadgets and other cute little bits.
Decorate it in your favourite style, for example with Hello Kitty, pastel stars and bows, or in a Pipp from My Little Pony mood. Stickers, little wings, music notes: everything looks super sweet on a tiny bag. Cubi says: “Let’s make something tiny that brings a lot of joy!”
BEFORE WE START
What you need.
Materials
- Patterned paper
- Stickers or decorations
Tools
- Scissors (optional)
- Ruler
STEP BY STEP
Let’s make it.
- 1
Make a square
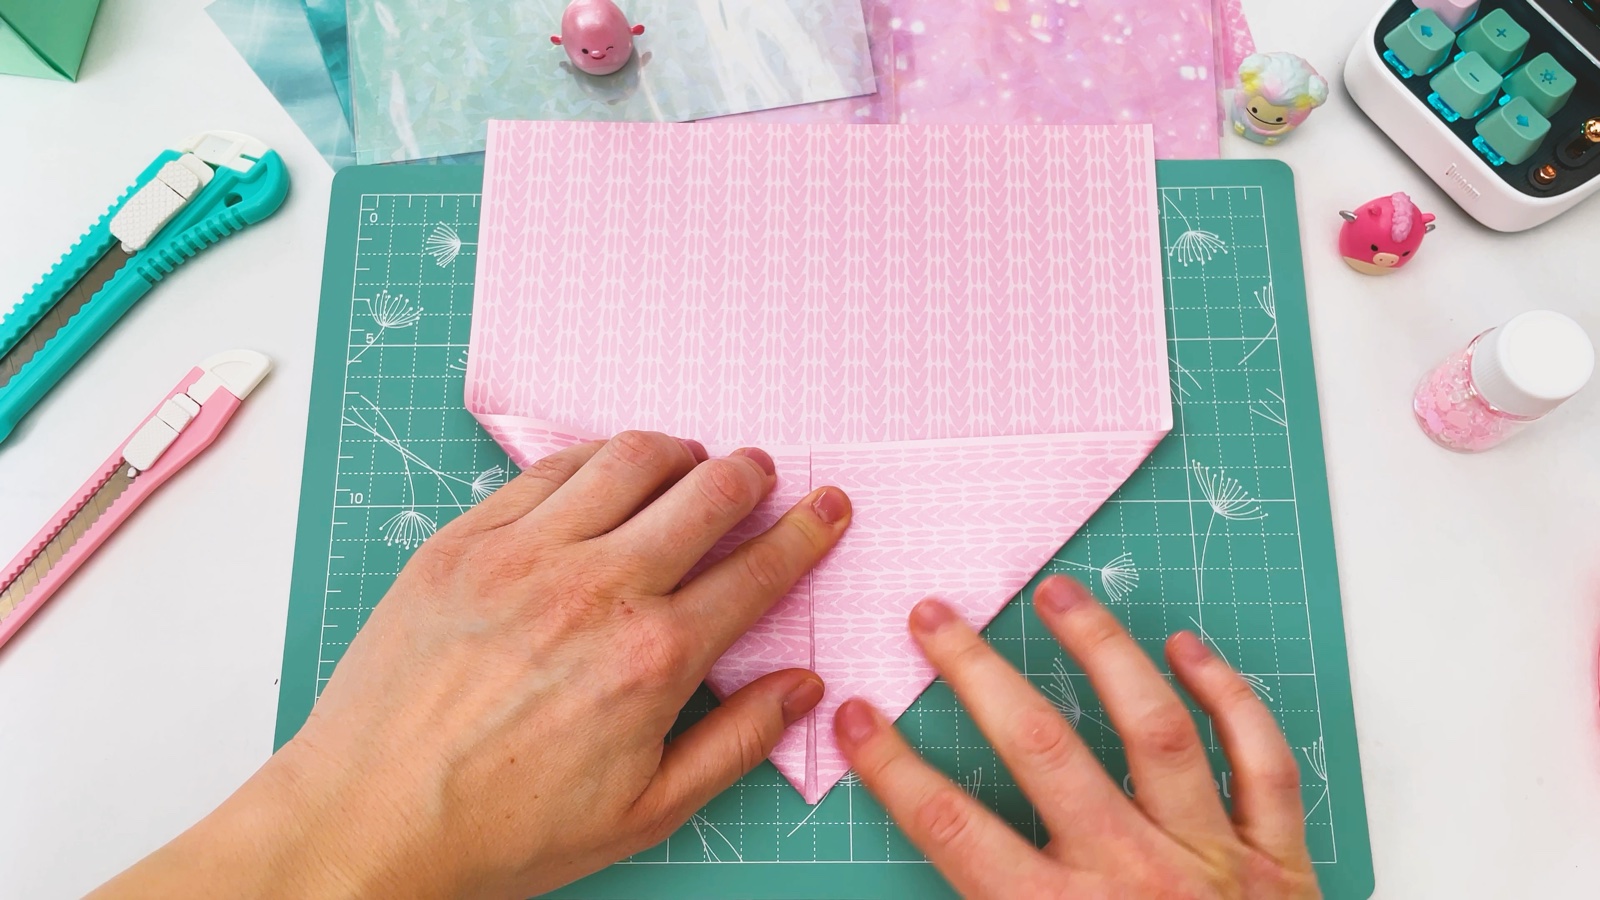
Fold one corner of the sheet down so the short edge lies along the long edge. You get a triangle and a strip of paper above it. Cut or tear off the strip and keep it: it will become the handles.
- 2
Crease both diagonals
Open the square. Fold it corner to corner, press a sharp crease and open it. Do the same with the other two corners. Now you have an X in the middle.
- 3
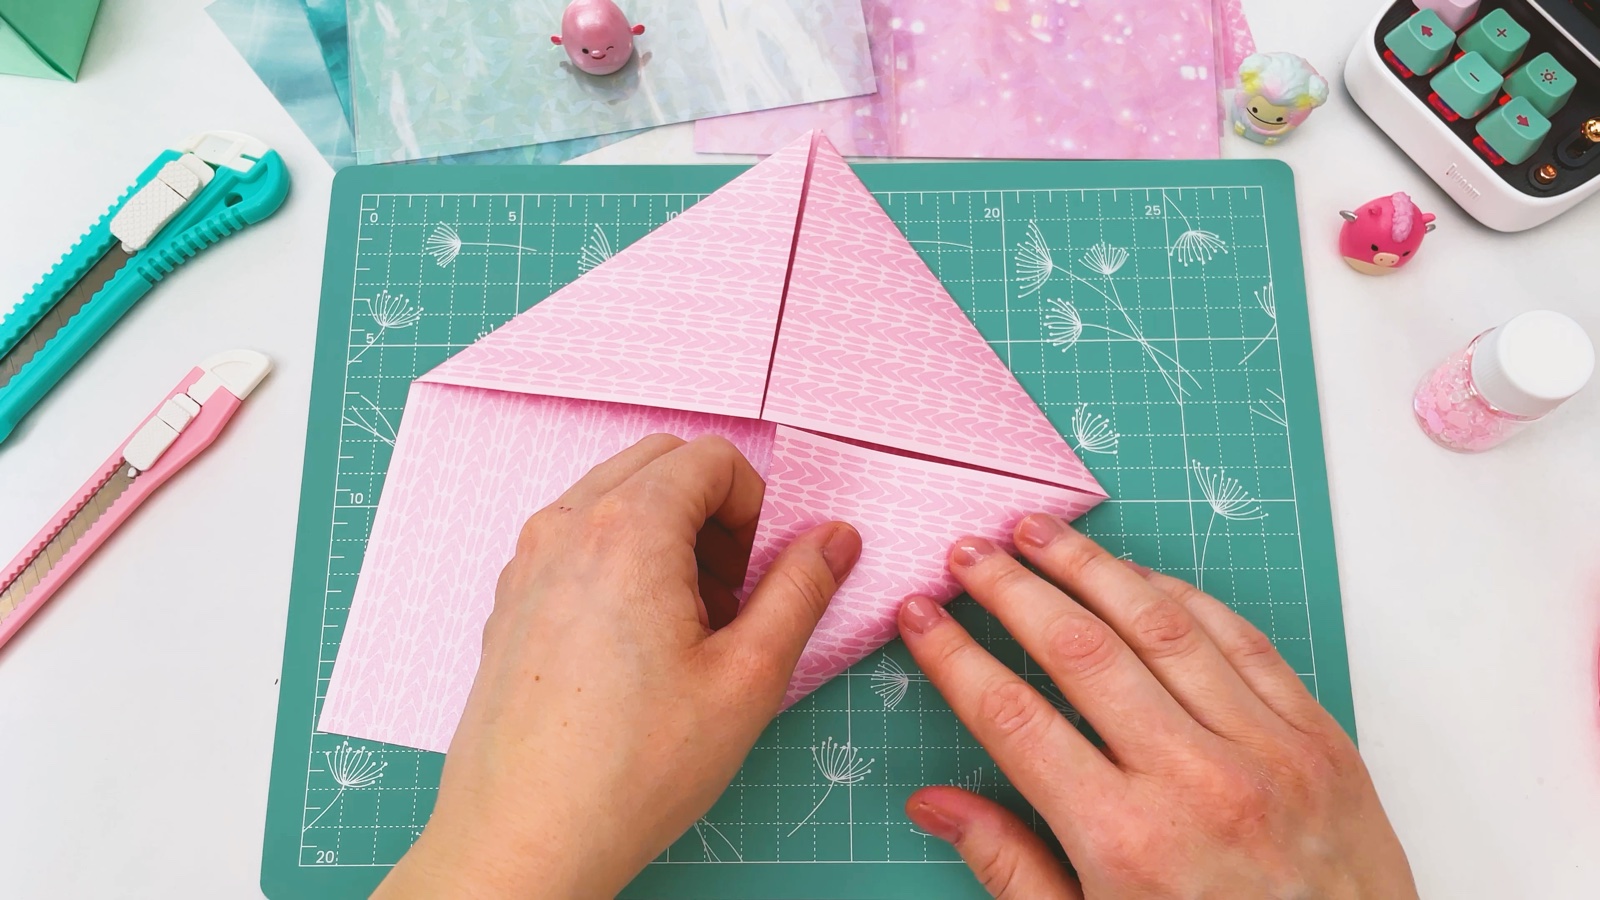
Fold the corners to the centre
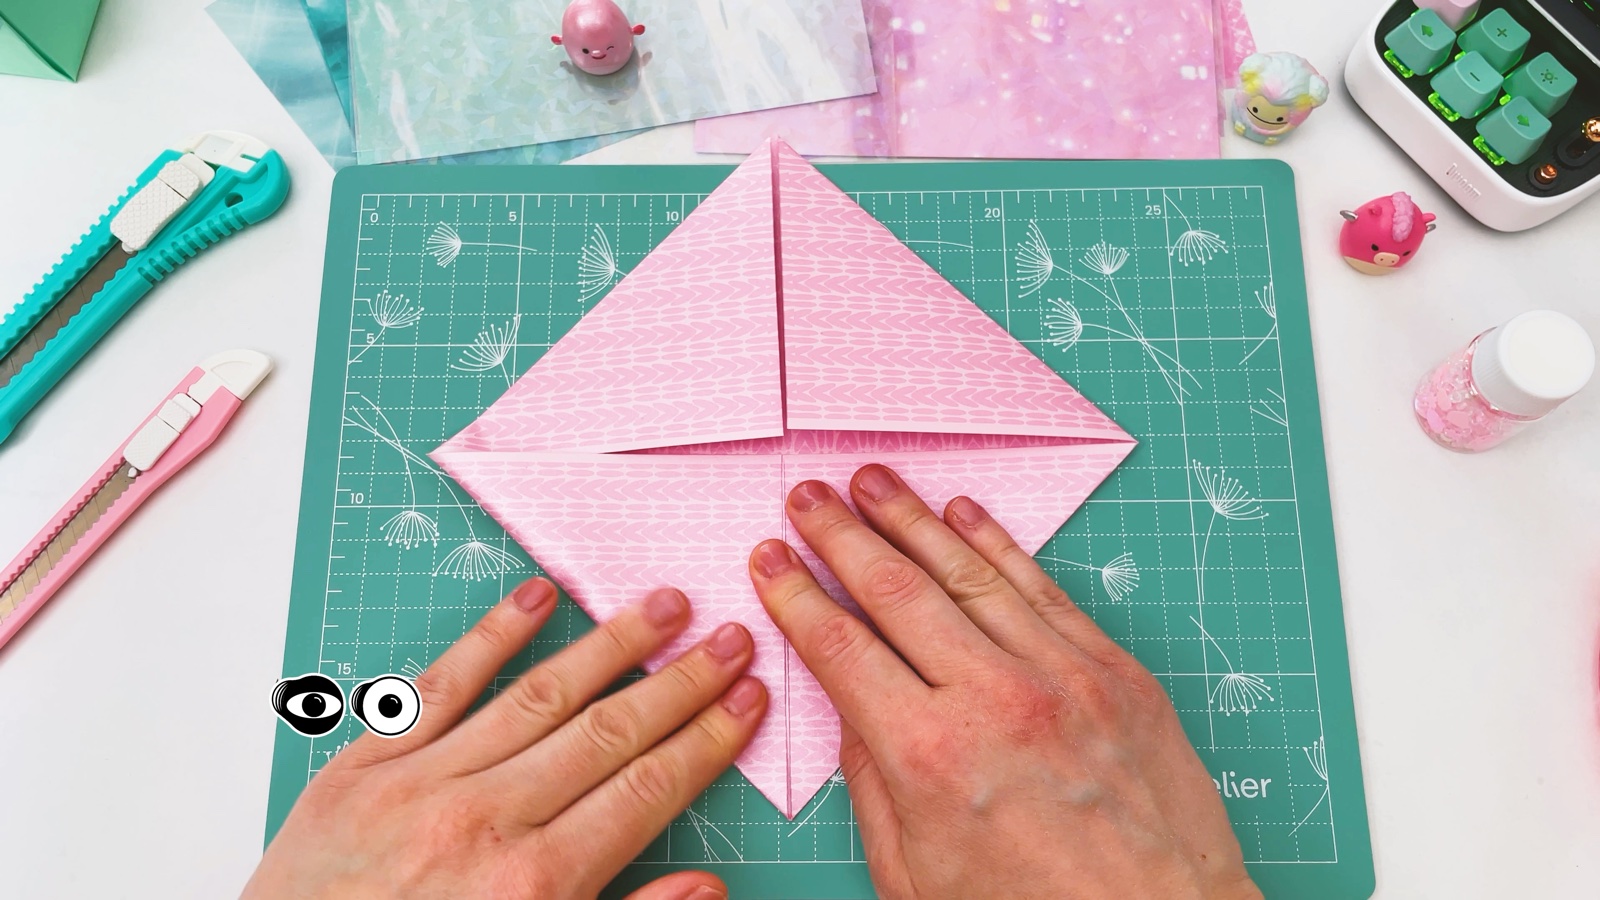
Turn the paper white side up. Fold all four corners to the middle, where the creases cross. You get a smaller square.
- 4
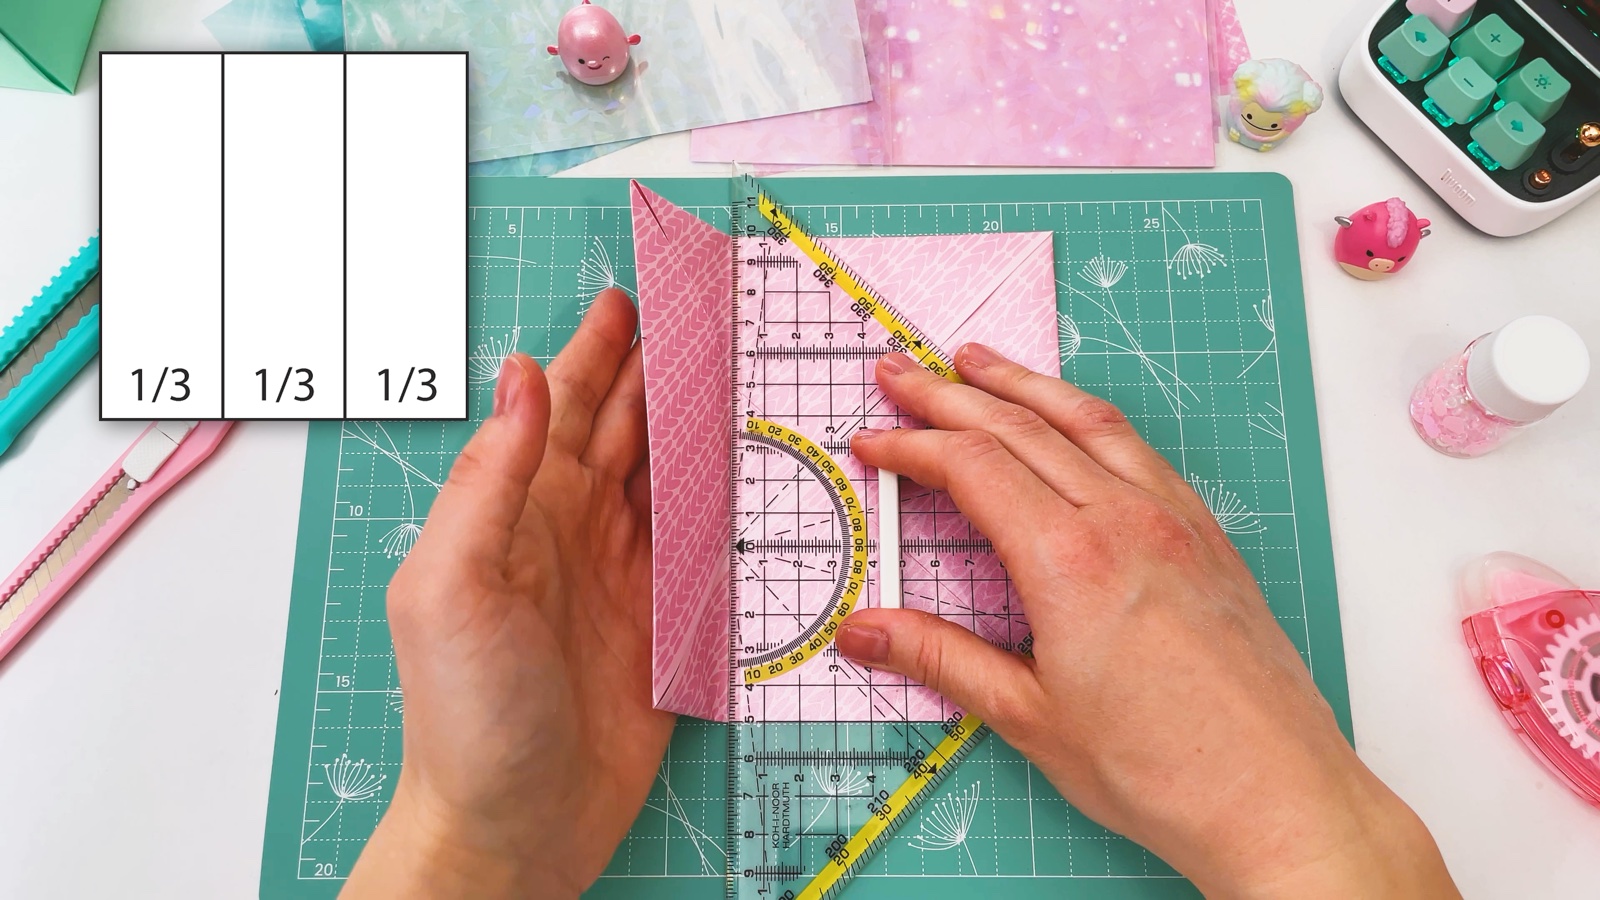
Fold into thirds
Divide the square into three equal parts. A ruler helps to find the lines. Fold the right side in to the first line.
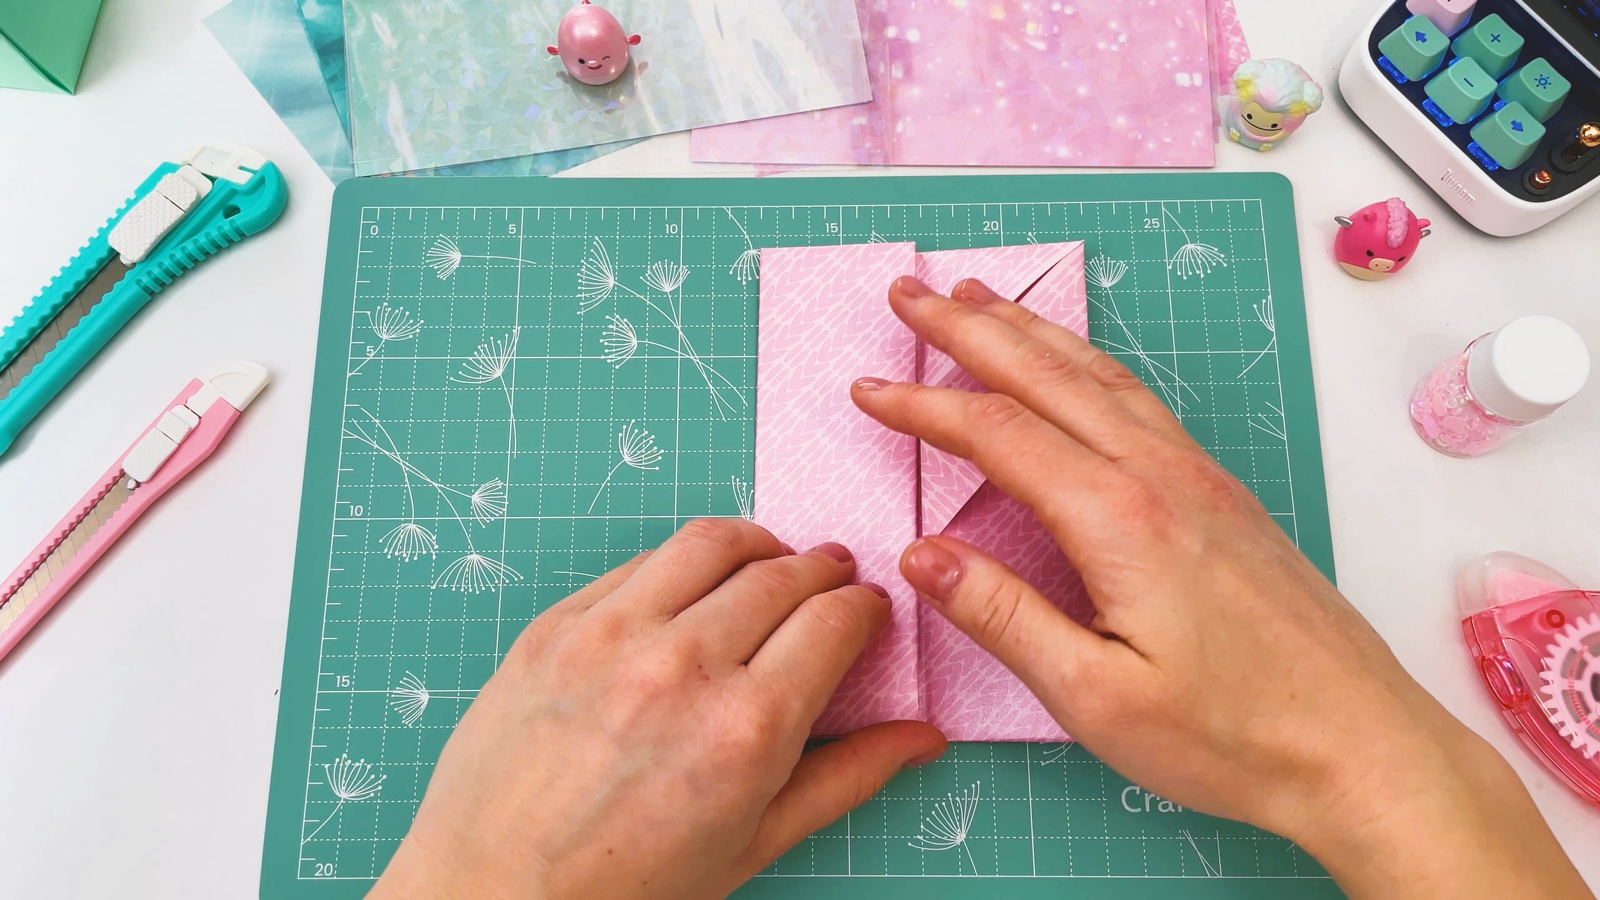
Fold the left side over it, so the square is folded in three like a letter. Press the folds well.
- 5
Fold into thirds the other way
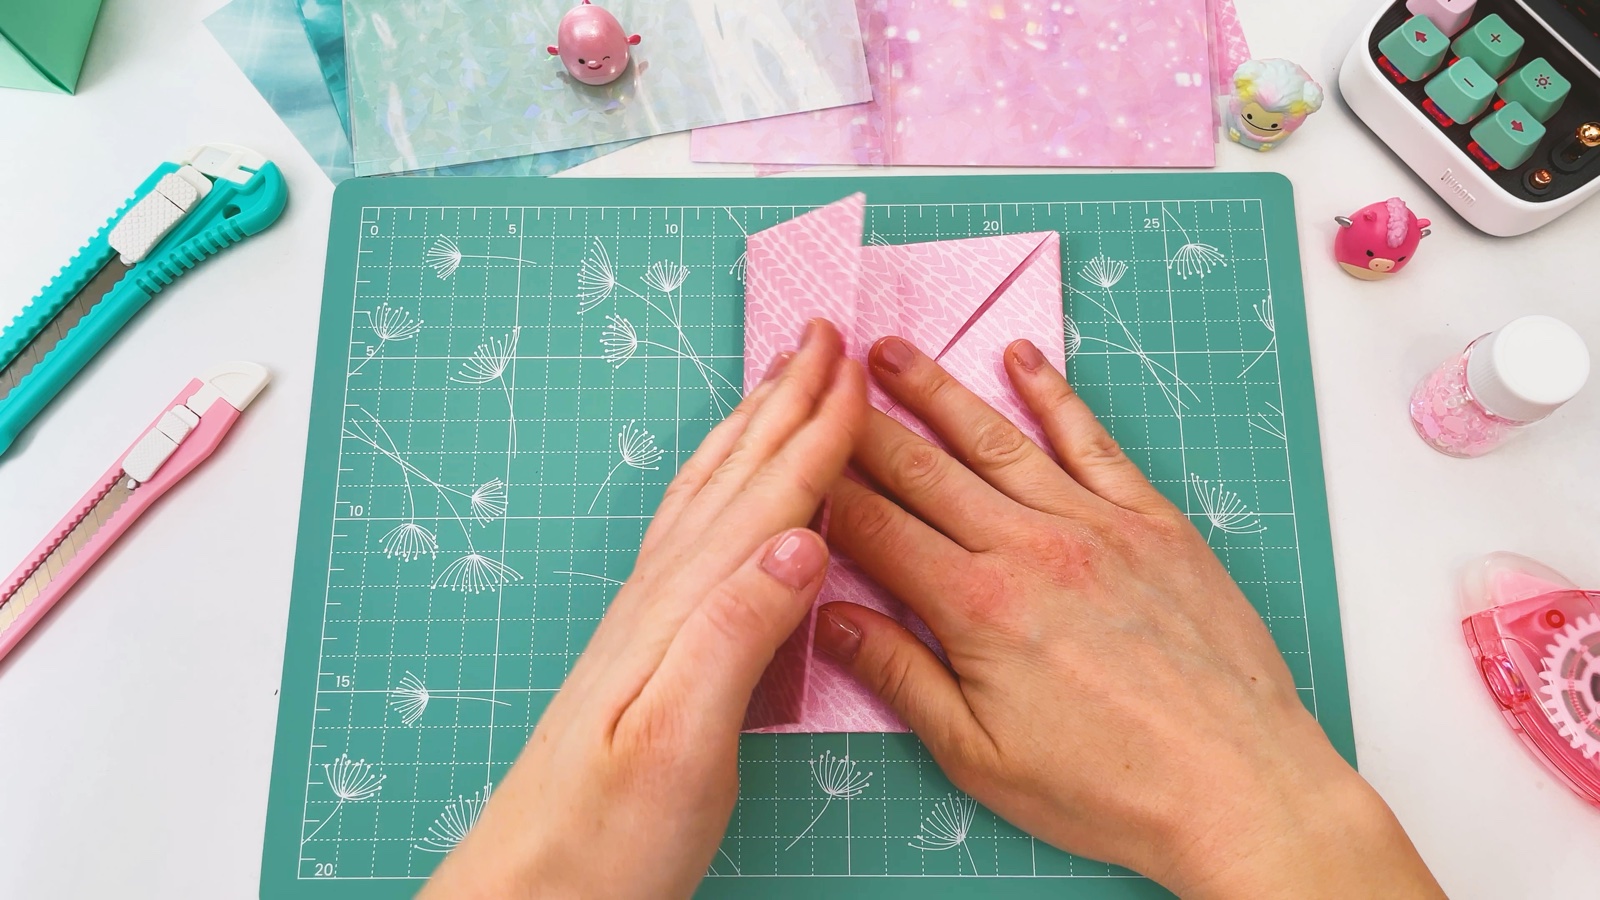
Open the thirds. Turn the square a quarter turn and fold it into thirds again, the same way. Press well and open it.
- 6
Open two corners
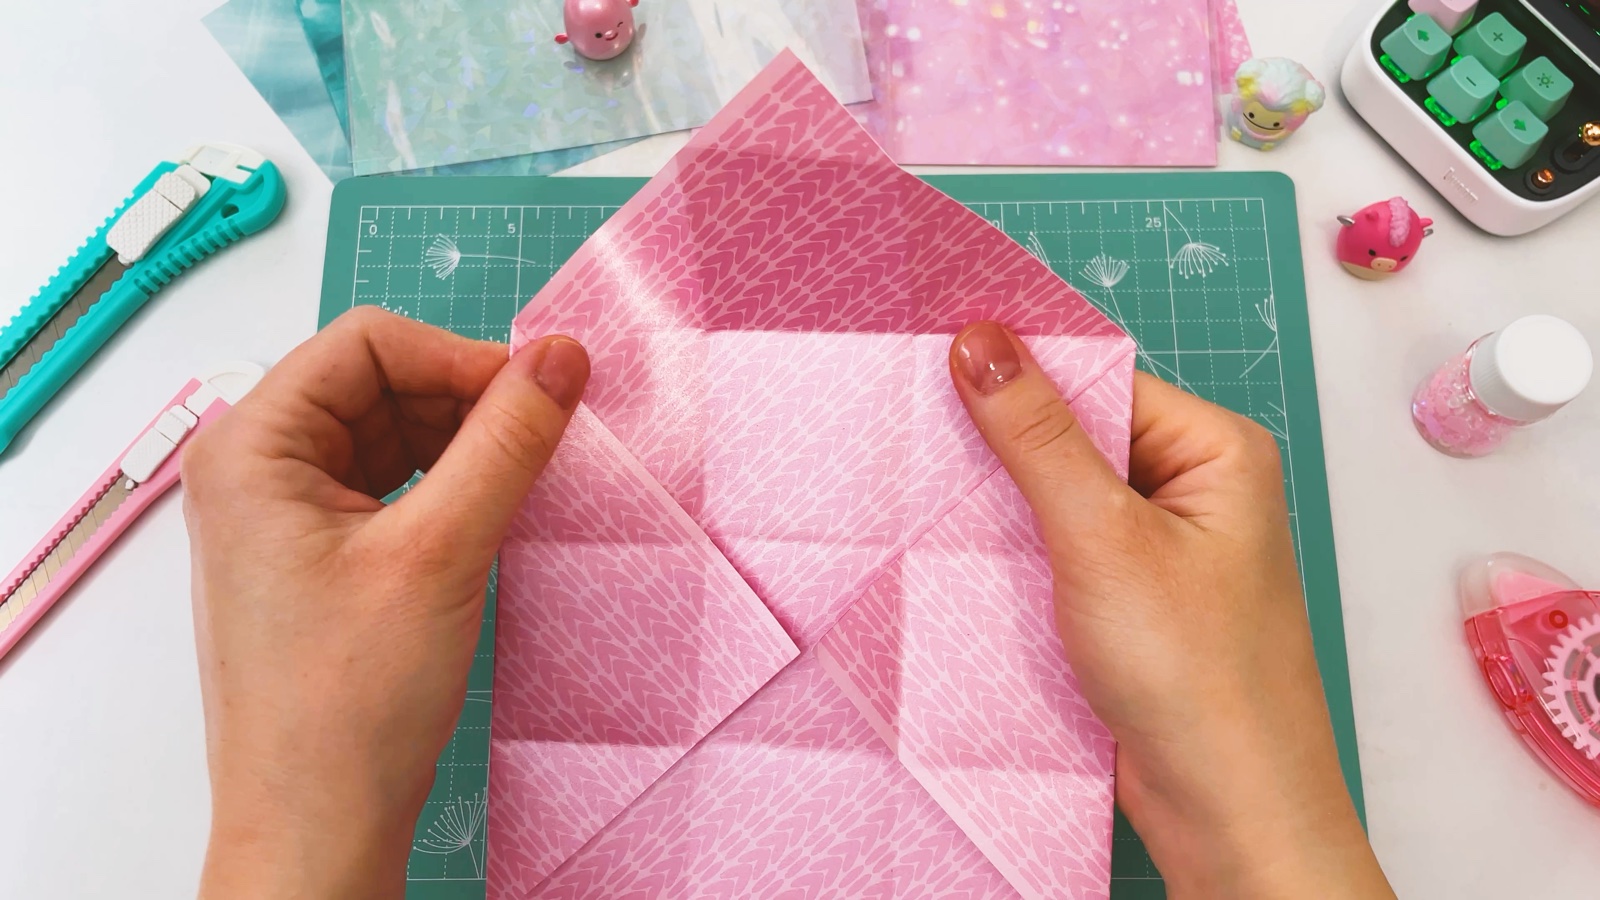
Unfold two opposite corners from the centre. The other two corners stay folded in.
- 7
Raise the walls
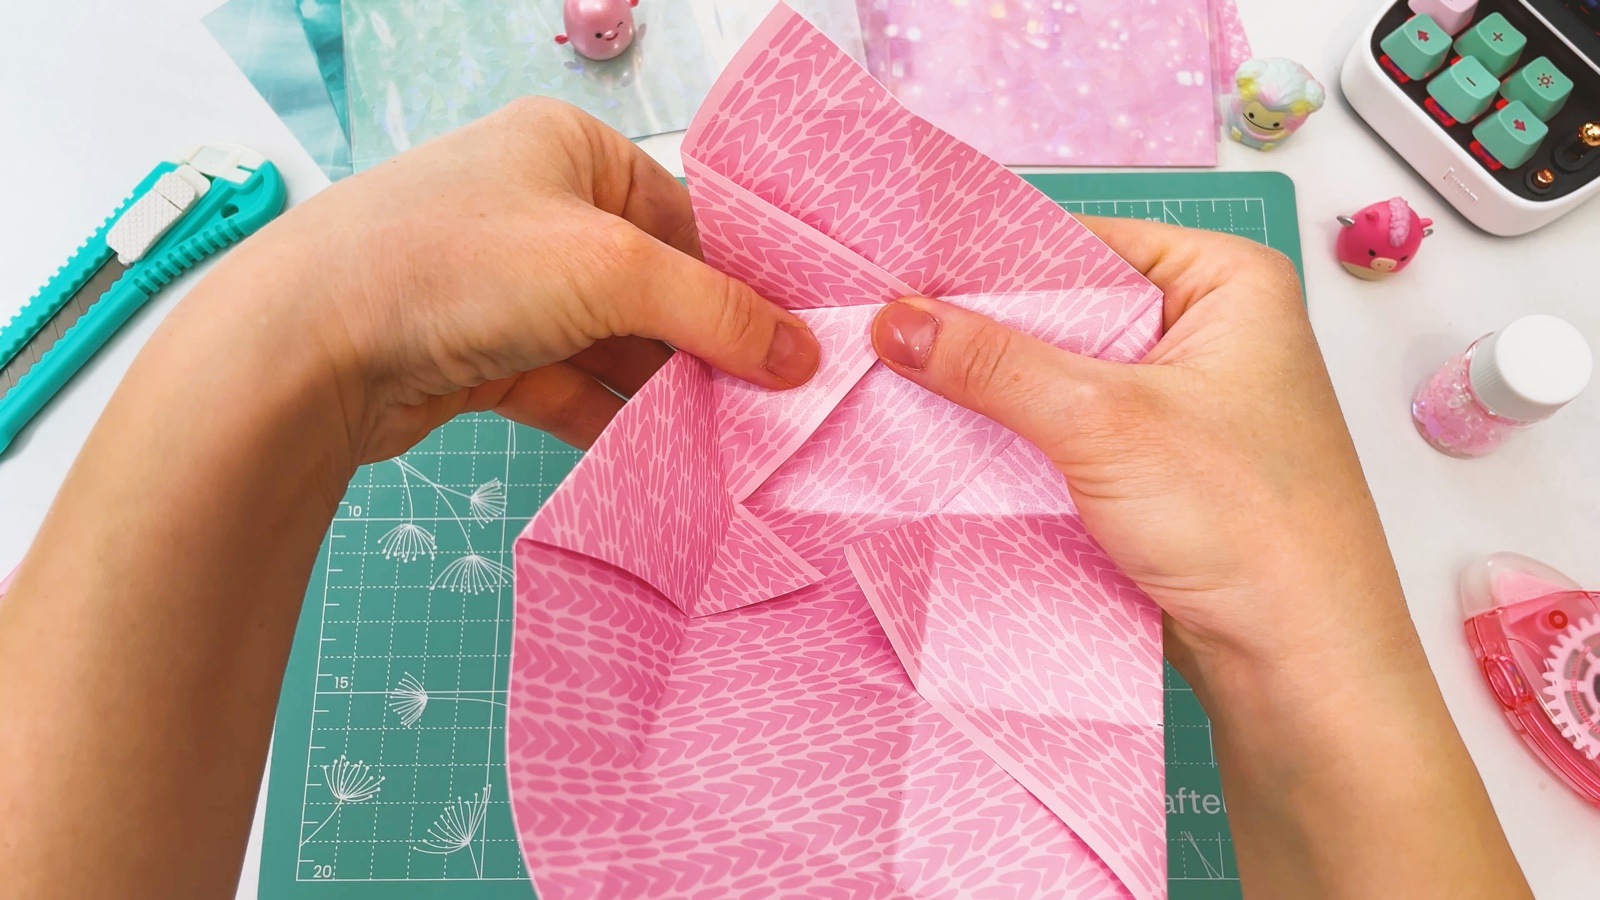
Lift the two long sides up along the third creases, so they stand like walls. Push the corners inward along the creases, so the open flap stands up at the end.
- 8
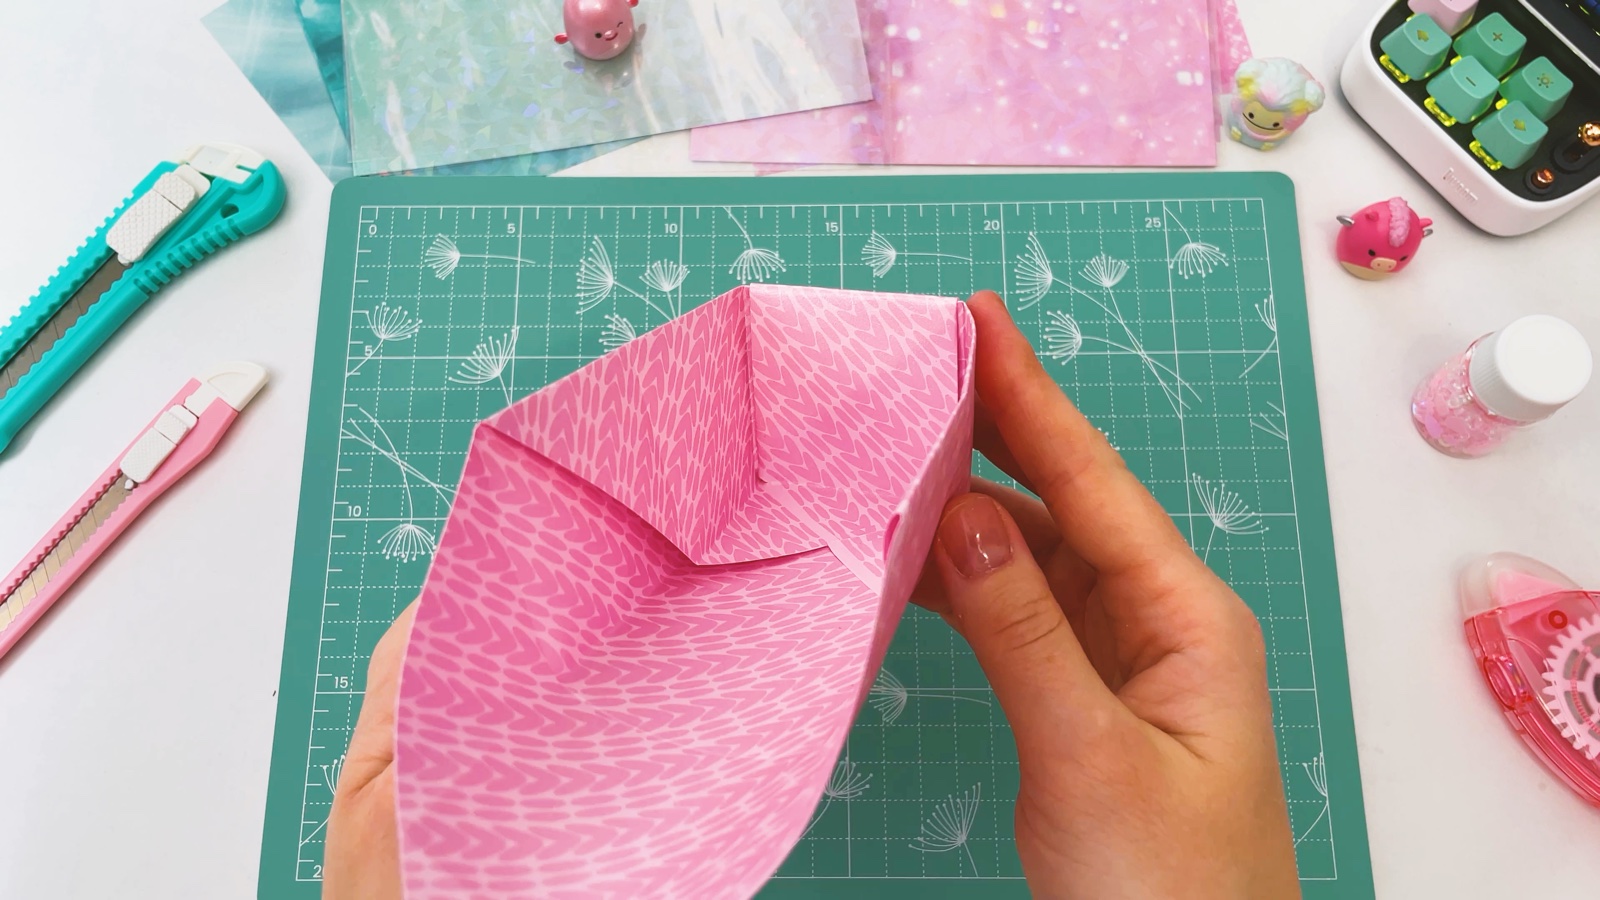
Wrap the flap over the end
Fold the standing flap over the end wall and down into the box. It holds the corners in place.
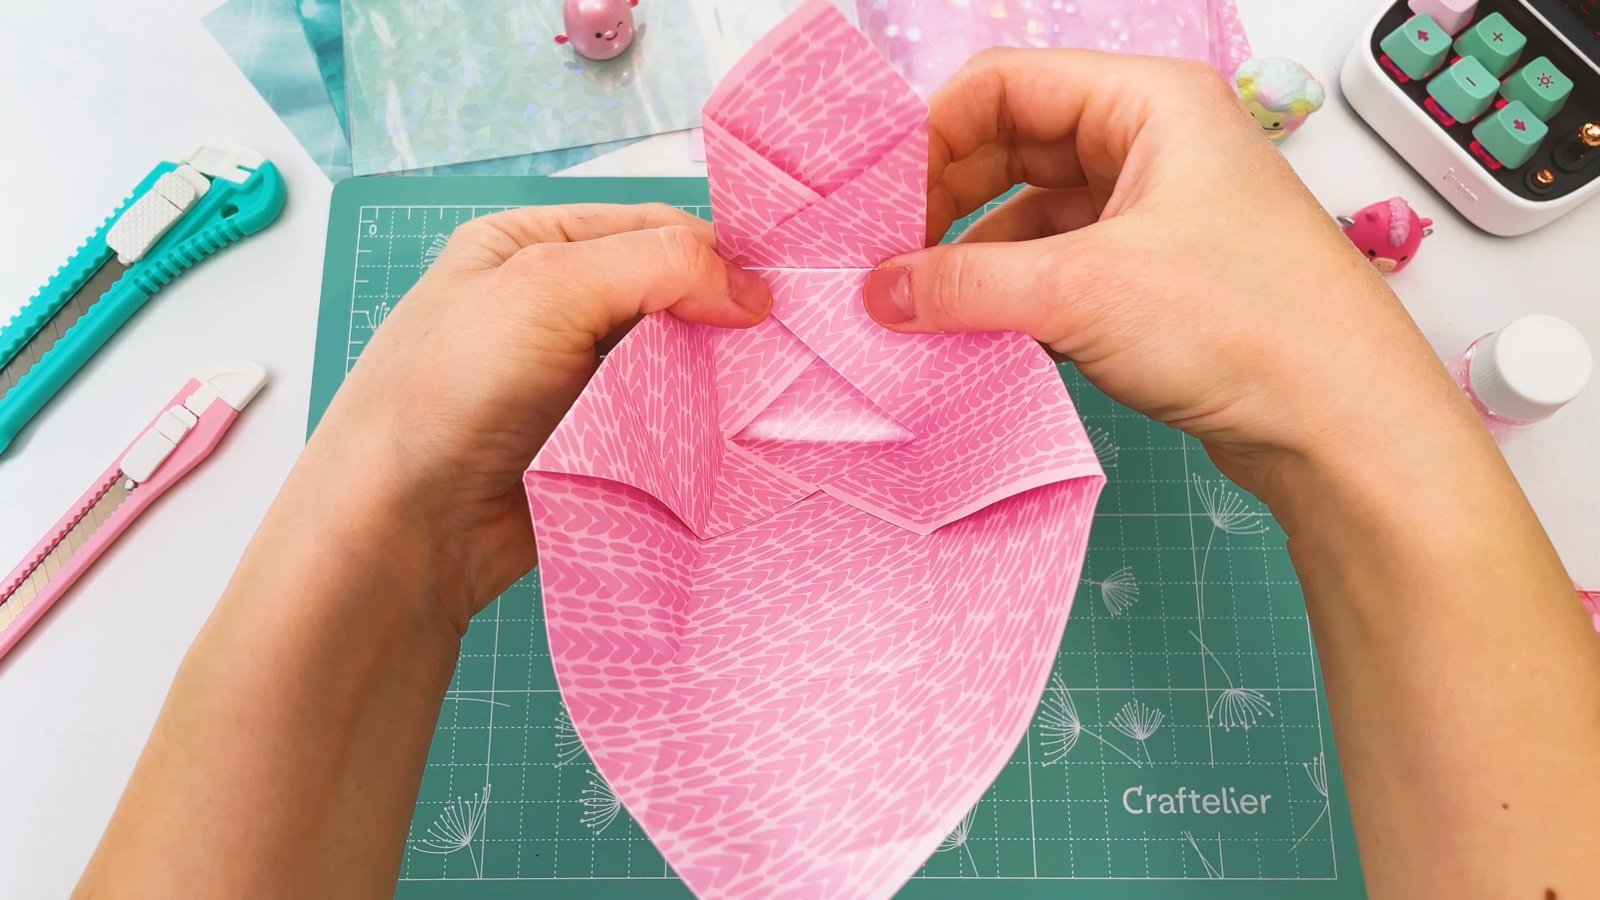
Press it flat inside. One end of the box is closed.
- 9
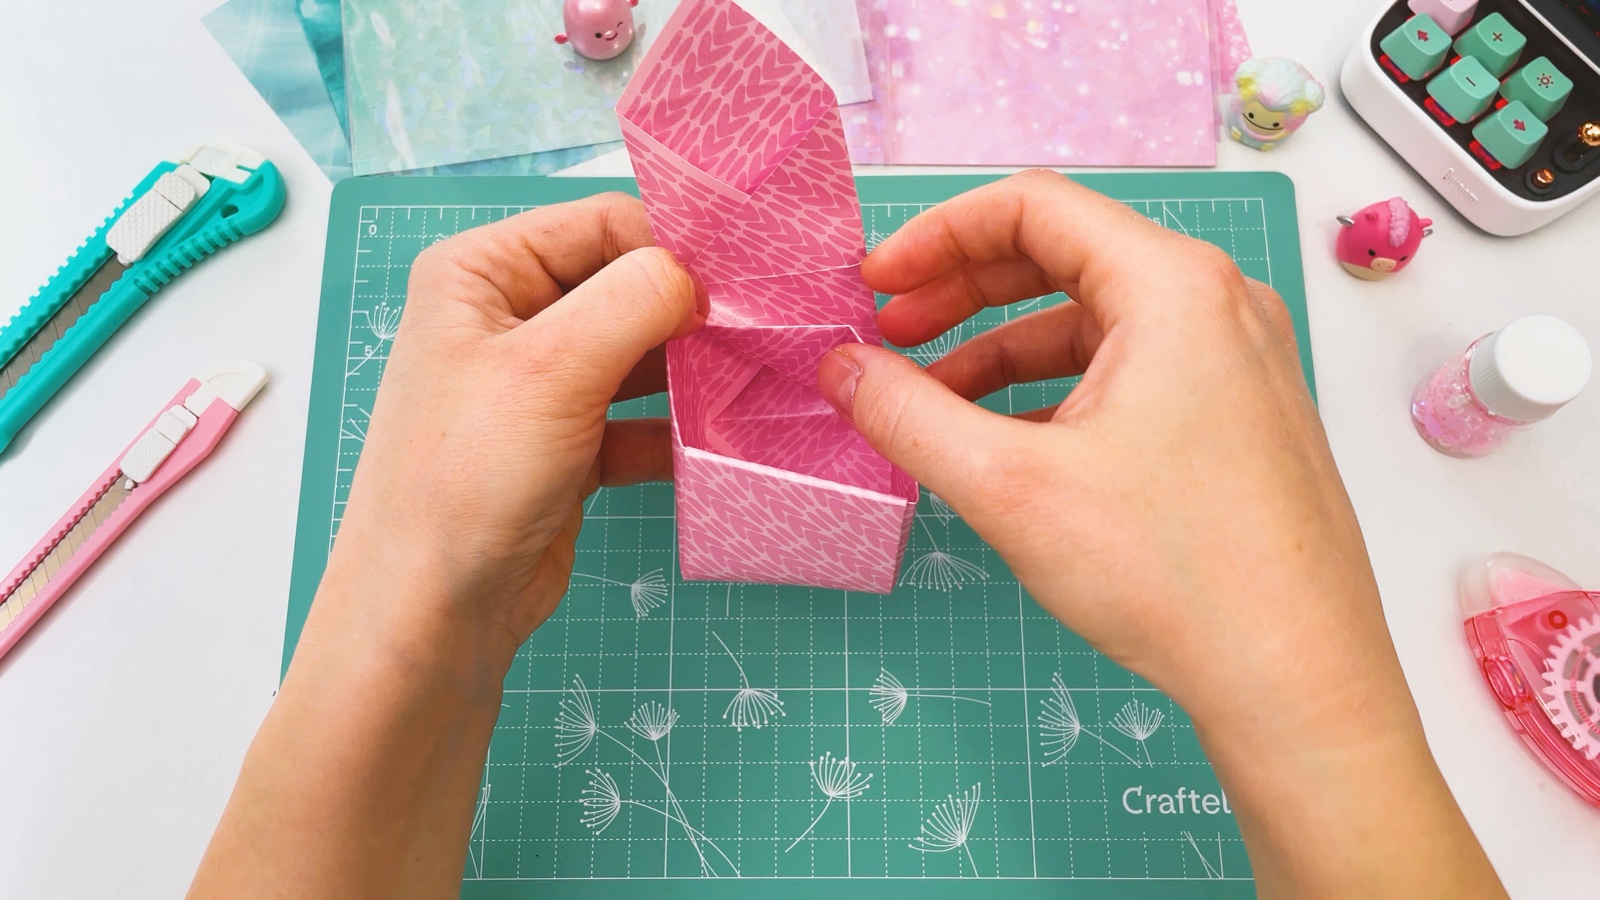
Close the other end
Do the same at the other end: push the corners in, then fold the flap over the wall and down inside.
- 10
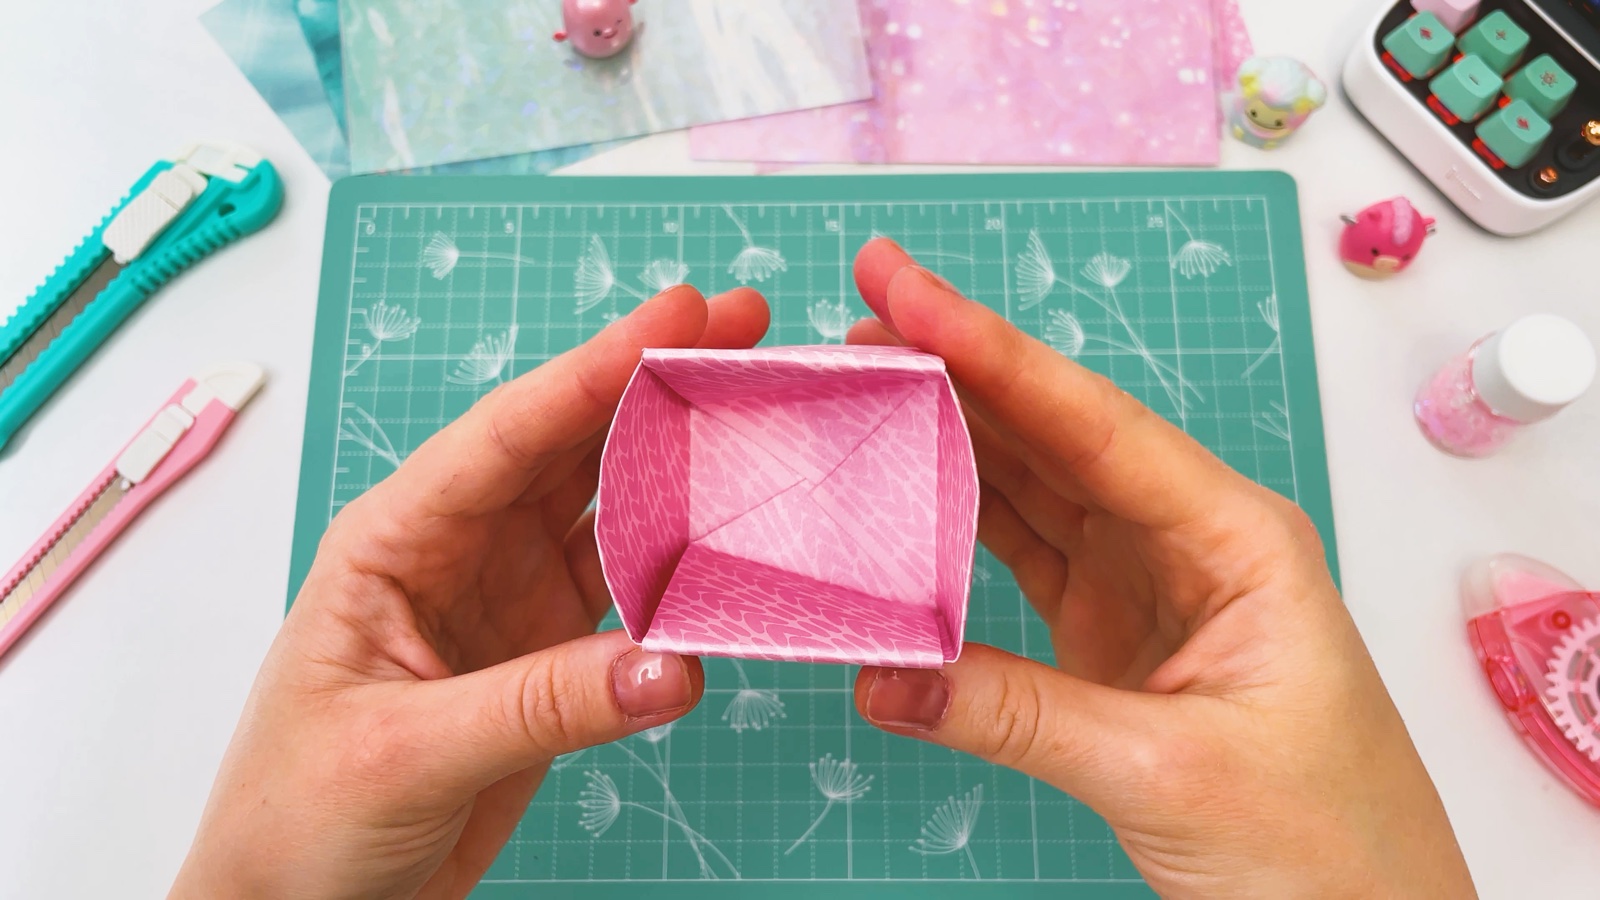
Shape the box
Press the inside flaps flat and square up the walls. Now you have a little open box.
- 11
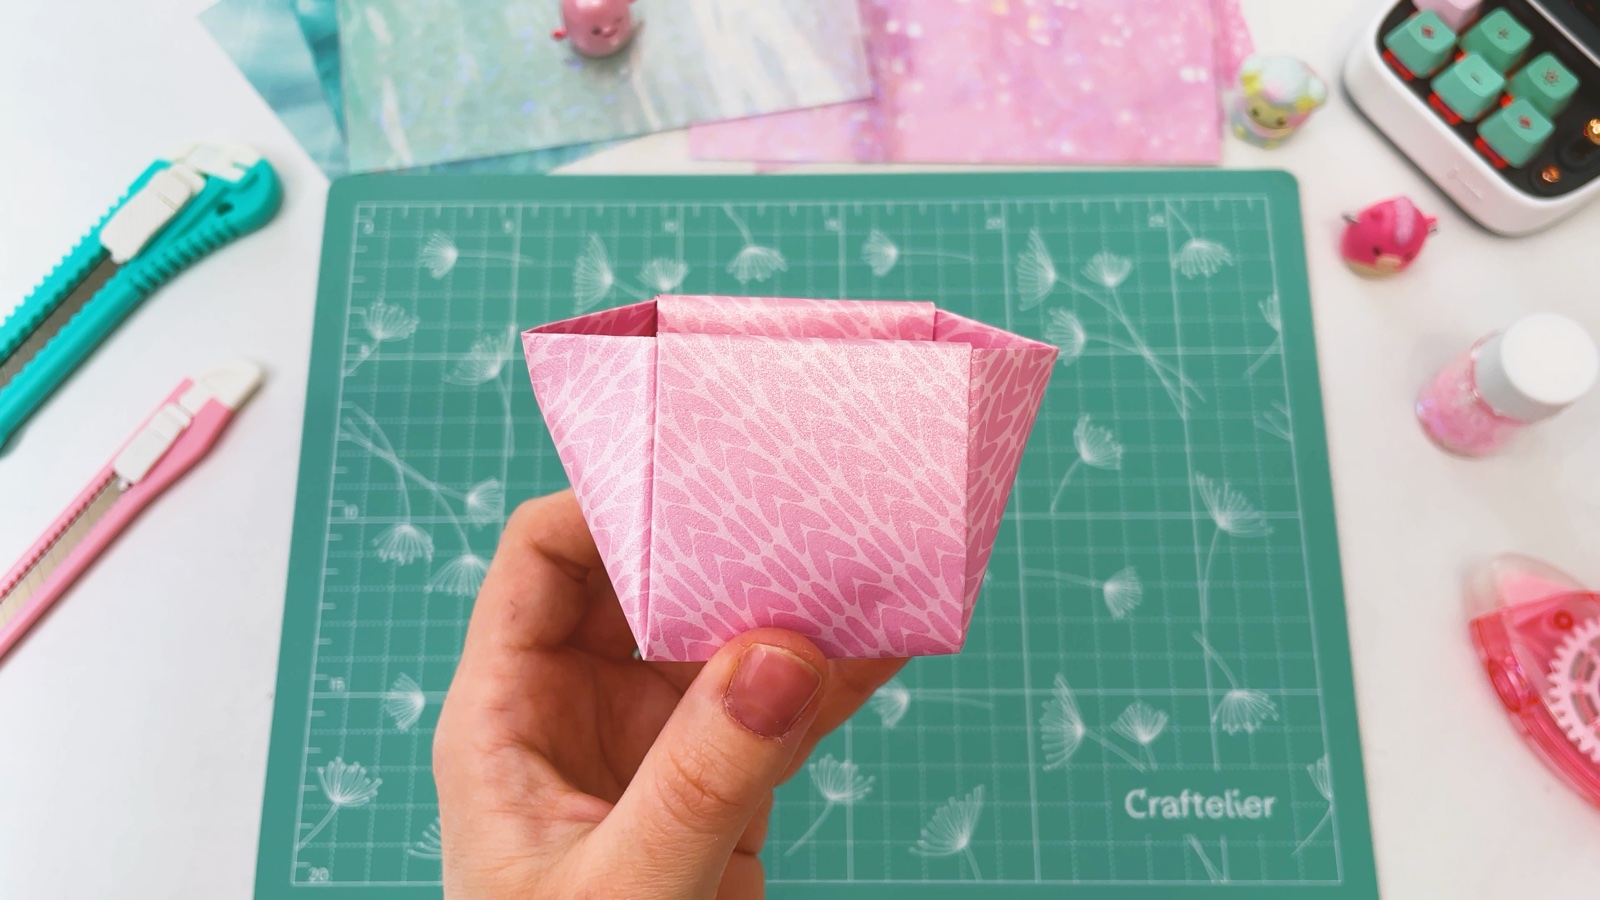
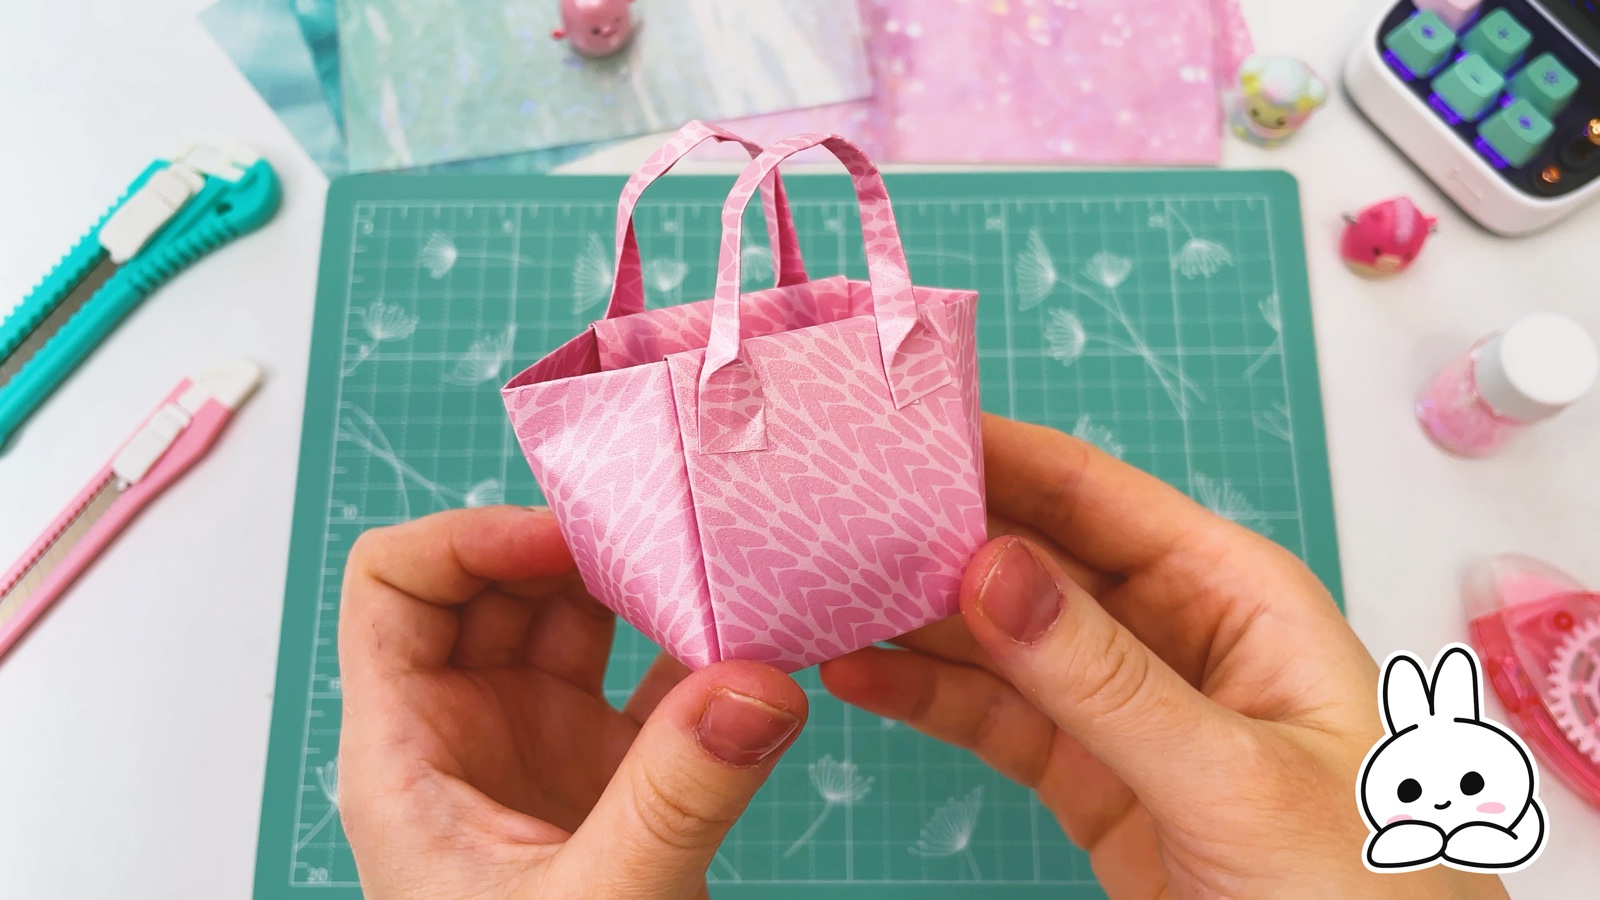
Make the bag shape
Gently press the short sides inward from the top, so each one folds in a little. The top gets wider than the bottom.
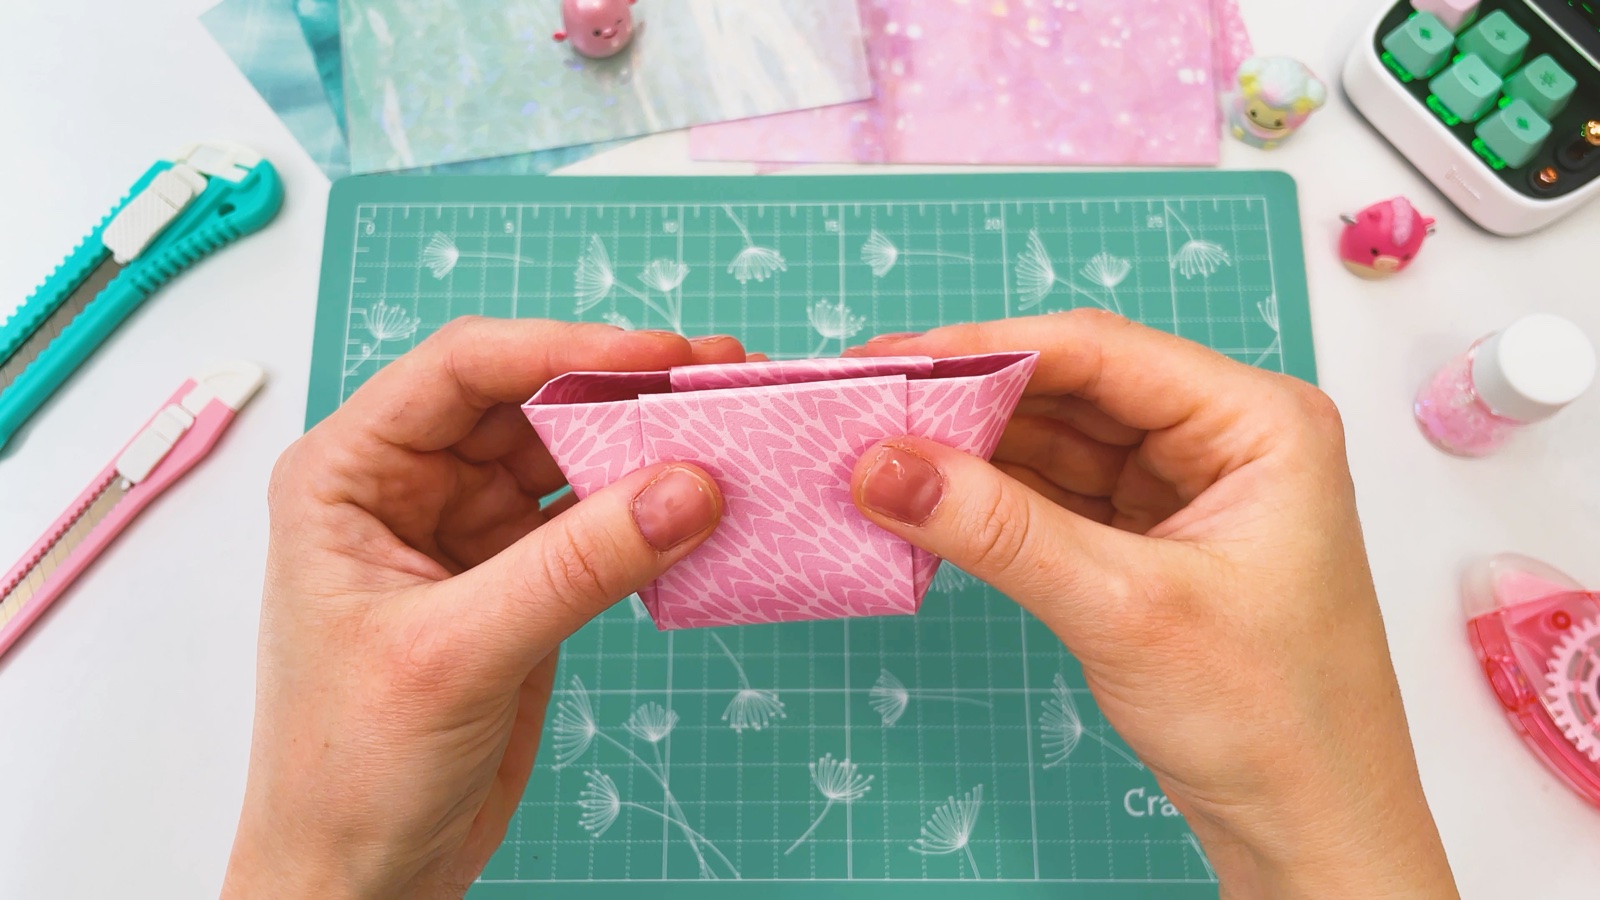
Now it looks like a shopper bag.
- 12
Fold the handle strip
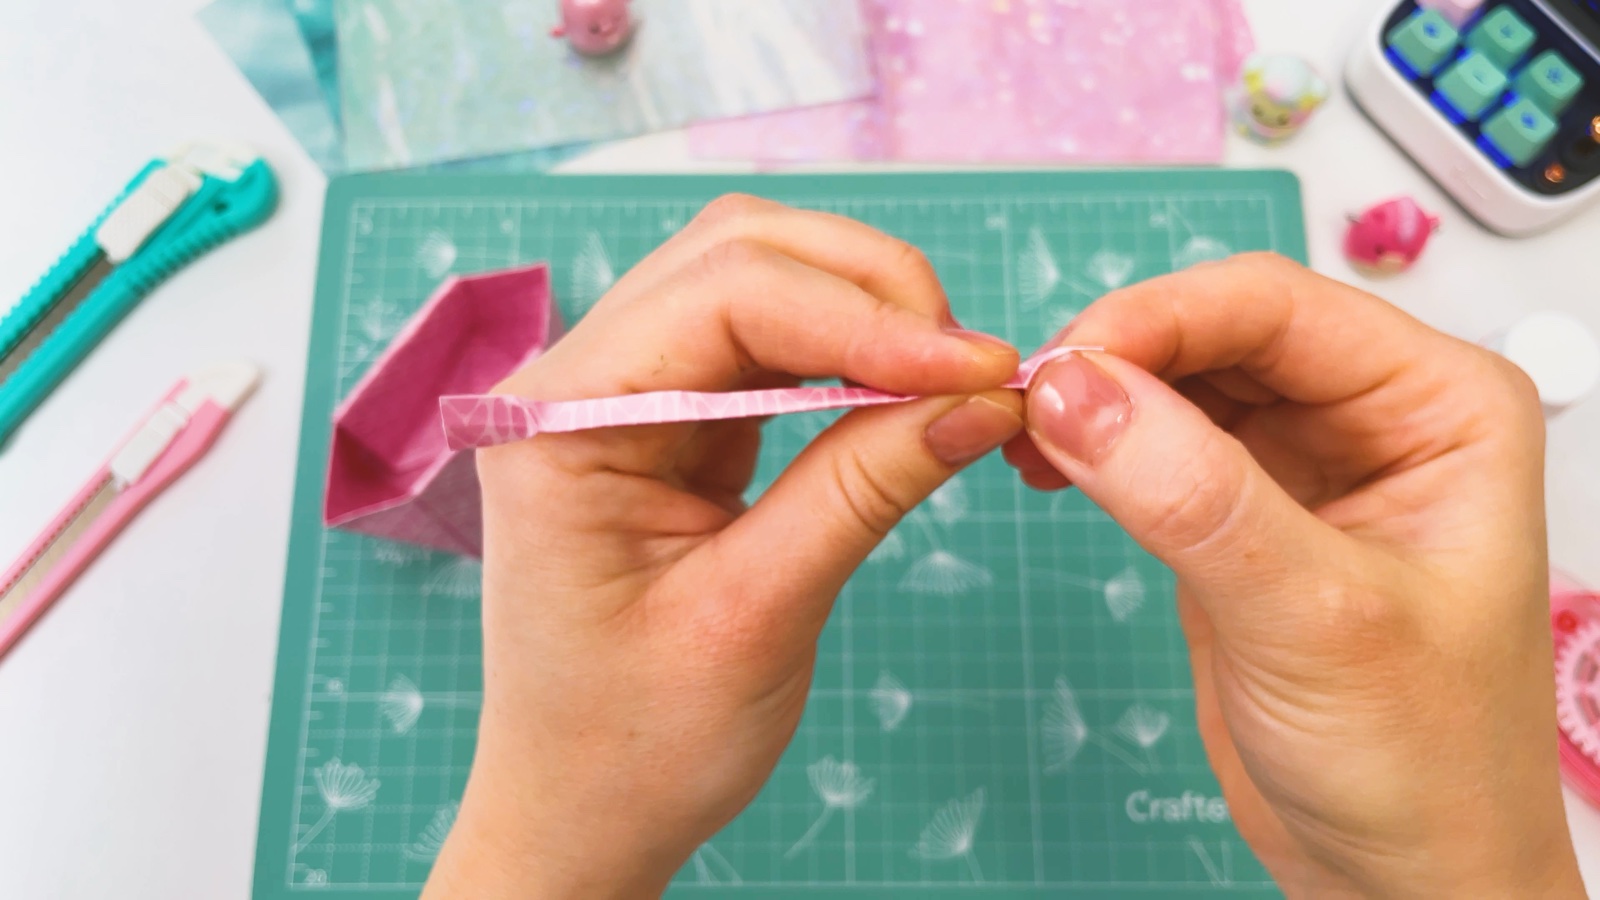
Take the strip from step 1. Fold it in half along its length, then again and again, until it is a thin, strong band.
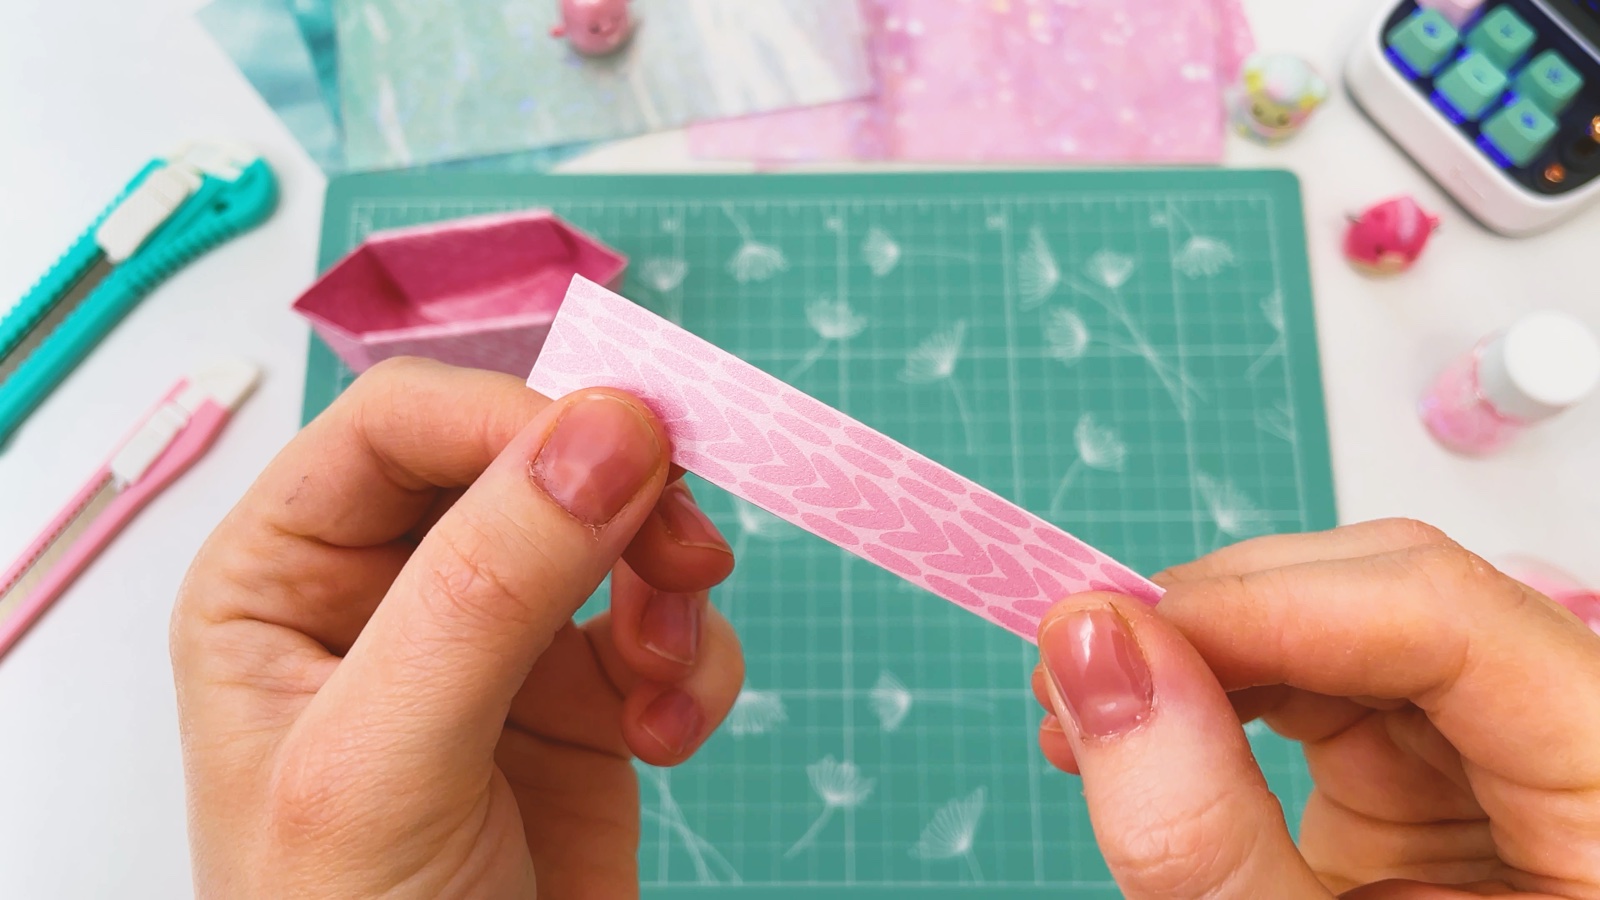
Press every fold flat. Cut the band in two, one piece for each handle.
- 13
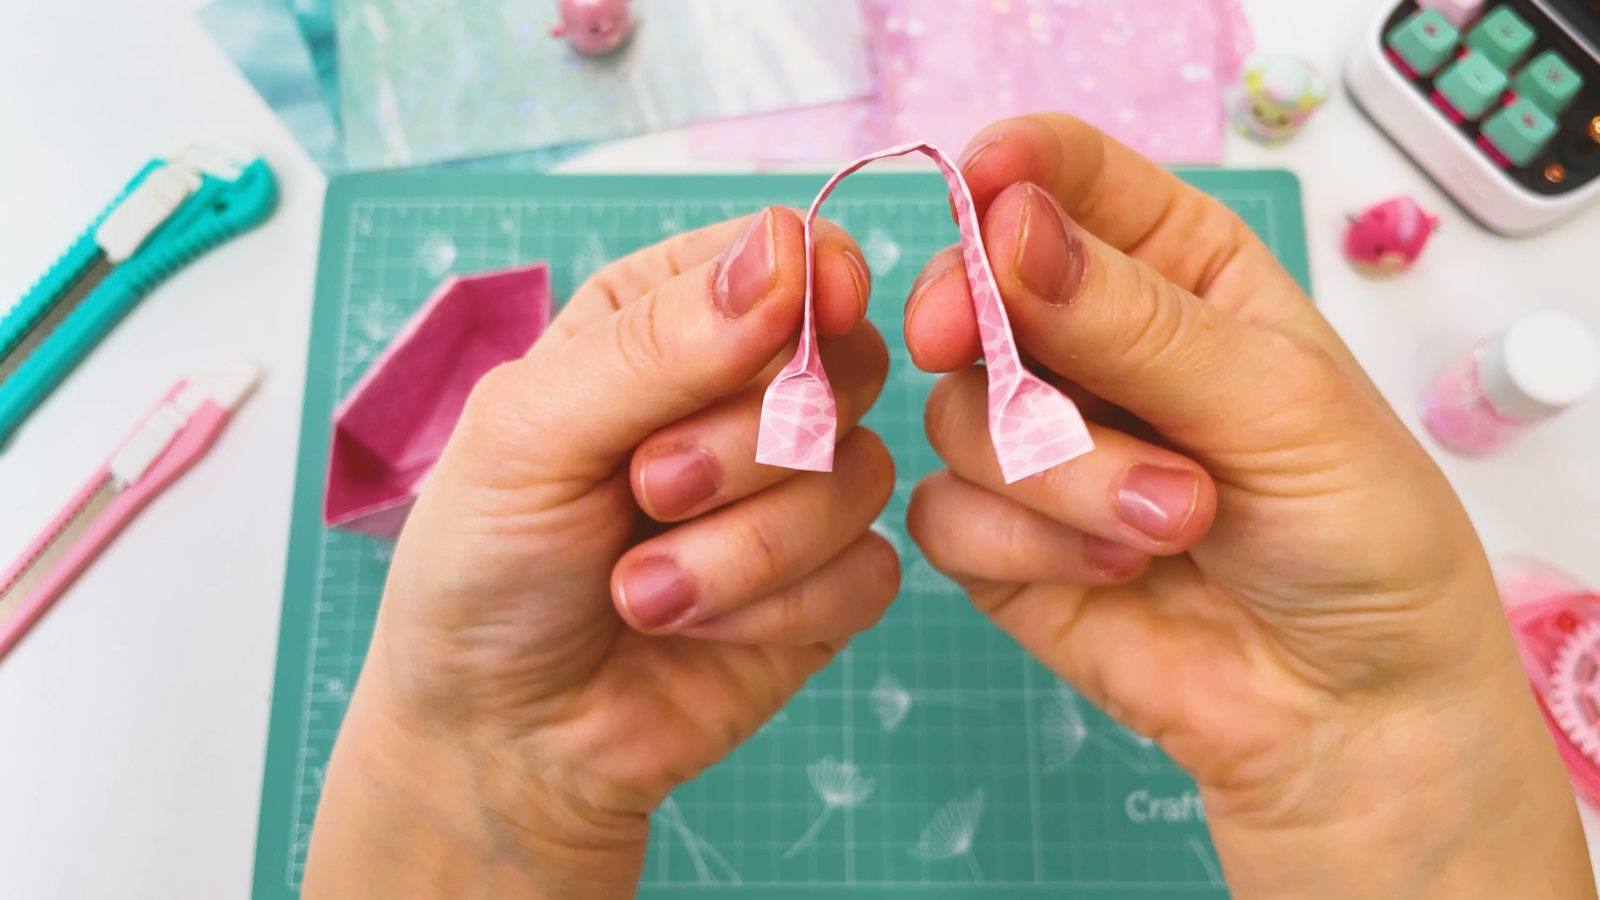
Fold the handle ends
Bend each band into an arch. Fold a small tab at both ends, so the handle can hook onto the bag.
- 14
Add the handles
Slip the ends of one handle into the top edge of the long side, so the tabs sit on the outside of the bag. Do the same on the other side. Now the bag has two handles.
- 15
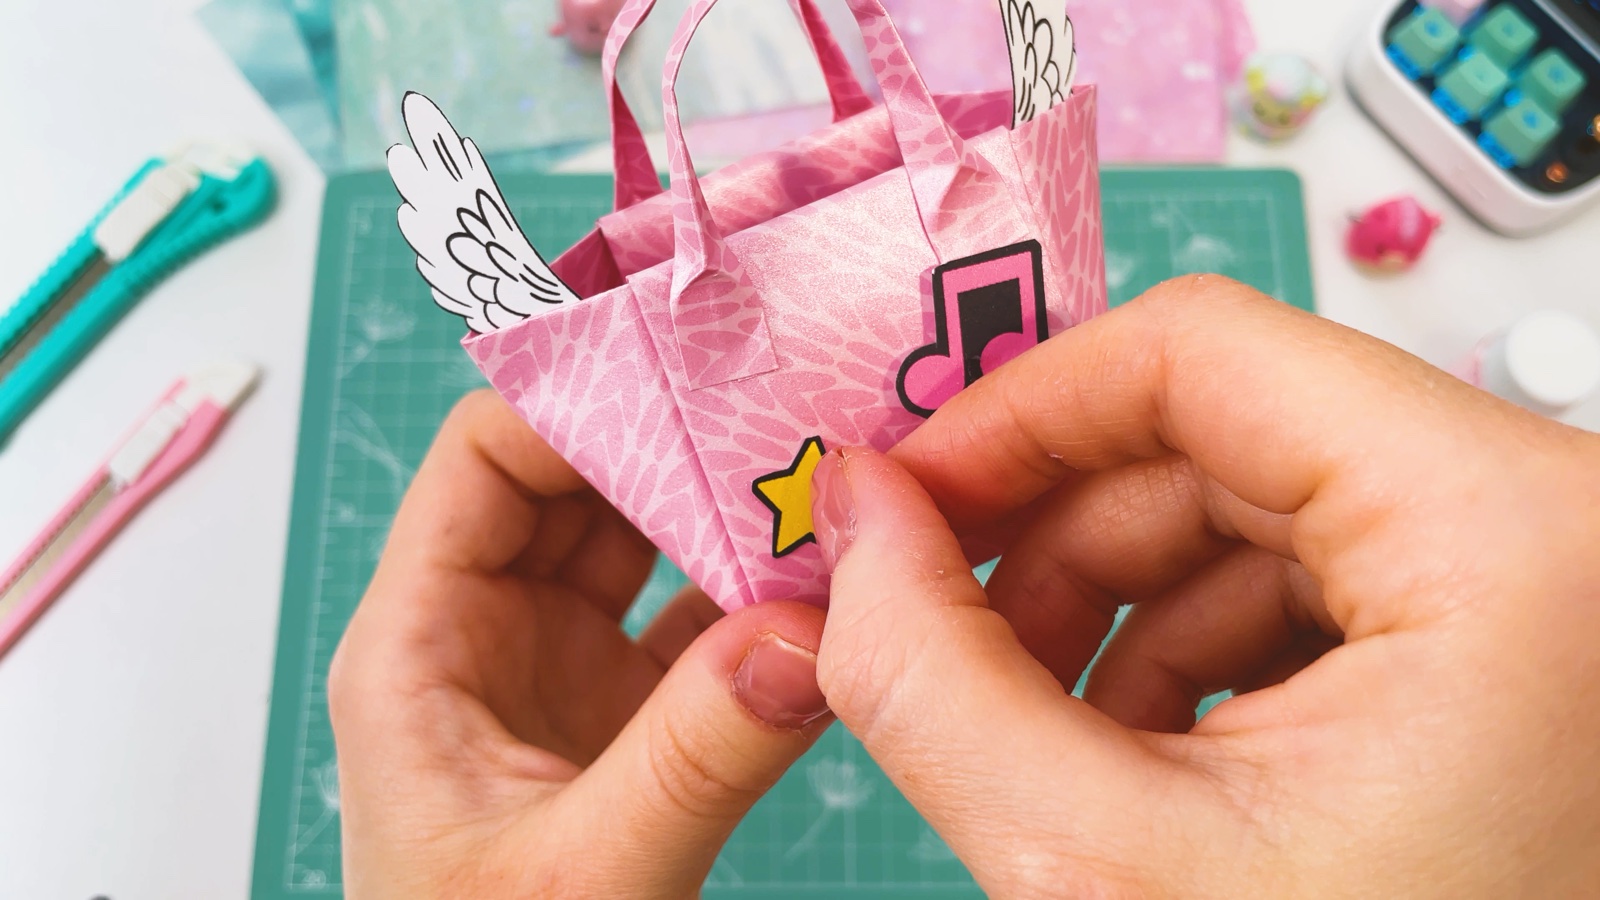
Decorate your bag
Add stickers or paper decorations. Little wings on the sides, a star and a music note on the front.
- 16
Fill it up
Put in your tiny treasures: squishy toys, hair clips, erasers.
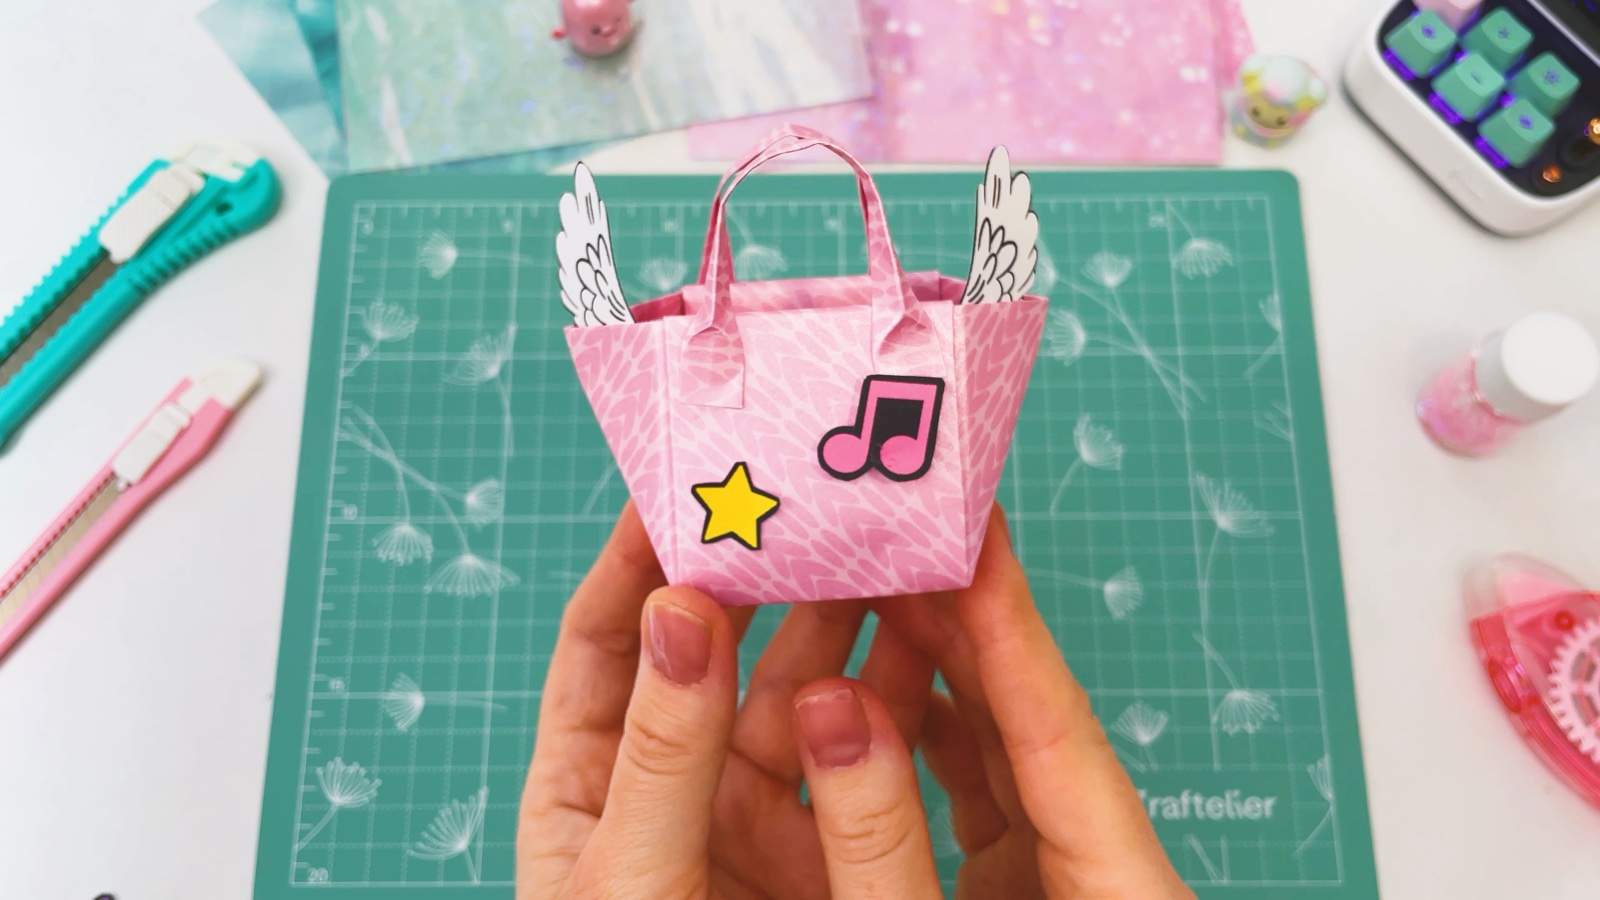
Your mini paper bag is ready.
THREE LITTLE TIPS
Make it easier.
- Sharp creases make a neat bag. Press every fold with your nail. The walls only stand up nicely when the creases are clear.
- Use thin paper. Thin patterned paper, about 80–120 g/m² (about 20–32 lb bond or 50–80 lb text), folds best. Card is too stiff for the corners.
- Make a matching set. Try a darker pink with a Hello Kitty bow, or pastel paper with stars, and give each friend their own bag.

A CUBI MINI MOMENT
What will you carry in your tiny bag?
Cubi folded a bag for Mini and filled it with something small and soft. What will you put in yours?
Three tiny squishies, packed for Mini’s sleepover.
Loved making it?
Catch the next make first, or save this one for a rainy day.